Point clouds and textured meshes
In the Point Clouds and Textured Meshes configuration view of CADMATIC eShare, a project administrator can upload and remove point clouds and textured meshes, configure and view their status and information, and download generated point cloud files (.cpx).
Note: CPX files generated with version 2023T3 cannot be opened with older versions.
For textured meshes, the supported file formats are FBX, OBJ and GLB files. The texture needs to be either as a linked separate image (with FBX and OBJ files), or an embedded image file (with FBX and GLB files). The supported image file formats are PNG and JPEG.
The mesh files need to be uploaded to eShare as a ZIP file.
As soon as the server has created a .cpx file, it becomes available to eShare App in client computers. You can also use CADMATIC eBrowser or Plant Modeller to open .cpx files. The server automatically deletes any other files from the point cloud folders. The server also deletes .cpx files that no longer have a corresponding source file.
Point clouds always use the project coordinates and are imported there.
Do the following:
-
Navigate to the project, and then click Project Admin in the main menu. The project administration view opens.
-
Click Point Clouds and Textured Meshes. The Point Clouds and Textured Meshes configuration view opens.
In Viewing Options section you can configure the following settings:
-
Show Point Clouds and Textured Meshes by Default — Set to Show to show point clouds and textured meshes when the model is loaded. Set to Hide to hide the point clouds and textured meshes when the model is loaded. The default is Show.
Point clouds and textured meshes set to Hide can still be viewed by toggling their visibility in the model tree in Model view.
-
Color Scale Factor (Brightness) — Set the color factor value for adjusting the brightness/darkness of the point clouds. Values between 1-10 brighten, and values between 0.001-0.99 darken the point clouds. The default value is 1. This setting only affects point clouds.
Point clouds and textured meshes folder
eShare server automatically converts point cloud files (.e57, .cpd, .cpe, .ptx) into point cloud panorama files (.cpx) and textured meshes (.fbx, .obj) to compressed mesh files (tm7z). Point Clouds and Textured Meshes Folder Options shows how much space the point clouds and textured meshes in the project are using. To free up space by removing the original files, click Delete Original Files. This will not delete the project's point cloud (.cpx) or textured mesh (tm7z) files., but only the original source files like E57 or FBX files. The behavior of the point cloud folder can be additionally configured using Cadmatic.RemovePointCloudSourceFilesAfterSync and Cadmatic.RemovePointCloudsWithoutSourceFiles settings in Internet Information Services (IIS) Manager application settings. See Configuring application settings.
Point Clouds and Textured Meshes Folder Options also shows the location of the project's point clouds and textured meshes in the file system, if eShare is running on the same machine as the client.

In eShare server, the location of the project's point clouds and textured meshes is C:\ProgramData\Cadmatic\eShare\pointCloud in a folder whose name matches the project ID. The location of the file can be configured using Cadmatic.PointCloudFolderName setting in Internet Information Services (IIS) Manager application settings. See Configuring application settings.
eShare server stores source files and the processed point cloud and textured mesh data in this folder. These folders are managed by the server. If uploading large point cloud files through the user interface is problematic, the administrator can directly place the point cloud source files into this folder. Especially for E57 files, if the file should be converted using spherical panorama images from mobile scanning, the file must have the extension .pan.e57. Only insertion of new source files is supported within this folder. All other point cloud and textured mesh administration should be done via eShare admininstration user interface.
Uploading point clouds
Do the following:
-
Navigate to the project to edit, and then click Project Admin in the main menu. The project administration view opens.
-
Click Point Clouds and Textured Meshes. The Point Clouds and Textured Meshes configuration view opens.
-
In Point Clouds and Textured Meshes Hierarchy, select the folder for the point cloud files. If you have not added subfolders, only the base folder is available.
-
To add point clouds to the project, click Upload Files, or drag and drop the point cloud files there. You can add multiple point cloud files at once.
-
Select the point cloud file or files from your computer's file system and click Open.
Note: When uploading E57 files, a dialog with the following prompt Process E57s as mobile scans or terrestrial scans? is shown. Terrestrial (default) in the correct option when E57 files contain structured point cloud data with scanner position. Mobile is the correct option when E57 files contain unstructured mobile scanned point cloud data with spherical panorama images.
If you know that mobile is the correct option, E57 files can also be uploaded directly to the point cloud folder and by changing the file extension from .e57 to .pan.e57. -
In Transformation Settings dialog, select No if you do not wish to set transformation settings for the point cloud files. Select Continue.
If you select Yes, specify the following transformation settings:
-
Transform / Move — Set the offset for X, Y, and Z.
-
Transform / Rotate — Set the rotation angle in degrees and the coordinates for the X, Y, and Z axes.
-
Transform / Scale — Set the scaling factor for adjusting the scale manually.
Note: CPX files cannot be transformed.
-
-
Select Save and the transformation in completed during the conversion.
The point clouds are uploaded to the project. A progress bar shows the status of the upload.
If a transformation was configured, it is saved and can be later viewed in read-only mode, in case future adjustments are needed.
Verifying the display of point clouds
-
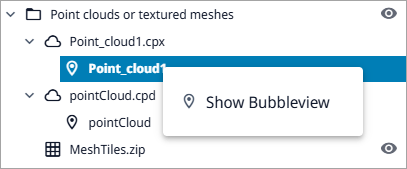
To verify that the point clouds can be displayed, open eShare App, open the Model view of the project, and then in the Model tab either double-click a point cloud name or right-click it and select Show Bubbleview.

To verify that the point clouds can be displayed, open eShare, open the Model view of the project, and then in the Scans tab, right-click the name of the point cloud, and select Show Bubbleview.
Creating zipped files of textured mesh files
Do the following:
-
Select the folder containing the mesh files from your computer's file system.
-
Right-click the folder and select Send to > Compressed (zipped) folder.
A zipped folder is created and all the files in the folder are added in it.
Uploading textured meshes
Prerequisites
-
You have the textured mesh files in a ZIP file.
Do the following:
-
Navigate to the project to edit, and then click Project Admin in the main menu. The project administration view opens.
-
Click Point Clouds and Textured Meshes. The Point Clouds and Textured Meshes configuration view opens.
-
In Point Clouds and Textured Meshes Hierarchy, select the folder for the textured mesh ZIP files. If you have not added subfolders, only the base folder is available.
-
To add textured meshes to the project, click Upload Files. You can add multiple files at once.
-
Select the textured mesh file or files from your computer's file system and click Open.
The textured meshes are uploaded to the project. The progress of the upload is shown under Status.
Verifying the display of textured meshes
-
To verify that the textured meshes can be displayed, open eShare App, open the Model view of the project, and then in the Model tab either double-click a textured mesh name or right-click it and select Locate.

-
To verify that the textured meshes can be displayed, open eShare, open the Model view of the project, and then in the Scans tab right-click the name of the textured mesh, and select Locate.

Managing the visibility of point clouds and textured meshes to user groups
Do the following:
-
Navigate to the project to edit, and then click Project Admin in the main menu. The project administration view opens.
-
Click Point Clouds and Textured Meshes. The Point Clouds and Textured Meshes configuration view opens.
-
In Groups Allowed to See Point Clouds and Textured Meshes section you can define which user groups are allowed to see the point clouds and textured meshes.

-
If no groups are selected, only administrators will see the data.
-
Add user groups with Add.
-
Remove user groups with the remove
 button.
 -
If the All Users group is selected, other group selections will be ignored.
-
Save changes with Save.
-
Viewing point cloud and textured mesh file details
Do the following:
-
Navigate to the project to edit, and then click Project Admin in the main menu. The project administration view opens.
-
Click Point Clouds and Textured Meshes. The Point Clouds and Textured Meshes configuration view opens.
-
In Point Cloud and Textured Meshes Hierarchy section, select the point cloud or texture mesh folder where the file is located. The files in the folder are shown below.
-
Click
 button for the file, and select Details. A dialog with file details opens.
Managing point cloud and textured mesh hierarchies
Do the following:
-
Navigate to the project to edit, and then click Project Admin in the main menu. The project administration view opens.
-
Click Point Clouds and Textured Meshes. The Point Clouds and Textured Meshes configuration view opens.
-
In Point Cloud and Textured Meshes Hierarchy section you can define the hierarchy of point clouds and textured meshes.
-
Click
button for the point cloud or textured mesh folder for which you want to create a subfolder and select Add subfolder. -
Enter a name for the folder and select Add.
-
To rename a subfolder, click
button and select Rename. -
To delete a subfolder, click
button and select Delete. You cannot delete a subfolder which contains point cloud or textured mesh files.Note: You cannot rename or delete the Point Clouds and Textured Meshes base folder.
-
You can also rearrange the folders by dragging.
-
To move files in folders, see Moving point clouds and textured meshes in folders.
Moving point clouds and textured meshes in folders
Do the following:
-
Navigate to the project to edit, and then click Project Admin in the main menu. The project administration view opens.
-
Click Point Clouds and Textured Meshes. The Point Clouds and Textured Meshes configuration view opens.
-
In Point Cloud and Textured Meshes Hierarchy section, select the point cloud or textured mesh folder where the files are located. The files in the folder are shown below.
-
Click
button for the file you wish to move, and select Move. You can also move multiple files at once by selecting them and clicking Move Selected. -
Select the new folder from the drop-down menu and select Save.
-
You can also move the files by dragging to other folders.
Removing point clouds or textured meshes
Do the following:
-
Navigate to the project to edit, and then click Project Admin in the main menu. The project administration view opens.
-
Click Point Clouds and Textured Meshes. The Point Clouds and Textured Meshes configuration view opens.
-
Click remove button
for the point cloud or textured mesh you want to delete. A confirmation dialog opens. Click Remove to delete the file or Cancel to keep it.To remove multiple point clouds or textured meshes in the folder at once, select them and click Remove Selected. A confirmation dialog opens. Click Remove or Cancel to keep them.
Note: After confirming the deletion of the point clouds or textured meshes, the action cannot be undone.
Exporting and importing point cloud ans textured meshes configuration
Note: The exported configuration includes all point cloud, textured mesh, and label detection configurations of the project.
Do the following:
-
Navigate to the project to edit, and then click Project Admin in the main menu. The project administration view opens.
-
Click Point Clouds and Textured Meshes. The Point Clouds and Textured Meshes configuration view opens.
-
To export settings, click Export All, and then copy the settings from the Export Point Cloud Options text box.
-
To import settings, click Import, paste the required settings into the Import text box, and then click Import.