Draw vertical cableways
Next, we will insert vertical cableways.
Using F8 to rotate the symbol sometimes makes inserting easier, as you can rotate the symbol angle as you wish. The angle is based on the ortho angle.
You can change the insertion point in the symbol with the Tab key. Each press will move from one point to another.
You can easily draw straight line with ortho. If ortho is disabled, you can temporarily enable it with the Shift key (enabled as long as Shift pressed down).
Do the following:
-
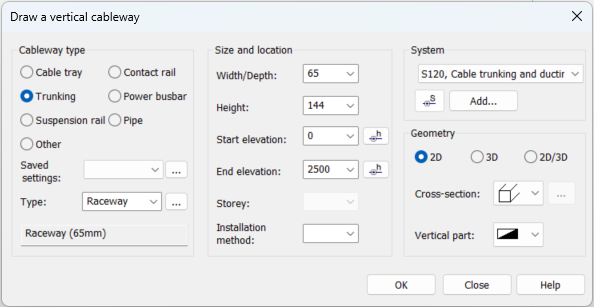
Select Layout tab > Cableways group > Draw menu > Vertical cableway. The Draw a vertical cableway dialog opens.
-
Define the following:
-
For the cableway type, select Trunking.
-
For Width/Depth, enter 65.
-
For Height, enter 144.
-
For Start elevation, enter 0.
-
For End elevation, enter 2500.
-
Select the cross-section and vertical part symbols.
-
-
Start inserting by clicking OK.
-
Press the Tab key until the cursor is in the bottom right corner of the symbol.
-
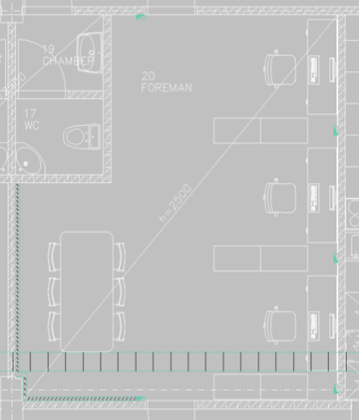
Insert the vertical cableway to the door frame using the End snap.
-
Accept the 0 angle by right-clicking.
-
Start inserting another cableway by repeating the previous command by right-clicking.
-
Accept the size information by clicking OK.
-
Rotate the symbol to the correct angle by pressing F8.
-
Insert the vertical cableway to the wall using the Nearest snap.
-
After inserting the vertical cableways, select to draw cableways and draw trunking with the same sizes. Set to draw according to the top and set elevation as 1000 mm.
 Previous Previous |
Next

|