Use setting groups
With setting groups, you can manage the layers shown in the drawing. Setting groups are based on the system IDs, and are therefore not dependent on layer name or the settings file in use. Therefore, you can utilize them during design. However, the setting groups are most valuable with print modes.
Next, we'll practice using the setting groups and create a new layout.
Do the following:
-
Select Tools tab > Layout group > Layout. The Layout dialog opens.
-
Select the ELEC_2101 layout, and click Copy.
-
Enter ELEC_2104 as the name, and click OK.
-
Click Close.
-
Set ELEC_2104 as the current layout.
-
Change the information on the label:
-
Change 2104 as the drawing number.
-
In the fourth description field, enter Electrical locations.
-
-
Move inside the viewport by double-clicking PRINT located in the lower right corner of the status bar.
-
Select Layout tab > 3D and view group >
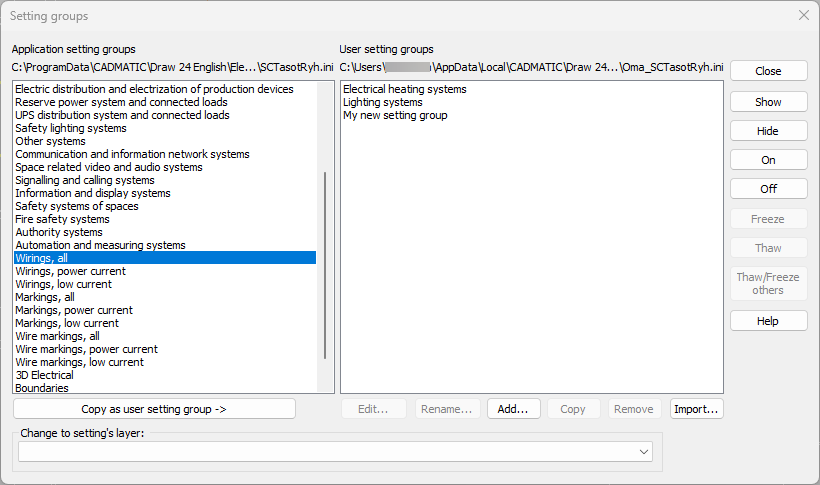
 (Handle setting groups). The Setting groups dialog opens.
 -
In the Application setting groups list, select Wirings, all.
-
Click Freeze.
-
Close the dialog.
-
Move back into the print mode by double-clicking the pen icon located in the lower right corner of the status bar.
 Previous Previous |
Next

|