|
|
Layout tab > Frames and sheets group > Drawing sheet |
| Layout tab > Frames and sheets group > |
With these functions, you can set drawing limits and scale. In addition, you can draw a frame and as many viewports as you need.
Do the following:
-
Select to use standard sheets, printer sheets or custom sheets:
-
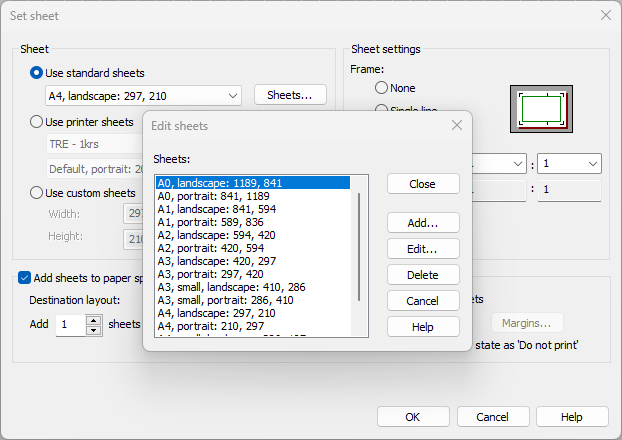
Use standard sheets – Select the size from the list. The sizes are stored to a text file Arkit.lue in the application folder.
You can add, edit and delete sheet sizes by clicking Sheets:
-
Use printer sheets – Select the printer and printer's paper. The list of papers depends on the printer / print configuration.
-
Use custom sheets – Select sheet width and height from the drop-down menus, or enter the desired values into the fields.
-
-
Define the sheet settings:
-
Frame – Select to draw the frame either with a single line or fold marks, or not at all.
-
Drawing scale – Select the drawing scale from the list, or enter values into the fields.
-
Set lower left corner – Select this if you want the program to ask you to enter the lower left corner of the sheet.
-
Set limits – Select this if you want to set the drawing limits according to the paper size. This function is disabled in print mode.
-
Sheets fixed corner (only available when editing) – When editing the drawing area you can select which lower corner is kept at its place (left or right). This corner point stays in the current location even if the drawing frame size increases or decreases.
-
-
If you want to create a number of drawing frames and viewports to the paper space (print mode), do the following:
-
Select Add sheets to paper space. No frame will be drawn to the design mode.
-
Select the desired destination layout.
-
Define the number of sheets and spacing.
-
If you want to create a viewport for every frame, select Add viewports to sheets. You can set margins for viewports. You can also set the print status for the viewport layer do not print.
By default, the frame will be drawn on the FRAME layer and viewports on layers named VIEWPORTS.
-
-
Click OK.