|
|
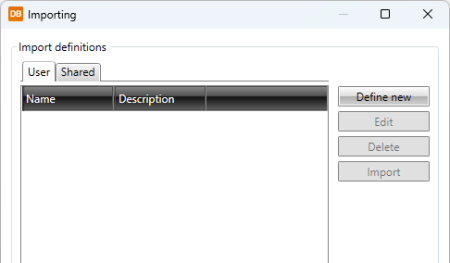
DB tool > Management tab > Product information > Import |
The product information import function allows importing different types of information to the project or product databases by using import definitions. The import definitions you have added yourself are shown on the User tab, and you can use them to easily re-import the same piece of information.
Add new import definitions
Import definitions specify where the information is imported from and how. You can define the location of the source file and the target database, for example, and add the necessary links to have the information in the correct columns. The preview and automatic operations help in creating the definition.
You can save the completed definitions for later use.
The following example describes importing from an Excel file.
Do the following:
-
In the Product information management dialog, click Import. The Importing dialog opens.
-
Click Define new. The Define Import Settings wizard opens.
-
Click the
 button, and browse to select the file from which you want to import product information.
Click Next.
-
Define the following:
Key column – Unique data that identifies the product information. There cannot be two identical values in the product database.
Start row – The row from which the actual product information rows in the Excel file begin.
Column headers – If the Excel file has a column header row, you can define it here.
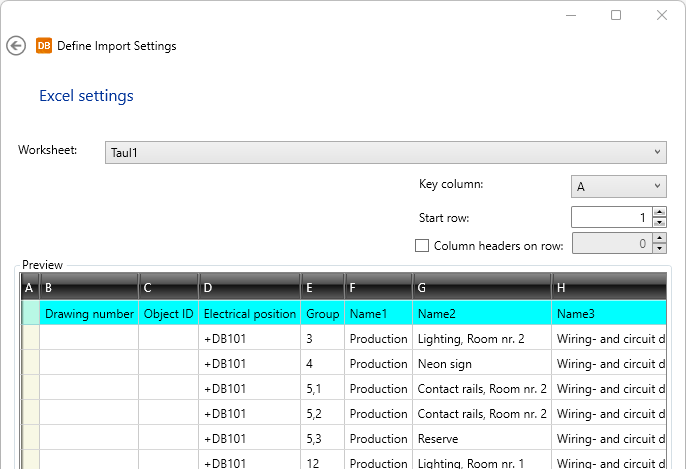
Click Next.
-
Select an existing database to which you want to import product information, or create a new one.
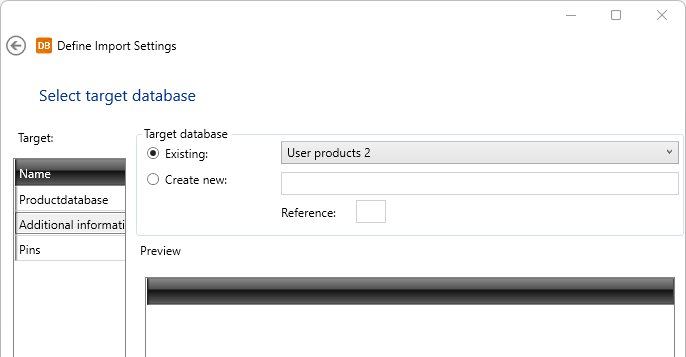
If you selected an existing database, the current content of is shown in the grid.
Click Next.
-
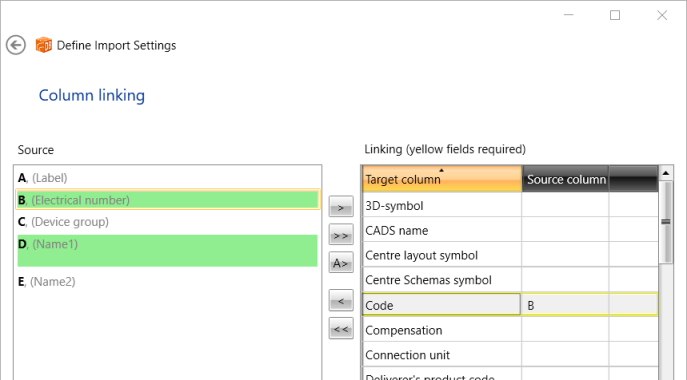
Define which columns in the
source file and target database match each other.
- You can link columns one by one by first selecting the source column, then the target column and then clicking the arrow button pointing right.
- You can automatically link all the source columns by clicking the double-arrow button pointing right.
- You can clear links by clicking the arrow buttons pointing left.
-
Source – All columns in the Excel file
-
Target column – The column in the target database
-
Source column – The linked column in the Excel file
-
Define the following:
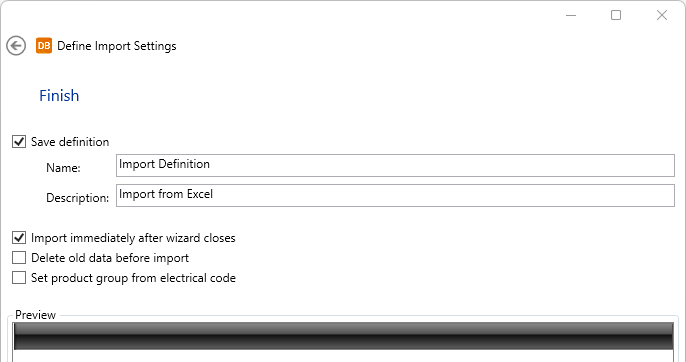
- If you want to save the definitions for later use, enter a descriptive name.
- If you do not want to start the import right away, clear the Import immediately after wizard closes option.
- If you want to clear the target database, select Delete old data before import.
- If you want to set the product group, select Set product group from electrical code.
Save import definitions and import product information by clicking Finish.
- Click Finish.
If the column names are identical in the Excel file and the target database, the columns are automatically linked.
Note: Item code is mandatory, and must be linked.
Click Next.