Start exploring
In addition to
After installing CADMATIC Draw and CADMATIC Electrical and activating your license, you are ready to start using Electrical!
Learn more:
First startup
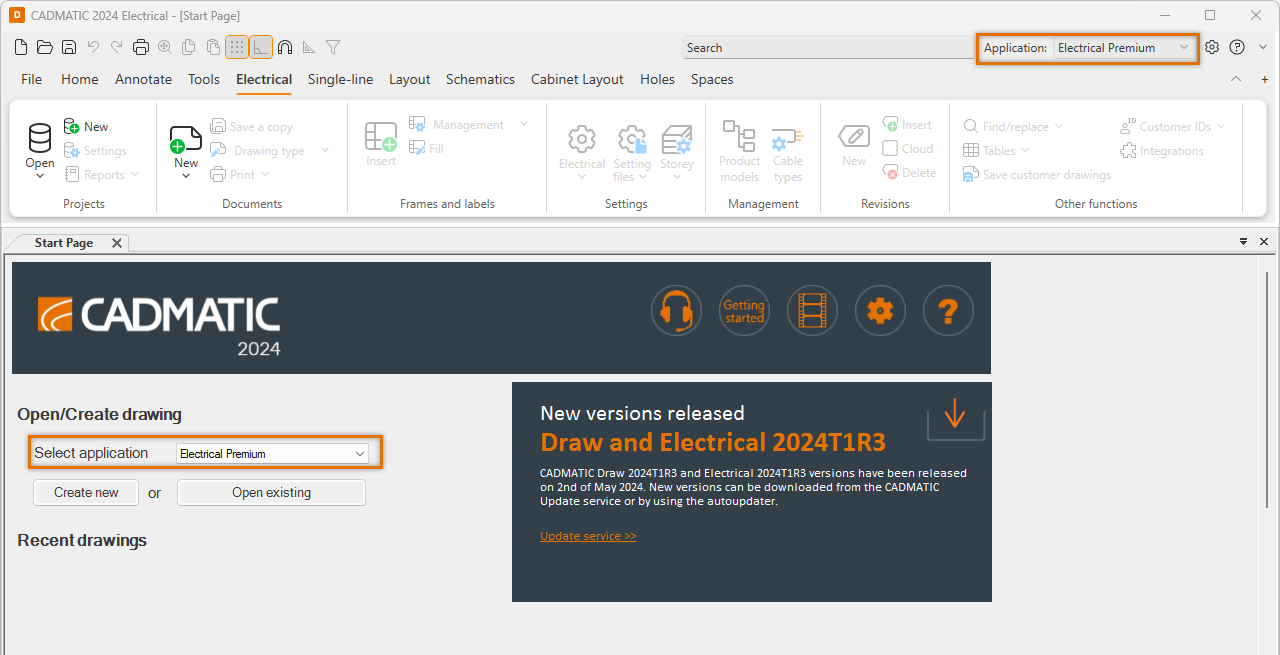
You can start the program, for example, by double-clicking the Draw icon on the desktop. If the license information has not been given yet, it will be requested at first startup. When the program opens, select the Electrical application from the drop-down menu on the top right or on the Start page:
Most of the functions and tools are provided in the ribbon located to the top of the application window. The ribbon consists of tabs for all the main functions, and the tabs, in turn, consist of logical groups for the various functions and tools.
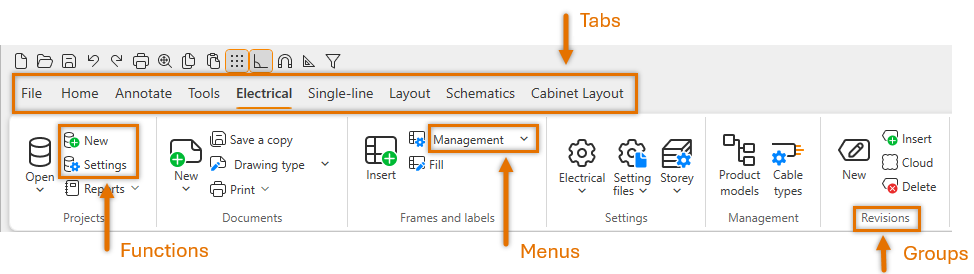
The active tab is underlined. When you open a drawing, the correct tab
On the Electrical tab, you have access to general functions such as starting new drawings and defining settings. With Ctrl + D, you can easily move between the Electrical tab and the tab related to the active drawing (Schematics, for example).
The Home, Annotate and Tools tabs include CADMATIC Draw's basic CAD functions, such as drawing polylines and shapes and inserting texts.
Explore and test with example project drawings
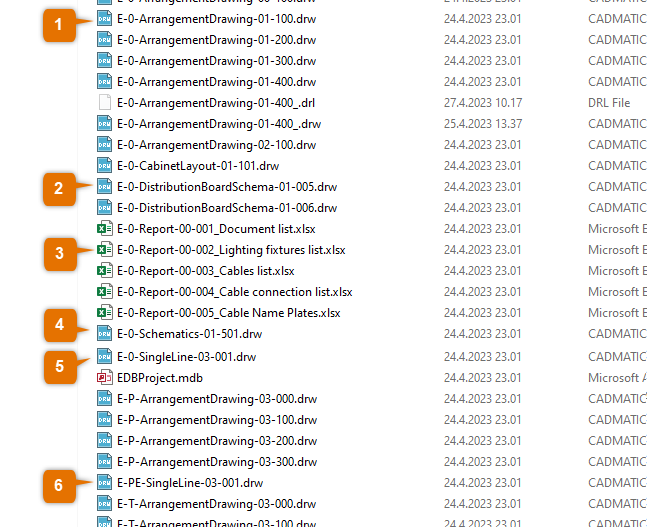
Installation includes example drawings and an example project with different kinds of documents. By default, the project is in the Samples folder. Copy the path to Windows Explorer to find the location easily:
C:\ProgramData\CADMATIC\Draw 25 English\Samples\Electrical\Electrical Example Project
You can copy the project folder to the desktop, for example, to keep the original intact and to modify the copy.
Explore the example project documents freely, make some edits and try to use some of the Electrical functions. Check out these documents, for example, to view certain drawing types created with Electrical:
|
Drawing type:
|
Create a new drawing
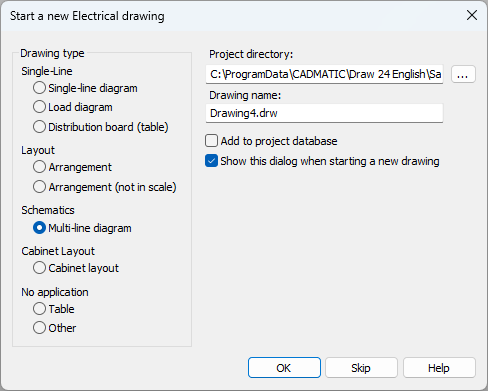
On the Start Page, click Create new to start a new drawing. Alternatively, click New on the Electrical tab.
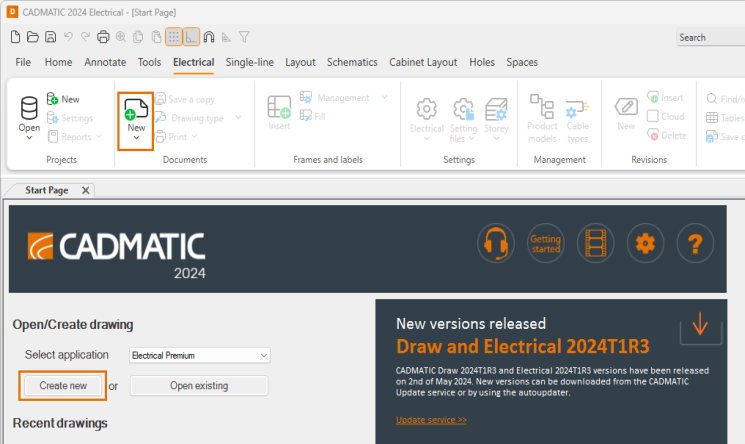
The Start a new Electrical drawing dialog opens.
The basic setup is now done, and you can start designing. For more help to get started, check out our videos at myCADMATIC.