Draw flush wiring
Next, we will draw flush wiring and select some cables as the cable types to be used in this project.
Do the following:
-
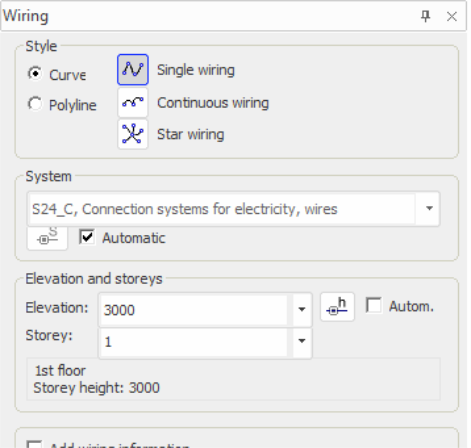
Select Layout tab > Wiring group > Draw. The Wiring window opens.
-
For style, select Curve.
-
Select Single wiring.
-
For elevation, select Other and define 3000 as the value. If you cannot change the value, first clear the selection on Autom.
-
Define wiring information:
-
Select Add wiring information.
-
Click the
 button. The Wiring properties dialog opens.
 -
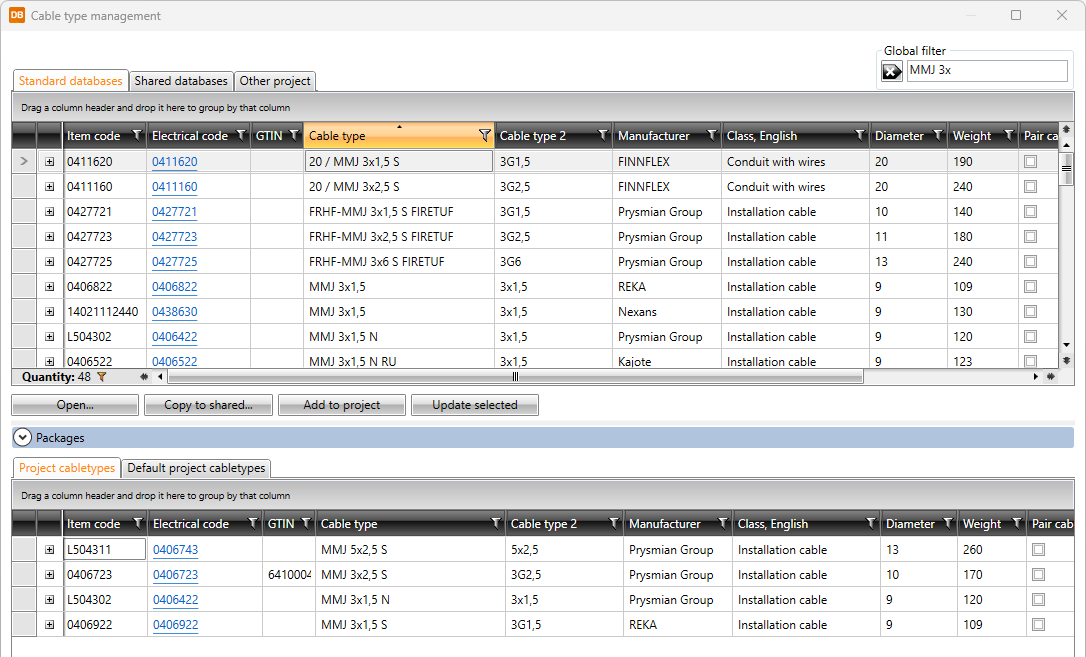
Click Cable type management. The Cable type management dialog opens.
-
In the Global filter field, enter MMJ 3x.
-
Select the MMJ 3x1,5 S cable type from the filtered list.
-
Add the cable to the project by double-clicking or by clicking Add to project.
-
Add the MMJ 3x1,5 N, MMJ 5x2.5 S and MMJ 3x2.5 S cable types to the project in the same way.
-
Click Close.
-
-
In the Wiring properties dialog, select MMJ 3x1,5 S as the cable type and click OK.
-
Indicate the start point of the wiring on the light fixture.
-
Indicate the middle point, i.e. the point through which the curve goes.
-
Indicate the end point.
-
Define wiring to go through a joint box by adding the joint box at the end of the wiring:
-
Start wiring from the symbol, and add the middle point.
-
In the Wiring dialog, click Symbol.
-
Select the joint box symbol.
-