|
|
Electrical tab > Settings group > Setting files |
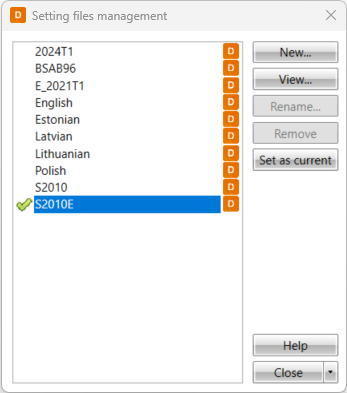
In the Setting files management dialog, you can select the setting file to be used, create new setting files and edit existing files.
The ![]() icon
next to the setting file name indicates the file currently in use. The icon after the setting file name indicates whether the file is one of the
program's default setting files or a
setting file defined by you:
icon
next to the setting file name indicates the file currently in use. The icon after the setting file name indicates whether the file is one of the
program's default setting files or a
setting file defined by you:
|
|
This is a default setting file delivered with the application. You cannot edit these types of files but you can view the settings by clicking View – the button is only shown when you select a file marked with the |
|
|
This is a user-defined setting file. These types of files are the ones you can edit. |
Learn more:
Take a setting file into use
The ![]() icon
next to the setting file name indicates the file currently in use.
icon
next to the setting file name indicates the file currently in use.
Do the following:
-
Select the setting file you want to use.
-
Click Set as current.
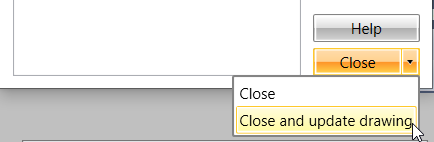
Note: Changing the setting file does not automatically affect the drawing. If you want to update the drawing according to the current setting file, close setting file management by selecting Close and update drawing, or use the separate update functions.
Create new setting files
Do the following:
-
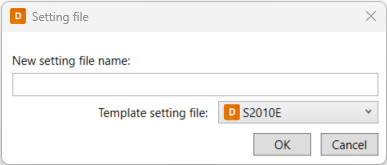
Select the setting file you want to use as the basis for the new file.
Tip: Select a file that is as similar as possible to the new settings. This minimizes editing needs.
-
Click New. The Setting file dialog opens.
-
Enter a descriptive name for the settings to be created.
- Click OK. The new setting file is created and added to the list.
You can now continue to edit the file settings.
If necessary, remove your own setting file with Remove. The button is only available when you select a setting file marked with the ![]() icon.
icon.
Edit setting files
You can only edit the setting files you have created yourself. These files are marked with the ![]() icon.
icon.
Do the following:
-
Select the desired setting file marked with the
 icon that you want to edit.
 -
Click Edit. The button is only shown when you select a setting file marked with the
icon.The Setting file dialog opens.
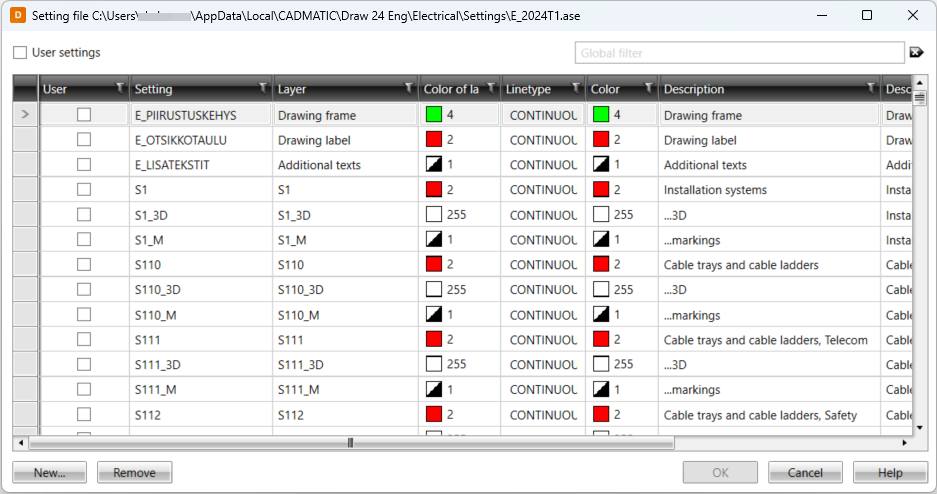
The name of the setting and its layer, colors, line type and descriptions are shown in the grid. The first column (uneditable) indicates whether the setting is created by you or one of the application's default settings. The Visible setting determines whether the setting is visible in the selection dialog or not.
 Selecting columns/information shown in the grid, sorting and filtering information
- If you select User settings, the grid will only display settings defined by you.
- With Global filter, you can look for information from any of the cells in the grid. You can clear filtering by clicking the button next to the field.
-
You can select the columns you want shown in the grid by right-clicking and selecting Show columns. Hide an individual column by selecting Hide column.
-
You can sort the grid according to the desired column by clicking the respective column header. You can clear sorting by right-clicking and selecting Remove sorts.
-
You can set column-specific filters by clicking the
 button.
You can clear filters by right-clicking and selecting Remove
filters.
button.
You can clear filters by right-clicking and selecting Remove
filters.
-
Edit values directly in the grid excluding values in the User and Setting columns. You can edit multiple cells simultaneously by multi-selecting them or holding Ctrl/Shift key and entering the value or selecting it in the right-click menu.
-
If necessary, add new settings:
-
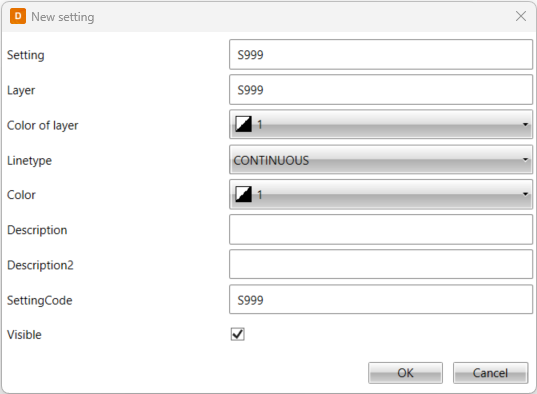
Click New. The New setting dialog opens.
-
Edit the desired information.
-
Click OK.
-
-
If necessary, remove settings by clicking Remove.
-
Click OK. The changes you make do not automatically affect the drawing. If you want to update the drawing, close setting file management by selecting Close and update drawing, or use the separate update functions.
In addition to editing the settings, you can rename your own setting files: Click Rename, and enter a new name for the file. The button is only available when you select a setting file marked with the ![]() icon.
icon.