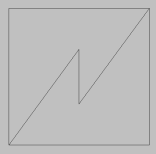
In this exercise, you will draw an electrical device. Normally, these devices are available in applications as symbols, for example.
You can enter coordinates as absolute or relative to the previous entered point. Relative coordinates are entered by using the @ character.
Do the following:
-
Create a new drawing by selecting File > New.
-
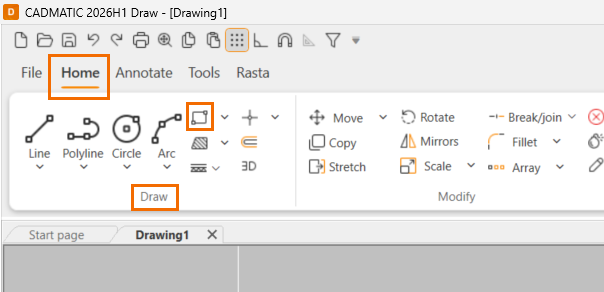
Select the Home tab > Draw group >
 (Rectangle).
 -
Enter an absolute coordinate point 300,100 for the lower left corner of the rectangle. The corner point will locate 300 drawing units right form the origin (along x-axis) and 100 drawing units up from the origin (along y-axis).
-
Enter the upper right corner using a relative coordinate point @600,600.
The entered relative point will be located 600 drawing units both ways from the earlier corner point. Now we have a 600 x 600 square.
-
Select the Home tab > Draw group > Line.
-
Enter the absolute coordinates 300,100 for the start point of the line and relative coordinates @300,420 for the end point.
The line starts from the lower left corner of the rectangle because the start point is the same absolute coordinate point as in drawing the rectangle. The endpoint is 300 drawing units from the start point along the x-axis and 420 drawing units along the y-axis (relative coordinates).
-
Draw the next line starting from the end point of the previous line and end it straight down as 240 drawing units long.
-
Enter both the start point and end point relatively with @0,0 (or 600,520) and @0,-240.
The last entered point is always saved when a point is entered. That means that the relative coordinate point @0,0 locates in the end point of the previous line.
The minus character is added to the y-axis value because we wanted to draw the line from up to down.
-
Draw another line starting from the end point of the previous line: enter the relative coordinates @0,0 (or 600,280) for the start point of the line and relative coordinates @300,420 for the end point.
Alternatively, press Enter when asked for the start point of the line. The start point will then automatically be set to the last entered point.
-
Save the drawing as follows:
-
Select File > Save as.
-
Select the folder where you want to save the drawing.
-
Type ElectricalDevice as the file name.
-
Ensure that you are saving into DRW format (CADMATIC Draw drawing (.drw)), and click Save.
-
The electrical device should look like this: