Take paper sizes into use
All paper sizes defined for the printer are not shown by default. You can add the desired paper sizes by editing the printer driver settings.
Do the following:
-
Select File > Print > Print settings.
-
Select the desired printer, and in the Printer section click Properties. The Modify printing device configuration dialog opens.
-
In the Paper and Scale section, click Edit.
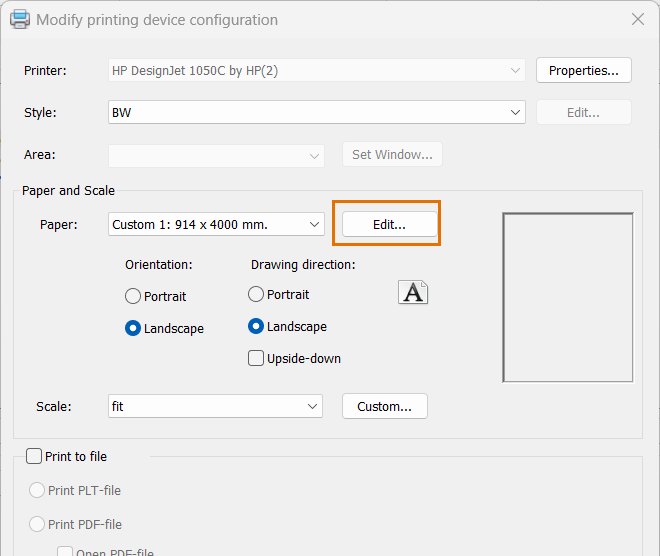
The Paper size dialog opens.
-
Click Add. The Add paper size dialog opens.
-
Select the desired paper size, and click OK.
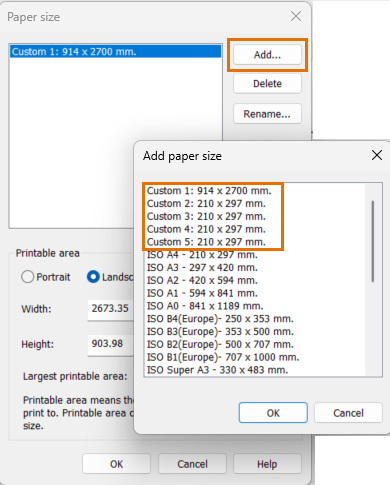
In the Paper size dialog, you can also
-
Delete the unnecessary paper sizes with Delete. Deleting a paper size does not delete it from the printer driver and it can be added again later.
-
Rename paper sizes with Rename.
-
Edit the printable area values with Set. Printable area means the biggest possible area on paper to print to. The printable area can never be bigger than the paper size. Usually printers cannot print in the whole paper size area. When adding a new paper, program will use the largest possible area as reported by the Windows driver of the printer in question. If the values have been changed, you can restore printer driver default values with Default.
-
-
Add all paper sizes the same way, and click OK. You can now select the added paper sizes from the Paper drop-down menu.
-
Close both dialogs by clicking OK.