|
Layout tab > Devices group > Symbols |
Layout tab > Devices group >  Symbol functions menu > Symbol functions menu >  Light fixtures menu > Linear light fixture Light fixtures menu > Linear light fixture |
With these functions, you can create a linear light fixture symbol according to your own definitions. If you want, you can save the symbol to your own symbols to be used later.
Do the following:
-
Start the function in one of the following ways:
-
In the Symbols window, select the
 (User's symbols) tab, click the arrow next to the
  (Save user symbol) button and select Define linear light fixture.
 -
On the ribbon, select the Layout tab > Devices group >
Symbol functions menu > Light fixtures menu > Linear light fixture. -
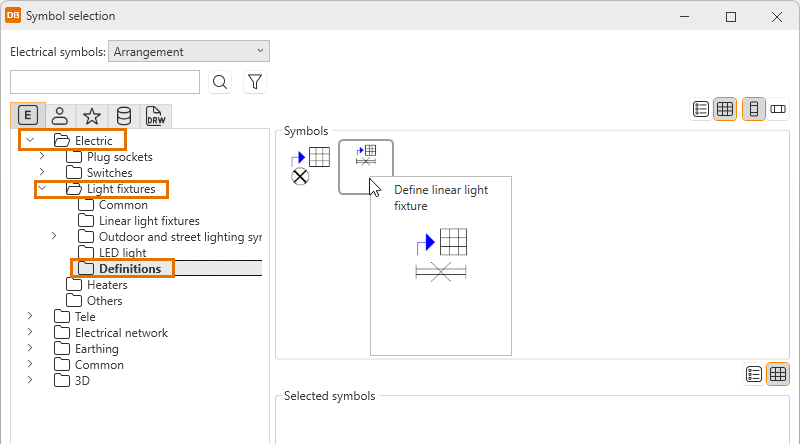
In the device or product model property dialog, open the Symbol selection dialog and select Electric > Light fixtures > Definitions and then Define linear light fixture.
The information will be saved as device or product model properties.
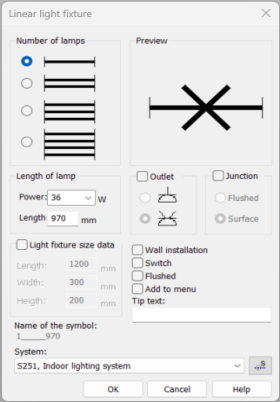
The Linear light fixture dialog opens.
-
-
Enter the definitions for the linear light fixture.
-
You can also define size data for the light fixture. The symbol saved in the menu then already has the size data, and there is no need to define it separately.
-
If you want to save the symbol to your own symbols, select Add to menu and enter a description in the Tip text field. The symbol will then be available on the
(User's symbols) tab both in the Symbols window and the Symbol selection dialog. -
Indicate the position of the linear light fixture in the drawing.
Tip: It is recommended that the Closest snap is used with symbols that are positioned adjacent to the wall. Then point the wall line when positioning the symbol in the drawing, so that the distance between the symbol and the wall is always the same.
Tip: Sometimes the symbol rotation function (F8) makes positioning easier. The function is used to turn the symbol angle as desired during positioning. Magnitude of the angle is determined by the forcing angle.