|
|
Spaces tab > Add group > Opening |
With this function, you can add openings to a space object afterwards.
Do the following:
-
Indicate the segment of the space boundary polyline to which you want to add an opening.
-
Indicate the starting point of the opening on the segment.
-
Indicate the endpoint of the opening on the segment. The Space, opening dialog opens.
-
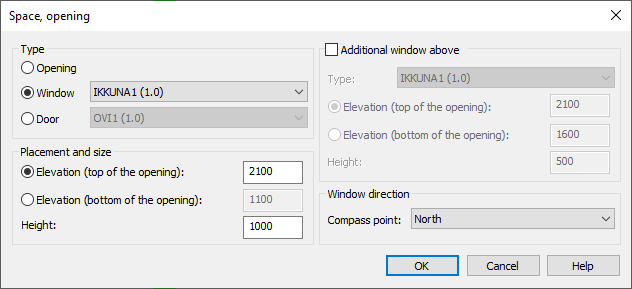
Select a type for the opening:
-
Opening – There is no need to feed additional data for the opening.
-
Window – Select the window type from the drop-down menu. You can define window types in the project data.
-
Door – Select the door type from the list. You can define door types in the project data.
-
-
Select whether the opening placement is defined from the top or the bottom of the opening.
-
Enter the elevation of the opening from the floor.
-
Enter the height of the opening.
-
If you want to place an additional window above the opening (such as two windows on top of each other on the same floor), do the following:
-
Select Additional window above.
-
Select the window type from the drop-down menu. You can define window types in the project data.
-
Select whether the window placement is defined from the top or the bottom of the window.
-
Enter the elevation of the window from the floor.
-
Enter the height of the window.
-
-
Select window direction. If you have placed a compass rose on the drawing, the program suggests a direction based on that.
-
Click OK.
The opening is added to the selected wall line. The opening is shown as wider section on the line.