|
|
Layout tab > Wiring and markings group > Draw wiring |
With this function, you can select the drawing style in the Wiring window.
During wiring, the wiring points included in the symbols are activated. Wiring point is the spot to which a wire or a cable can be connected (a real terminal in equipment). By drawing all wires and cables from one wiring point to another, you can make sure that the devices connected to the wires can be found, and the number of vertical displacements is calculated correctly.
You can draw wiring between the wiring points by indicating the start and end points for the wire. You can create more complex wiring by indicating intermediate points.
Tip: While drawing, keep an eye on the command line which shows you the commands and shortcut keys you can use next.
Do the following:
-
Select the drawing style:
-
Curve – Wiring is drawn using a spline curve and constant arc radius.
While drawing, the command line shows you the commands and shortcuts you can use:
-
Change the shape of the arc with the Tab key.
-
Change the direction to which the wiring is drawn with the key combination Ctrl + <.
-
Change from curve to polyline and vice versa by entering the T command into the command line.
-
-
Polyline – Wiring is drawn using a straight multi-line and beveled endpoints, if desired.
While drawing, the command line shows you the commands and shortcuts you can use:
-
Change the angle of beveling with the Tab key.
-
Change the direction to which the wiring is drawn with the key combination Ctrl + <.
-
Draw a corner wiring by entering the corner command into the command line, or with the key combination Ctrl + F1.
-
Change from curve to polyline and vice versa by entering the T command into the command line.
-
Add end bevel 90° by entering the square command into the command line.
-
Take the wiring to a cableway by entering the route command into the command line. Then indicate the in and out points from the cableway.
-
-
Single wiring – The drawing mode prompts for start and end points for each wiring.
-
Continuous wiring – The start point of the next wiring is automatically set at the end point of the previous one. When you end one continuous wiring with Enter, the function remains active and you can draw another continuous wiring. If you press Enter when you should indicate the start point, the function is closed.
-
Star wiring –The start point of the next wiring is always set at the same wiring point as the start point of the previous wiring.
-
-
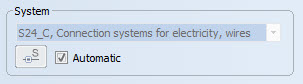
If you want to assign a specific system for the wiring, remove the check mark from the Automatic option and select the desired system from the drop-down menu or pick it from the drawing. When Automatic is selected, wiring always goes to the wiring system of the symbol from which the wiring starts.
Wiring along cableway
You can set surface wiring to pass along a cableway. By entering the route command, you can pick a point on cableway where the wiring enters the cableway and another point where wiring exits the cableway. The function draws the wiring between the selected points along the cableway by using the shortest route possible.