Layout tab > Other functions group > ![]() (Setting groups management)
(Setting groups management)
With this function, you can handle layers in groups, i.e. you can activate/deactivate, freeze/thaw, etc. several layers at the same time.
The setting groups are based on systems in use. The Lighting systems setting group, for example, includes several layers (lighting equipment, wires, markings, safety lights, indicator lights, etc.) – therefore, when you deactivate the Lighting systems setting group, all associated layers are deactivated.
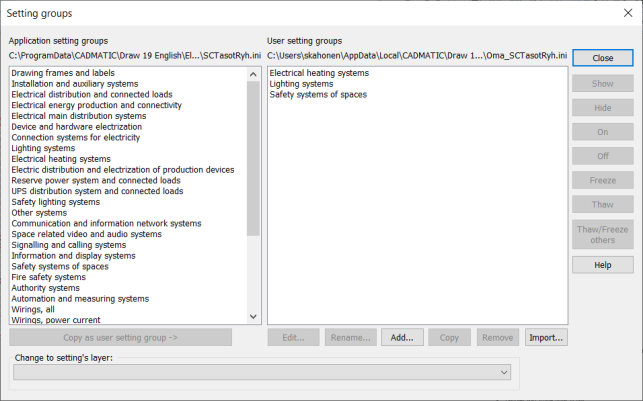
The buttons on the right affect the setting group selected from the Application setting groups list:
- Show – Change to setting's layer sets the work layer according to the selected system in the Show function.
-
Hide – This button is used to deactivate all setting group layers and activate other layers, which have been defined in the current setting file.
-
On – This button activates the setting group layers.
-
Off – This button deactivates the setting group layers.
-
Freeze – This button freezes the setting group layers. The button is used in design / floating viewports mode only (inside the viewport).
-
Thaw – This button thaw the setting group layers. The button is used in design / floating viewports mode only (inside the viewport).
-
Thaw/Freeze others – The selection will be made in "Design / floating viewports" mode (inside the viewport) with Thaw/freeze others. The function should only be used in design / floating viewports windows mode.
Note: If the function deactivates a layer, which has been an active layer, the 0 layer should be selected as the active layer in order to perform the deactivation.
Managing setting groups
Editing application's default setting files is restricted. Instead, you can copy an existing group by clicking Copy as user setting group. After that you can edit group details by selecting it from User setting groups -list.
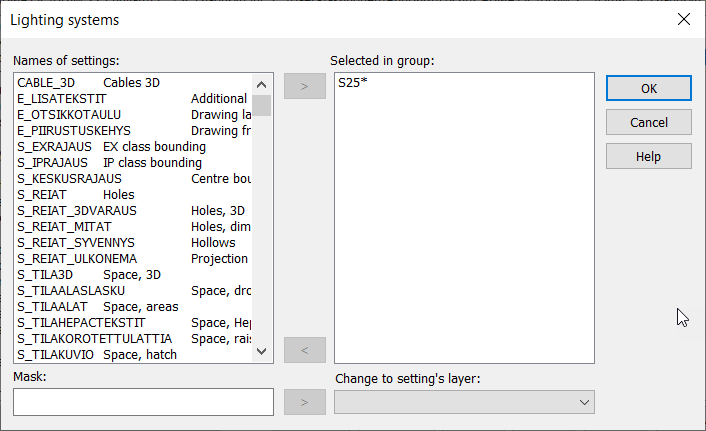
- Edit – Function determines which systems/layers belongs to active setting group. System is added by selecting it from Names -list and pressing > button. You can also use masks to determine systems by adding it to Mask-textbox and pressing the > button next to it. For example if you want to create setting group that handles heating and lighting systems, you can add S25* and S26* masks.
This button is used to activate all setting group layers and deactivate other layers, which have been defined in the current setting file.
Rename – Renames selected User setting group.
Add – Creates new user setting group. Input name and press OK. New group is added and edit opens.
Copy – Creates copy of selected user setting group.
Remove – Deletes selected user setting group.
Import – You can import existing setting groups for example from previous versions settings file. Browse for SCTasotRyh.ini from your computer and select setting groups you wish to import. Setting groups will be imported to user setting groups.