Create new objects in the database
Do the following:
-
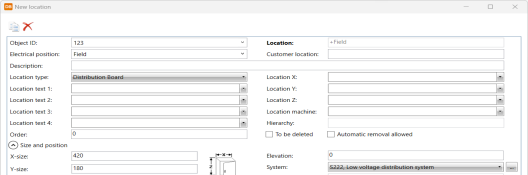
Create a new location:
-
Select the Locations tab in the database tool.
-
Right-click on the grid, and select New location.
-
Define the following information in this order:
-
Electrical position – Field
-
Object ID – 123
-
Location type – Distribution Board
-
-
-
Click OK. The new location is now shown in the location grid.
-
Create a new device:
-
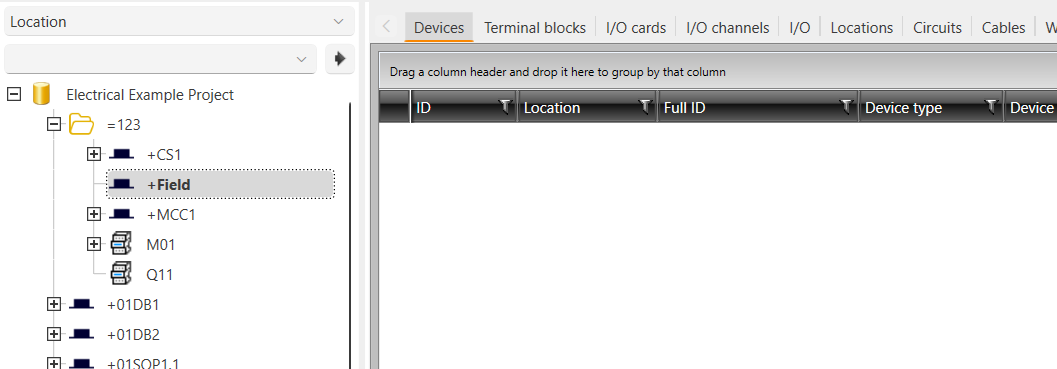
Select the Devices tab.
-
Find the new location from the project tree, and click it.
There are no devices in this location since it was newly created.
-
Add a new device to this location by right-clicking the empty grid, and selecting New device.
-
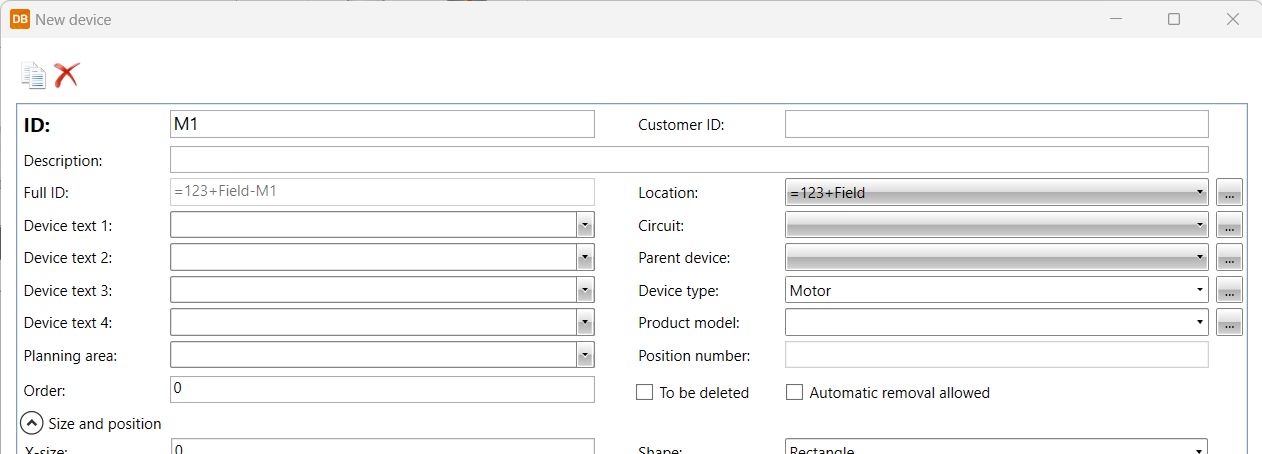
Define the following information:
-
ID – M1
-
Location – Already correct because we have the =123+Field selected in the tree
-
Device type (optional) – Motor
-
-
Click OK. The new device is now shown in the device grid.
-
-
Create a new terminal strip:
-
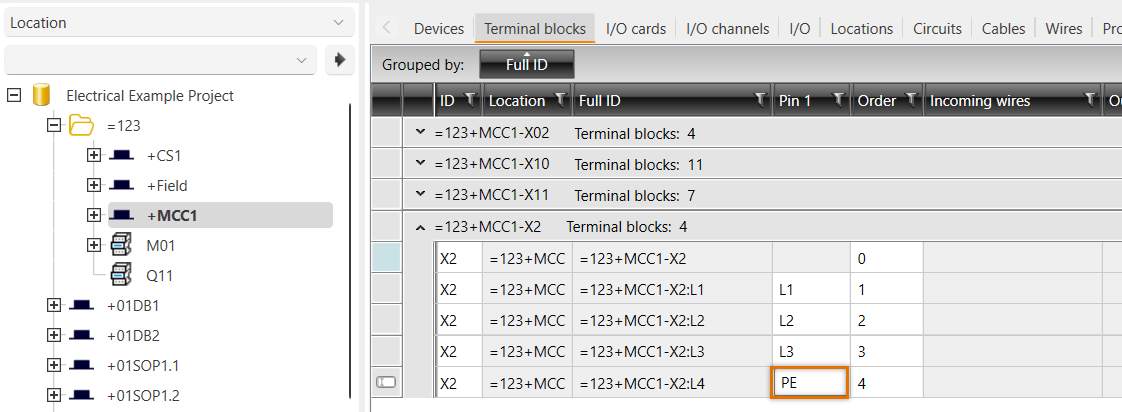
Select the Terminal blocks tab.
-
Select =123+MCC1 from the project tree.
-
Right-click on the grid, and select New terminal strip.
-
Define X2 as the ID.
-
Click OK.
-
Add pins to the terminal strip:
-
Select and right-click the newly created terminal strip, and select Generate multiple terminal blocks.
-
Define L1 as the starting number and 4 as the quantity, and click OK.
-
After generating the blocks, rename the 4th block to PE in the grid.
-
-
-
Select the Cables tab.
-
To clear filtering based on the selected location, select the root of the project tree (the
 icon and the project name).
 -
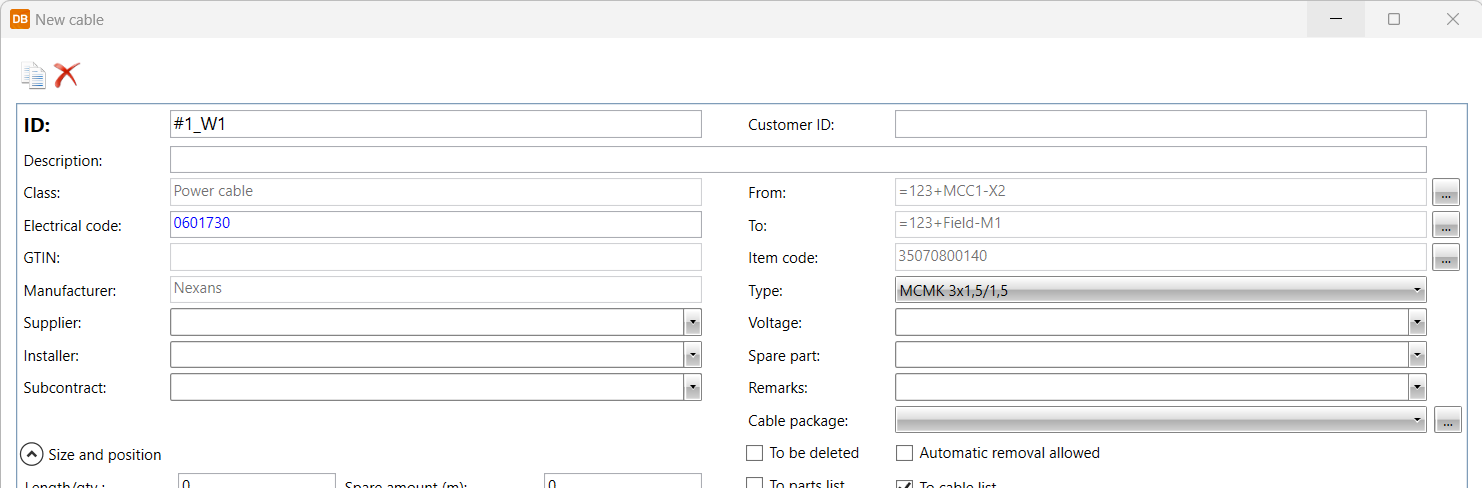
Create a new cable:
-
Right-click on the grid, and select New cable.
-
Define the following information:
-
ID – 1W1
-
From (optional) – =123+MCC1-X2; select by clicking the
 button
 -
To (optional) – =123+Field-M1; select by clicking the
button -
Type – MCMK 3x1,5/1,5; select from the drop-down menu
-
-
Click OK. The new cable is now shown in the cable grid.
-
-
Move back to the drawing side, and synchronize it with the
 button. The objects created are now visible in the project tree.
 Previous Previous |
Next

|