Create, edit and remove documents
Important: Never rename project drawings in Windows' File Explorer as it must be done in document management. The same applies to deleting documents from the project.
Create a document
Do the following:
-
On the drawing side, create a new document by selecting Electrical tab > Documents group > New.
-
Use the following definitions:
-
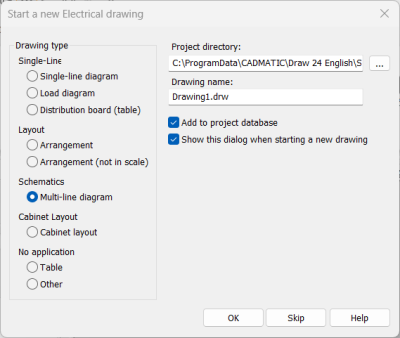
Drawing type – Multi-line diagram
-
Project directory – The same as where your project is currently
-
Add to project database – Always select this to link the document to the database.
-
-
Add the default frame to the empty drawing by selecting Electrical tab > Frames and labels group > Insert.
You have now created the new drawing, and added it to the project. You can now start designing.
-
Save and close the document.
Tip: If you forget to add the document to the database when creating a new drawing, you can add it later by clicking the ![]() Add document to project button in the Electrical window.
Add document to project button in the Electrical window.
Edit a document
Do the following:
-
In the Electrical window, click the
 (Open DB Tool) button to open the database tool.
 -
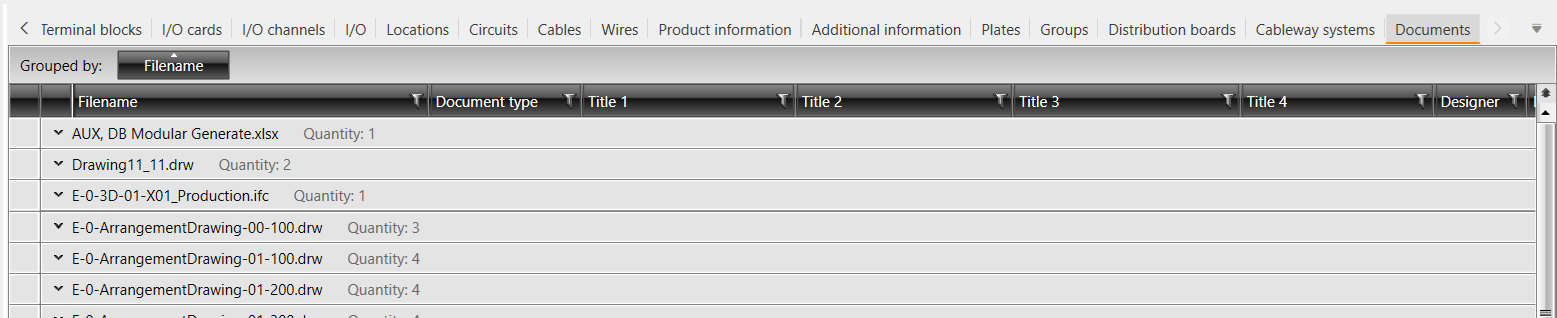
Select the Documents tab.
-
Drag and drop the Filename column header to the grouping row.
-
The blue row represents the whole document.
-
The gray row represents document’s frame/label.

-
Right-click the blue row, select Rename and enter a new name.
Files and their frames/labels are arranged together.
Delete a document
Do the following:
-
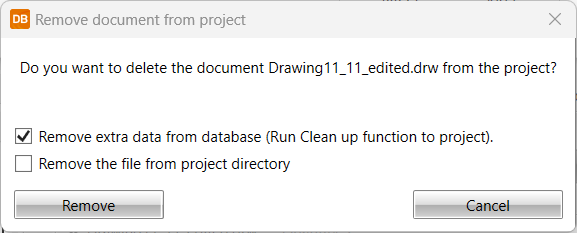
On the Documents tab, right-click a blue row and select Remove document.
-
Select from the following options:
-
Delete the drawing from the project, and clean objects from the database.
-
Delete the drawing from the project and the project directory. Additionally, clean object data from the database. This option is recommended.
-
-
Click Remove.
 Previous Previous |
Next

|