Adding point clouds to a project
Point cloud files can be stored in the file system of the CADMATIC eShare server, in project-specific folders that the server creates using the project GUID as a folder name.
eShare server automatically converts point cloud files (.e57, .cpd, .cpe, .ptx) into point cloud panorama files (.cpx). To optimize visualization and performance, the conversion creates two separate .cpx files, a low-resolution version and a high-resolution version, for each point cloud in the source file. When the user views the point clouds, eShare shows low-resolution versions of all point clouds, and high-resolution versions of the nearest three point clouds. The server automatically deletes any other files from the point cloud folders. The server also deletes .cpx files that no longer have a corresponding source file.
Note: CPX files generated with version 2023T3 cannot be opened with older versions.
As soon as the server has created a .cpx file, it becomes available to eShare App in client computers. You can also use CADMATIC eBrowser or Plant Modeller to open .cpx files.
Do the following:
-
Use eShare or eShare App to get the relevant project GUID. You can see it in the General view of project administration, in the Database Name field.

-
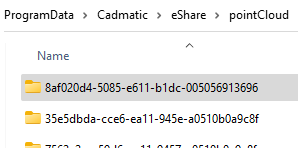
In eShare server, browse to C:\ProgramData\Cadmatic\eShare\pointCloud, and copy the point cloud files to the folder whose name matches the project GUID.

-
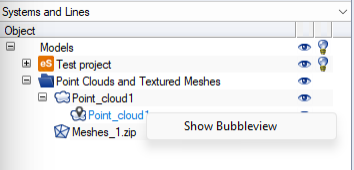
To verify that the point clouds can be displayed, open eShare App, open the Model view of the project, and then in the Model tab either double-click a point cloud name or right-click it and select Show Bubbleview.
