Creating a new status tracker
Perform the following to create a new status tracker and to define the workflow that users must follow when changing the value. Status trackers always relate to attributes; an object or object group must have the specified attribute for the status tracker to be present. You can create multiple status tracking definitions that relate to the same attribute.
Status tracking can also be used for grouping, if there is need to work with a large number of status values.
Do the following:
-
Navigate to the project to edit, and then click Project Admin in the main menu. The project administration view opens.
-
Click Status Tracking and Object Grouping. The Status Tracking and Object Grouping configuration view opens.
-
If there are no existing status tracking attribute types, or you need to create a new one, do the following:
-
In the Status Tracking and Object Grouping view, click Edit Attribute Types.
-
In the Attribute Types view, click Add Attribute Type.
-
Enter a name for the new attribute and select the data type.
-
Click Save.
-
-
In the Status Tracking and Object Grouping pane, click Add. The Status Tracking Details view opens.
-
Define the general settings:
-
Name – Enter a suitable name for this status tracker. For example, if the purpose is to track the verification status of parts, the name can be "Part Verified".
-
Target Attribute – Select the attribute that an object must have to use this status tracker. Only ID-type (key) attributes and attributes that define a group can be selected. This setting cannot be changed later.
-
Default Value – Specify the default value of this status tracker or leave it as "Undefined". You can also select the color to use to visualize objects that have the default value; the default color of these objects is black.
-
Display Category – Specify the display name of the status tracking shown in the properties pane. Default is Status Tracking.
-
Use Unique Identifiers as References – Specify if the used reference is the key attribute or GUID id of the object or group.
If Disabled, statuses of this type are linked to the value of the Target Attribute of the status the object has. If some objects have identical key attributes, they will share the same status. If Enabled, statuses of this type are linked to the GUID id of the object, if the Target Attribute is the key attribute of the object. If the Target Attribute is a group attribute, then the status is linked to the GUID id of the group.
Note: This functionality should be enabled only in cases when the original 3D model contains GUID data.
-
Used for Grouping – If you select Enabled, it will affect the following settings:
 Show/hide details
-
The order of Status Values cannot be changed.
-
Project color definitions are not supported for Status Values.
-
User Permissions will be limited to Add New Status, See Status, and Change Status.
-
Status Workflows section will not be visible and all transitions are allowed.
-
-
Users Can Add New Values – Specify the following:
-
Enabled – Select if you want users to be able to add their own status tracking values in the properties pane of the 3D view. You can set the permission separately for each user group in the User Groups section.
-
Use Template for New Values – If adding new values is enabled, you can select to use a template for the new values.
Show/hide details
If set to Enabled, any combination of model attributes and text can be entered in the Value Template field.
In the model, when a user clicks on the plus button to start adding a new status tracking value, the attributes in the template are pre-filled in the box, if all the attributes used in the template are found in the selected object. The text can be edited or removed.
-
-
Disabled (default) – Select if you want users to be able to only select one of the predefined values.
Note: If you allow users to add values, you cannot define a workflow for the status tracker.
-
-
- In the Attribute Types section, select the attribute type from the drop-down list.
-
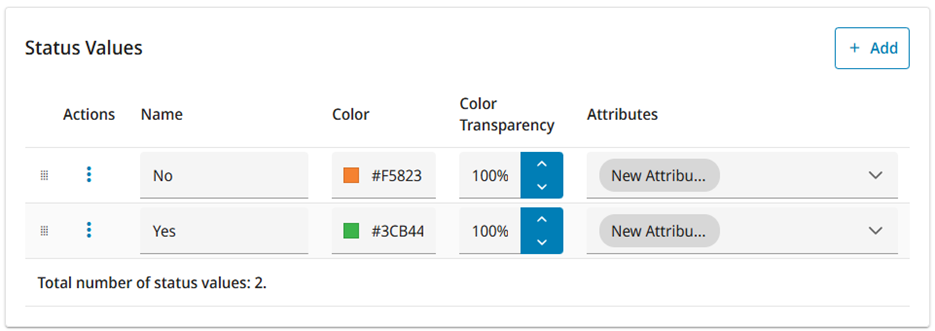
In the Status Values section, define the status values that users will be able to select.
-
To add a value, click Add, enter the value name, and select a suitable color. When a user selects this tracking value for an object in the 3D view, the object is shown in the specified color.
-
When there is more than one value defined, drag the values to designate the order in which the values are listed to the user.
-
-
In the 4D Sequence section, if the state is enabled, specify the following:
-
Excluded object visibility state – Specifies the visibility of objects, which are not part of the 4D sequence.
-
Do not change – The visibility of any model objects without an initial category will not be changed.
-
Hide all objects – Every single model object without an initial category is made visible automatically before starting the animation.
-
Show all objects – Every single model object without an initial category will be automatically hidden before starting the animation.
-
-
Step length – Sets the length of a single step in the 4D sequence. For example, setting the step length as "0 months, 1 days, 0 hours" means the length of each step is 1 day. Setting a low value in this field may result in very long 4D sequences.
-
Start time – Specify the start time for the sequence. Select from the following options:
-
From first – 4D sequence starts from the earliest instance of the data present in the database.
-
Specific start time – Select a specific start date from the date picker.
-
Relative start time – Set the amount of months, days, and hours to be counted from the time of querying the data to determine the sequence start time. Use negative numbers to indicate past, and positive numbers for the future.
-
-
End time – Specify the end time for the sequence. Select from the following options:
-
To last – 4D sequence continues until the latest instance of data present in the database.
-
Specific end time – Select a specific end date from the date picker.
-
Relative start time – Set the amount of months, days, and hours to be counted from the time of querying the data to determine the sequence end time. Use negative numbers to indicate past, and positive numbers for the future.
-
-
-
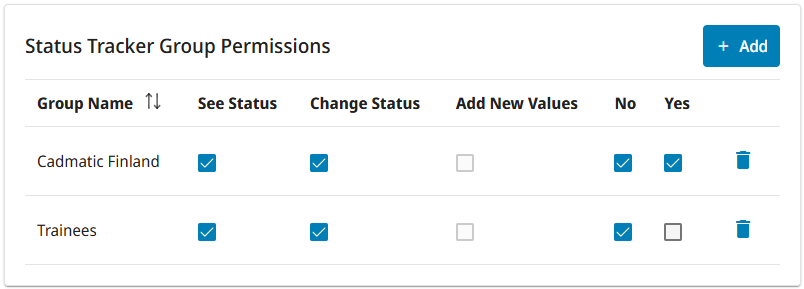
In the Status Tracker Group Permissions section, define the permissions that each user group has.
-
Add New Values – If you enabled Users Can Add New Values for this status tracker, select this option to allow the specified user group to add new status values.
-
See Status – Select this option to allow the user group to see the status of this status tracker.
-
Change Status – Select this option to allow the user group to change the status of this status tracker, either freely or according to the workflow settings.
-
<status value> – Select whether the user group can set the status to the specified value.
Show/hide image
In this example, both user groups can change the status (one can set it to "Yes" or "No", the other only to "Yes"), and none of the groups can add new status values.
-
-
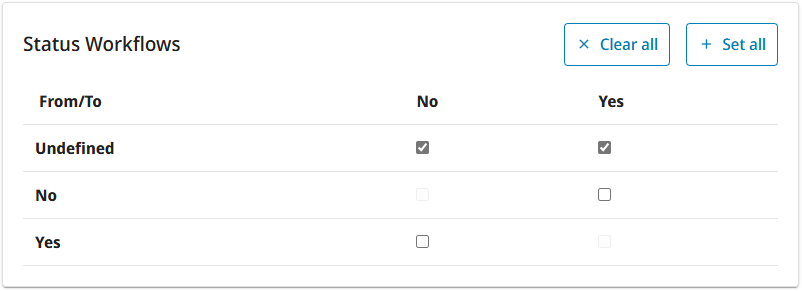
In the Status Workflows section, specify which status changes will be possible in the user interface. If a status that is listed in the vertical axis (in the From column) can be changed to a given status in the horizontal axis (in the To row), select the appropriate check box.
Show/hide image
In this example, the user would be able to change the default value "Undefined" to either "No" or "Yes", but not change "No" to "Yes" or "Yes" to "No".
Important: Make sure that User Group permissions do not unnecessarily prevent the user from following the specified workflow.
Note: Once the status has been changed in 3D, the user cannot set it back to the default value.
-
Click Save. The settings will be applied to the 3D model after the model is (re-)published.
Results
Users can select the status tracker from the visual style menu to see objects in status value specific colors.
Users can select the status tracker from the hierarchy menu to arrange the objects in the model tree according to their status.
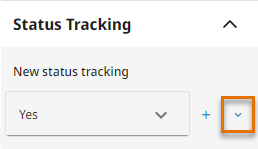
When users view or examine an object that has the target attribute specified by the status tracker, the status tracker is displayed in the Status Tracking section of the properties pane, and the status can be changed by selecting a value from the list (if allowed by the tracker's configuration). If the target attribute defines an object group, changing the status of one object changes the status for all objects in that group.
After the status has been changed at least once, clicking the small, blue arrow at the right shows a log of the status changes.
Example
If integration to CADMATIC design applications is not in use and you want to track pipe spool statuses, you can create a new attribute whose value is unique for every spool. You can combine the attributes "Idn" (Isometric Drawing) and "Spn" (Spool) in CADMATIC models to a new attribute such as "Ise" whose display name is "Spool Identifier". Define the "Ise" attribute to be of type "Group", and save and republish the model. Then, create status tracking for "Spool Identifier". For details on combining attributes, see Attribute settings.