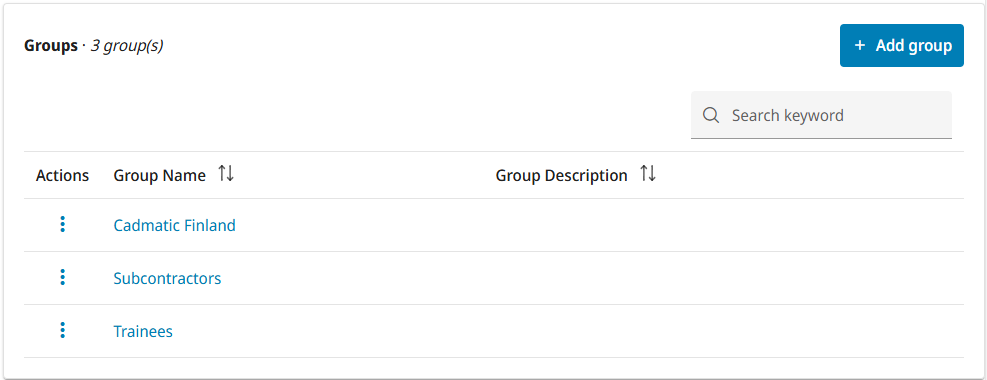
Group management view
In the Group Management view of CADMATIC eShare a system administrator can create user groups and assign users to groups.
-
To open the Group Management view, select Groups in the menu.


The title row of the Groups list indicates how many groups there are in total.
Adding a new group
A system administrator can add new user groups to CADMATIC eShare to enable project administrators to limit users' access to specific data.
Prerequisites
- You are a system administrator.
Do the following:
-
Select System Admin in the main menu. The system administration view opens.
-
Select Groups. The group management view opens, listing the groups currently defined in the system.
-
Select Add group.
- In the Group Details section, enter the following information:
- Group Name – Enter a name for the group.
- Description (optional) – Enter a description of the group.
- In the Users section, select the Group Member check box of the users to be added to the new group.
- Select Save.
Results
The new group is listed in the Groups list of the Group Management view.
You can add or remove group members as described in Editing group details.
Project administrators can select the group when defining data sources to specify that the group members can access data provided by the data source.
Editing group details
A system administrator can edit group's name and description, and add or remove group members.
Prerequisites
- You are a system administrator.
Do the following:
-
Click System Admin in the main menu. The system administration view opens.
-
Click Groups. The group management view opens.
-
Click
 in Actions column and select Edit. A view for editing the group details opens.
 -
Edit the settings as required, and then click Save.
Results
The changes are applied to the group.
Deleting a group
A system administrator can delete a group that is no longer needed for limiting users' access to specific data sources. Deleting a group does not delete the related users or remove them from the project.
Prerequisites
- You are a system administrator.
Do the following:
-
Click System Admin in the main menu. The system administration view opens.
-
Click Groups. The group management view opens.
-
Click
 in Actions column and select Delete. You are prompted to confirm the action.
Results
The group is removed from all data source configurations and deleted from the system.