Defining rules in System Management
Rules can be created and modified in the System Management application. In these cases the system creates and updates the corresponding configuration file(s). Configuration files containing rules can also be created and modified manually with a text editor (see Rule configuration files).
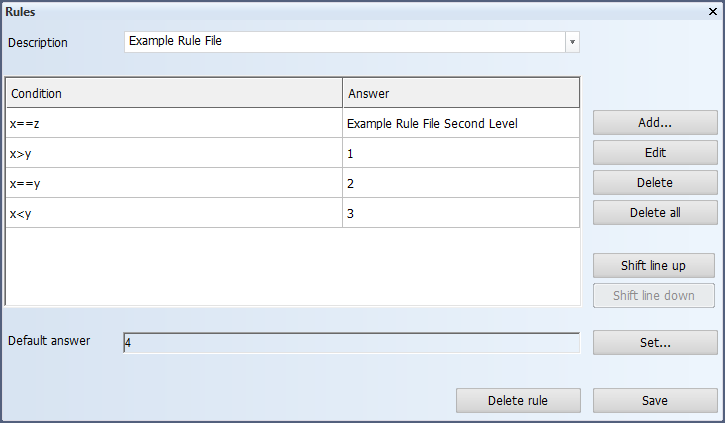
Example of creating a rule in System Management
Note: Lines containing more than 132 characters cannot be edited in the System Management application. The system shows a warning if a line exceeds 132 characters. The rule file must be edited manually if there are any lines containing more than 132 characters.
Conditions are handled top-down: The first condition which is met will be executed and the others are ignored. Therefore, the order of definitions is significant.
In this example, if x is equal to z, a second rule file will be called instead. If x is not equal to z, the second definition is examined. In that case, if x is greater than y, a value of 1 will be returned. If they are equal, a value of 2 will be returned, and if x is less than y, a value of 3 will be returned. However, if none of the conditions are met, a value of 4 from the Default answer field will be returned.
-
Description – Text entered here is shown at the top of the file to describe the rule file.
-
Add – Opens the Add dialog for adding new definitions. See Adding rules.
-
Edit – Opens the Edit dialog for editing the selected definition.
-
Delete – Deletes the selected definition from the rule file.
-
Delete all – Deletes all definitions from the rule file but not the file itself.
-
Shift line up / Shift line down – Moves the selected definition one step up or down within the rule file. The first condition which is met will be executed and the rest ignored.
-
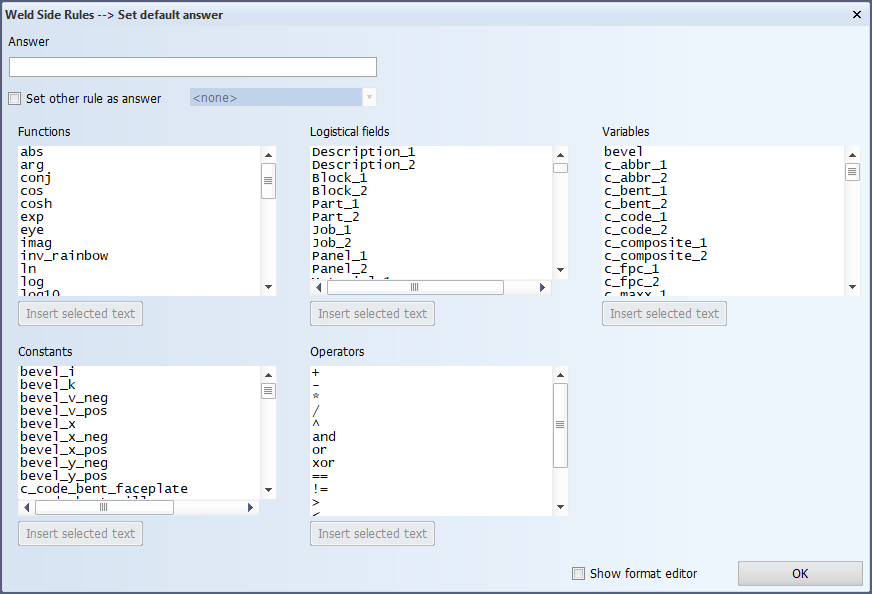
Set – Opens the Set default answer dialog where you can compose an answer that is returned in case none of the conditions are met. Compose the answer by selecting from the available items in the boxes and entering free text.
The default value cannot be set as a rule. You can set another rule file as the answer by adding a condition.
-
Delete rule – Deletes the rule file and all the definitions in it.
-
Save – Saves the rule file according to the name listed in the description. Clicking Save, changing the description and then clicking Save again will create a new rule file which can be called by other rule files.
Adding rules
Do the following:
-
Start one of the rule definition functions in System Management. The Rules dialog opens.
-
Click Add.
In the Add dialog you can define conditional expressions. The answer defines the result to be returned if the condition is met. If Set other rule as answer is selected, another rule file will be called if the condition is met.
-
Define the condition and the answer by typing them in the respective fields. In addition to typing, you can also add available functions, logistical fields, variables, constants and operators by first clicking the field (i.e. Condition or Answer) to which you want to add an item, and then selecting the item and clicking Insert selected text.
-
To insert a field format code, click Show format editor. Insert the field format code by clicking in the desired field (i.e. Condition or Answer) directly to the right of the item you want to format with the code, then click Insert Code. The field format code is appended at the selected position with a separating dot. If you want to remove the field format code, select it with the separating dot and press Delete or Backspace on your keyboard.
-
Click OK.
For example, after typing x in the Condition field, you can select the == operator and click Insert selected text below the Operators box.
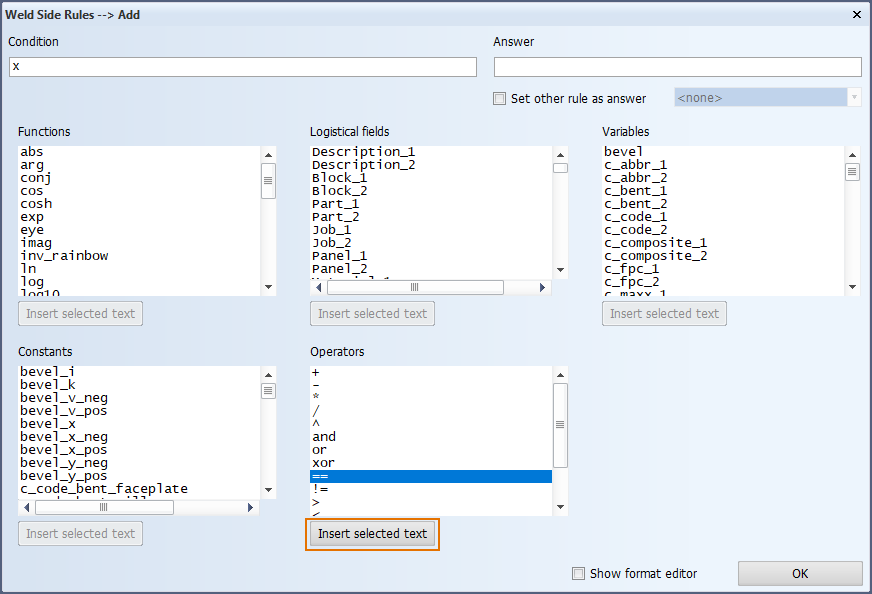
The selected operator is added in the Condition field, after which you can continue by typing or selecting items with Insert selected text.
Note: String values must be enclosed with double quotation marks, for example: Material_1=="GR-A".
For information on defining field format codes, see Defining field format codes.
Defining field format codes
Field format codes can be defined in any of the rule definition function in the System Management application (plate and profile bevel rules, weld factor and weld side rules, color map color and extrema rules for shell plate elongation reports).
Do the following:
-
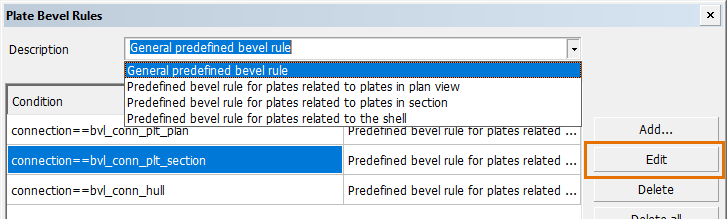
In any of the rule definition functions in System Management, select a rule and then a condition–answer pair, and click Edit. You can also click Add to add a new condition–answer pair.
The Add/Edit dialog opens. This where you can edit the rule.
-
Select Show format editor at the bottom right of the dialog. The Field Format Editor dialog opens.
-
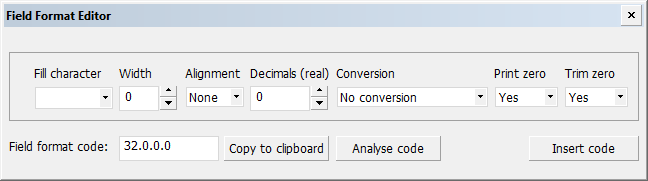
Define the field format code with the following options:
-
Fill character – The selected character is used to fill an empty character position in the value.
-
Width – The number of character positions. This affects the width of field. Note that for an empty character position, the Fill character option is used.
-
Alignment – Left, right, or none. This is applicable only if the value in the Width field is set larger than zero.
-
Decimals (real) – The number of rounding decimals. This is applicable only if the value is a number.
-
Conversion – Conversion of the value.
 Show/hide the available conversions
-
No conversion
-
Use conversion table
-
To inch (length) – From mm to inch
-
To pound (mass) – From kg to pound
-
To integer
-
To metric ton (U.S.)
-
To inch (area) – From mm2 to ft + inch
-
To inch (volume) – From mm3 to ft + inch
-
To ton (SI unit) – From kg to ton
-
To frame+offset
-
To decimal frame no.
-
To SB/MS/PS
-
To date and time – The format is defined by the setting Extra > Customize > 3D-Item Information > Settings > Date/Time Format.
-
To separator – The field works as a separator. The field itself is ignored if the value of the following field is empty (or zero for a numerical field).
-
To inch (offset) – If input is a number, this field format converts number to frame + offset, with offset in inches. If input is a combination of rid + offset (for example, B1+100), the offset is converted to inches.
-
From m2 to sq yard
-
-
Print zero – If the resulting value is 0 and you select Yes, the zero value is shown. If you select No, the zero value is not shown.
-
Trim zero – If the resulting value is a decimal value with trailing zeros (for example, 27.3900) and you select Yes, the zeros are removed (for example, 27.39). If you select No, the zeros are shown.
The code is shown in the Field format code field.
-
-
In the Add/Edit dialog, place the cursor into the position in the Condition or Answer input field where you want to add the formatting code.
-
Click Insert code to add the formatting code to the rule. The code is added to the cursor position.
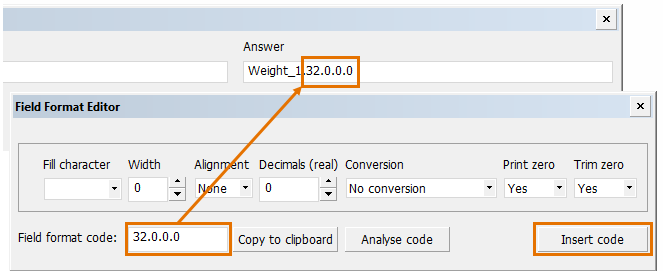
Note: The format code must be separated from the rest of the field's content by a period (full stop). When the code is inserted with Insert code, the system automatically adds the period. If you enter the code directly into the input field or paste it from the clipboard, you must add the period manually.
Clicking Copy to clipboard copies the code to the clipboard.
If you want to know which options a field format code consists of, you can paste or enter the code into the Field Format Code field and click Analyse code. The values for the different options are then shown in the fields above the code.