Create New Block
Overview of actions:
- Create Block "108"
First you have to create a new block. When creating a new block, you will first always need to enter an existing block within the project you are working on. This is the reason why you have just selected block 999 from the training project. From there you will create a new block named 108.
To create block "108", select File > New > Project/Block from the menu bar and in the panel Create Project/Block that appears, the blocks "108" and "109" are displayed. They have been predefined by the System Administrator.
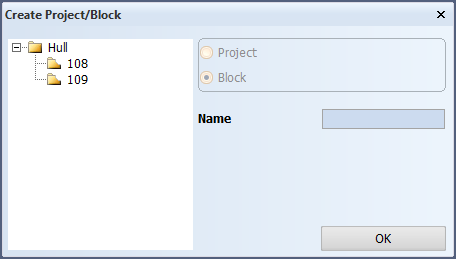
Any predefined blocks will appear on the left part of this panel. The new block name, which can be a name or a number, is displayed in the Name field.
Please select the predefined block "108".
Now the system creates and then opens the new block "108".
The next step consists of indicating the drawing mode, drawn or dashed, for each block. For this purpose the panel Solid/Dash is displayed:
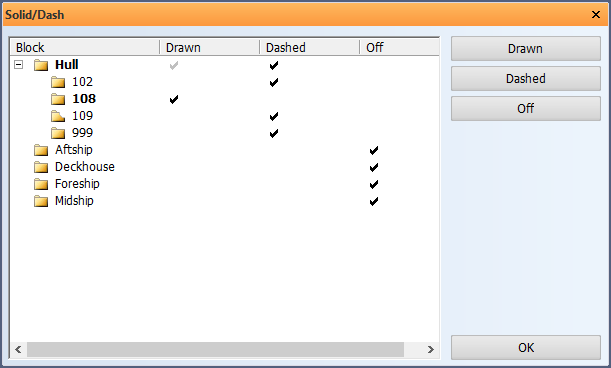
This panel contains four columns:
- Block – contains the groups and their blocks for which you can define the drawing mode.
- Drawn – to check blocks that you wish to be presented with drawn or solid lines.
- Dashed – to check blocks that you wish to be presented with dashed lines.
- Off – to check blocks that you don't wish to be presented at all.
In general, only the block you will be working in should be presented as drawn. The other blocks around it can be presented dashed if you want to see them as well.
You will only work in block "108" and will probably need information from the other blocks while working in your project. When you select block 108, you can use the check boxes to define how you want it to be displayed. You can either click on the check boxes, or use the buttons located to the right of the panel.
You can also select an entire group of blocks to appear dashed by selecting that group instead of just one block. Checking the Dashed checkbox will allow all the blocks part of the group to appear dashed.
Please click the OK button to continue.
In the next step, you will be able to create views. A view has an area in which the construction will be shown. The system displays the following message panel:
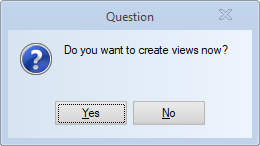
Please select Yes when the question Do you want to create views now? appears.
The next three training steps will teach you how to create the views.