Create Sheet Drawings
Although you haven't finished your block, you will create a sheet drawing to have an overview of your block. A sheet drawing is a drawing composed of various views.
Overview of actions:
- Switch to 'Sheet Drawing' environment
- Create new sheet drawing with paper size A0 and scale 1:25
- Select views to open inside the empty sheet drawing
- Save sheet drawing with drawing number "108" and sheet number "1" manually
- Leave the Sheet Drawing environment
End situation – Create Sheet Drawings
Additional description of actions:
- Leave the Sheet Drawing environment
To leave the Sheet Drawing environment, you click the icon Close Sheet Drawing in the last section of the Sheet tab:
![]()
Upon doing this, the sheet is also saved but this time automatically, and the application you have worked in last is loaded. In this case that is 3D-Contek.
Switch to 'Sheet Drawing' Environment
Select the icon Sheet Drawing in the Create section of the Home tab:
![]()
This option is available within the applications 3D-Contek, 2D-Contek, 3D-Show and Shell. After selecting it, the system will switch to the Sheet Drawing environment and present a new ribbon tab for creating and modifying sheet drawings named 'Sheet. While the Sheet Drawing environment is active, many other functions on various other tabs are disabled.
Create New Sheet Drawing
You will create a new sheet drawing with paper size A0 and scale 1:25.
Please select Create New Sheet in the General section of the Sheet tab to create a sheet drawing:
![]()
After selecting this function you will be presented with the panel Sheet settings to define the paper size and the scale of the drawing:
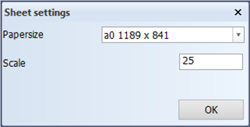
Please click the OK button to continue. Next, a new empty sheet drawing is created including a title-field which can be filled in. You are presented with a panel as an example of how some of the information in the title-field could be specified:
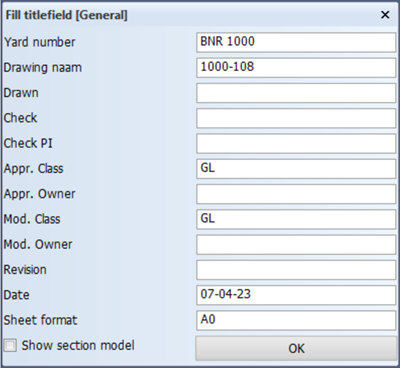
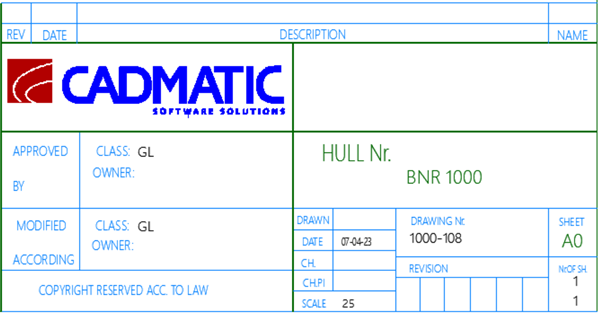
After clicking the OK button, the given information will be processed in the title-field:
Next you can load views into the sheet drawing. This will be handled as a separate action within this training step.
Import Views to Sheet Drawing
You will select views as part of the process for creating sheet drawings. These views will be loaded into the sheet drawing. The arrangement you will apply here will be different from the arrangement of views on the example sheet that you have on paper.
You will load the following views into the sheet drawing:
- Top views "108-6200" and "108-3500";
- Side views "108-3960" and "108-6600";
- Frame views "108-23", "108-24", "108-25" and "108-26".
The arrangement of these views is illustrated in this figure:
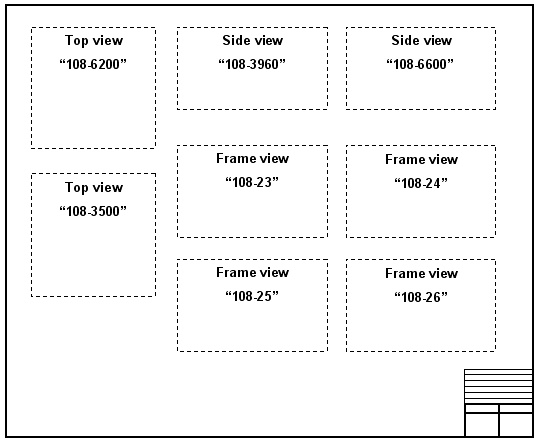
Let's first load the top views, followed by the side views and then the frame views.
To select the top views, check the option Top to the left of the panel Sheet Drawing:
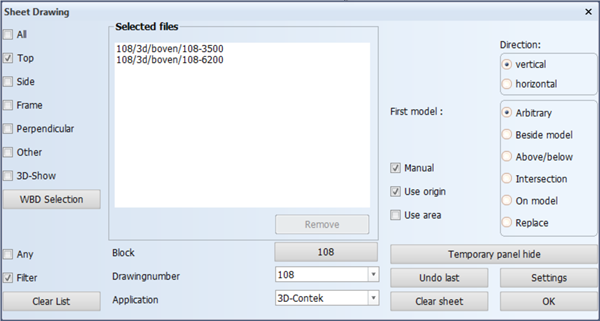
Within this panel you will find list of two available top views. In this case you will load the views in a manual and arbitrary way, please notice that the options Manual and Arbitrary are selected as default.
Please select the top view "108-6200" from the list and place the view at the desired position in the sheet drawing. The selected top view will disappear from the list in the panel.
The second top view "108-3500" will be not placed arbitrarily but below the first top view. Please select option Above/below:
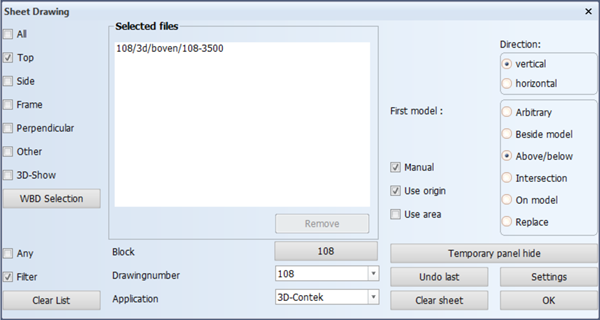
After selecting the top view "108-3500" from the list, you have to select one of the views in the sheet drawing as the hint Select a model suggests.
According to the selected placement method Above/below, you select one of the views in the sheet drawing by indicating a point above or below that view. So please indicate a point just below the first top view "108-6200" and in doing so, the second top view "108-3500" will be positioned below the first one with a default intermediate distance.
After selecting top views, you will continue with the side views by deselecting the option Top and then selecting option Side.
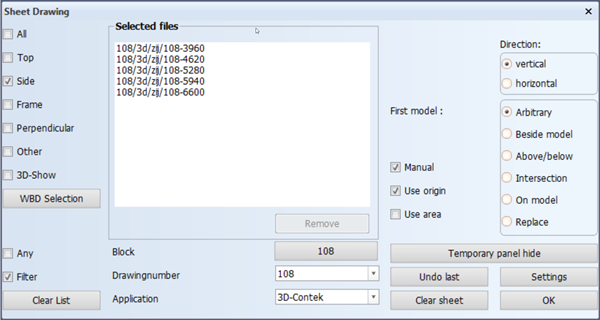
Within this panel you will find a list of available side views. From these five views only the two views "108-3960" and "108-6600" will be loaded into the sheet drawing. First select Arbitrary as the method of placement and then select the side view "108-3960" from the list and place the view at the desired position in the sheet drawing. You will position this view to the right of top view "108-6200".
The next side view "108-6600" has to be placed next to the side view "108-3960". So first select Beside model for the method of placement:
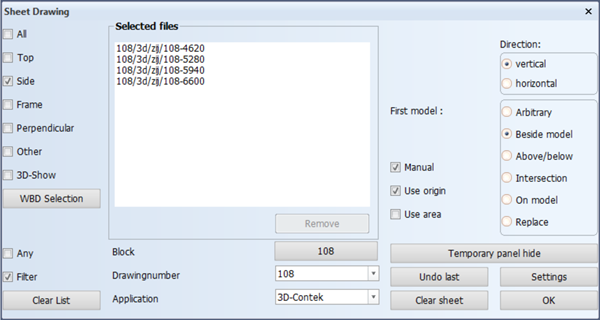
Please select side view "108-6600" from the list. Next, you indicate a point in the sheet drawing to the right of side view "108-3960" to define the position whereat the selected side view should be placed.
Please deselect the option Side and select the option Frame in the panel. Next you select the placement method Arbitrary to continue:
You are now presented with a list of eight available frame views. There is still some space available in the sheet drawing, therefore you will load four of the eight frame views; "108-23", "108-24", "108-25" and "108-26":
- Please select the first frame view "108-23" and place this view below side view "108-3960" and beside both top views "108-6200" and "108-3500";
- Since the frame view "108-24" should be placed next to the frame view "108-23", you select the option Beside model. Then select frame view "108-24" from the list and place it to the right of frame view "108-24" by indicating a point at that position;
- The third frame view "108-25" should be placed below frame view "108-23". Select option Above/below and frame view "108-25" from the list. Then select the frame view "108-23" by indicating a point just below it;
- The fourth frame view "108-26" should be placed next to the frame view "108-25" and below frame view "108-24", meaning at an intersection. Now select placement method Intersection in the panel:

Please select frame view "108-26" from the list. Next, you have to select the frame view "108-25" by indicating a point to the right of the view. Then you select frame view "108-24" by indicating a point just below it. Now the fourth frame view "108-26" will be aligned with both the frame view "108-25" and frame view "108-24".
After having loaded all the specified views, you can end this function by clicking OK. Confirm by clicking Yes in the panel that follows.