Deck 6200 Above Base – Part 5
In this final step, you will create and insert a construction detail of the bracket in section at frame 28.
You will also modify the hole status of the hole between frame 23 and 24 at 7000 from CL.
End situation – Deck 6200 Above Base – Part 5
Create Construction Detail
Now you will create a detail of the bracket in section at frame 28 to add to the current drawing.
Let's create the detail by clicking the icon Create Construction Detail on the Home tab:
![]()
Before you concentrate on the panel that appears, first indicate the bracket in section at frame 28 in the graphical screen. Then for Area margin and Scale use the values as shown below:
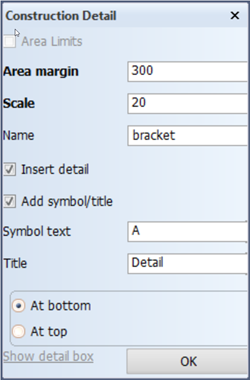
Note: Instead of using an area margin, you can also specify exact area limitations when you tick the Area Limits option.
Now please specify a name for the detail, and proceed to activate the Insert detail option. The Add symbol/title option allows you to add a detail symbol to the bracket at frame 28:

In addition you can also enter a title which will be added to the detail itself. For this title you can choose if you want it to appear at the top or at the bottom of the detail.
Proceed to enter A for the symbol text and type 'Detail' for the title. When you determine the title to appear at the bottom and click OK, the detail will look like this:
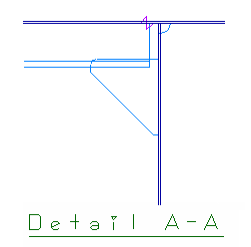
Because you activated Insert Detail, the detail is now attached to your mouse and you will be able to move it to the desired position. Place it with one mouse click.
Meanwhile, a drawing of the detail is being saved as frame view "108-28-bracket". You can open this drawing if you, for instance, want to add dimensions to your detail.
Proceed to open drawing "108-28-bracket". Add a dimension to the bracket and the bulkhead at 6600 from CL:
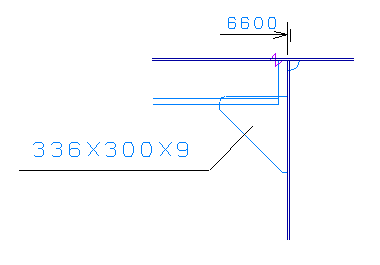
When you save this drawing and reopen drawing "108-6200", you will see that the detail is updated with the dimensions.
Change holes Status
When you don't want a hole to be cut yet, but instead wish to indicate on the plate that a hole is going to be there, then you can change the status of a hole into that of a marked hole.
Let's change the status of the hole between frame 23 and 24 at 7000 from CL. Select the icon Hole Status in the Modify section of the Holes tab:
![]()
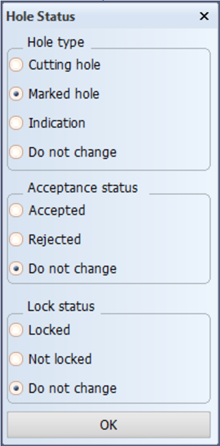
When the panel Hole selection menu appears, indicate the hole in the graphical screen and click Ok.
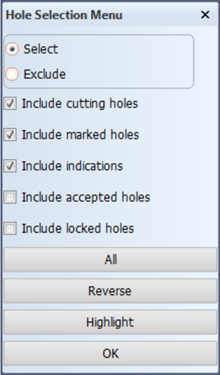
The next panel allows you to specify what you want the new status of the hole to be. Select Marked hole and confirm with Ok. The hole will now change color so that it will be recognized as a marked hole.
Proceed to code the deck plate with the Code One Part function. The result should look like this:
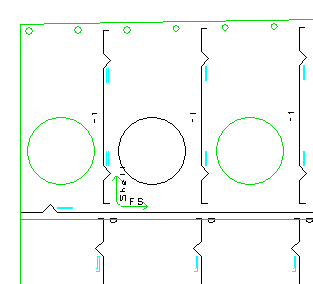
As you can see, the hole now has the same color as the marking lines, which means that it will not be cut and that it has become a marked hole instead.