Draw
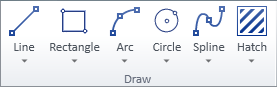
On the Drafting tab, the Draw group contains the following tools.
Line
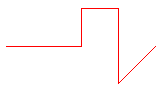
You can draw lines that consist of straight line segments and have the properties described in Line Properties or multilines that consist of several parallel line segments and have the properties described in Multiline Properties. Administrator defines the default properties, but you can choose different properties when inserting or editing a line. You can also apply predefined properties to existing line objects.
You can modify existing line and multiline objects with the generic tools described in Modify.
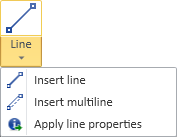
Insert line | Insert multiline | Apply line properties
Insert line
You can draw lines.
Do the following:
-
In the Draw group, click the line insertion tool
 or select Line > Insert.
 -
Pick the start point of the line.
-
You can now change the line's properties, if needed, by selecting Properties from the context menu.
-
Navigate to the next intended line point and pick that point. You can add as many points as needed and change the direction of the line at any point.
You can enable the Ortho (F8) option to ensure that lines are horizontal or vertical.
-
When you have added the last point of the line, press Enter to complete the line.
Insert multiline
You can draw lines that consist of several lines. The appearance of the multiline is defined in a Multiline Style configuration. In the style configuration, each individual line has an offset that defines its location in relation to the reference line that you draw in the drawing, and the colors are either fixed or set to be inherited from the document layer where the multiline is drawn.
Prerequisites
-
Multiline style.
Do the following:
-
In the Draw group, select Line > Insert multiline.
-
Pick the start point of the line.
-
You can now change the line's properties, if needed, by selecting Properties from the context menu.
-
Navigate to the next intended line point and pick that point. You can add as many points as needed and change the direction of the line at any point.
You can enable the Ortho (F8) option to ensure that lines are horizontal or vertical.
You can select Closed line from the context menu to create a closed line.
-
When you have added the last point of the line, press Enter to complete the line.
Apply line properties
You can apply predefined properties to existing (single) lines.
Do the following:
-
In the Draw group, select Line > Apply line properties.
-
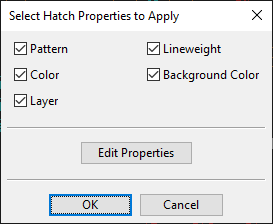
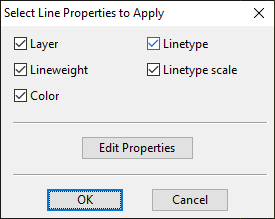
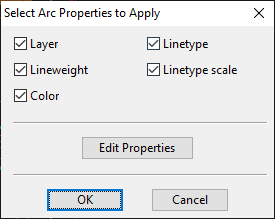
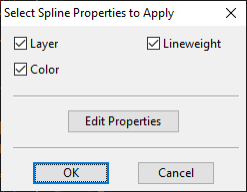
Pick one or more lines from the drawing and press Enter. The Select Line Properties to Apply dialog opens.
-
All properties are selected by default; change the selections if appropriate. For more information on these properties, see Line Properties.
-
To review or edit the properties before applying them, click Edit Properties.
-
Click OK.
Rectangle
You can draw rectangles that have the properties described in Line Properties. Administrator defines the default properties, but you can choose different properties when inserting or editing a rectangle. You can also apply predefined properties to existing rectangle objects.
You can modify existing rectangles with the generic tools described in Modify.
Insert
You can draw rectangles.

Do the following:
-
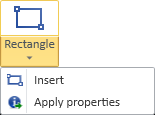
In the Draw group, click the rectangle insertion tool
 or select Rectangle > Insert.
 -
Pick the first corner of the rectangle.
-
You can now change the rectangle's line properties, if needed, by selecting Properties from the context menu.
-
Pick the opposite corner point to complete the rectangle.
Apply properties
You can apply predefined properties to existing rectangles.
Do the following:
-
In the Draw group, select Rectangle > Apply properties.
-
Pick one or more rectangles from the drawing and press Enter. The Select Line Properties to Apply dialog opens.
-
All properties are selected by default; change the selections if appropriate. For more information on these properties, see Line Properties.
-
To review or edit the properties before applying them, click Edit Properties.
-
Click OK.
Arc
You can draw arcs that have the properties described in Arc Properties. Administrator defines the default properties, but you can choose different properties when inserting or editing an arc. You can also apply predefined properties to existing arc objects.
You can modify existing arcs with the generic tools described in Modify.
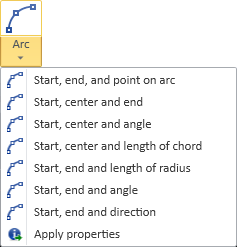
Start, end, and point on arc |
Start, end, and point on arc
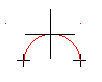
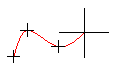
You can draw an arc by defining the start point, the end point, and a control point that defines the curvature of the arc.
Do the following:
-
In the Draw group, click the arc insertion tool
 or select Arc > Start, end, and point on arc.
 -
Pick the start point of the arc.
-
You can now change the arc's properties, if needed, by selecting Properties from the context menu.
-
Pick the end point of the arc.
-
Drag the mouse to achieve the intended curvature and pick that point to complete the arc.
Start, center and end
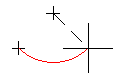
You can draw an arc by defining the start point, the center point, and the end point.
Do the following:
-
In the Draw group, select Arc > Start, center and end.
-
Pick the start point of the arc.
-
You can now change the arc's properties, if needed, by selecting Properties from the context menu.
-
Pick the center point of the arc.
-
Pick the end point to complete the arc.
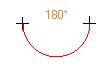
Start, center and angle
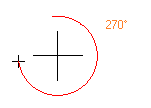
You can draw an arc by defining the start point, the center point, and the degree of curvature.
Do the following:
-
In the Draw group, select Arc > Start, center and angle.
-
Pick the start point of the arc.
-
You can now change the arc's properties, if needed, by selecting Properties from the context menu.
-
Pick the center point of the arc. A dialog opens for defining the degree of curvature.
-
In the Angle field, enter the curvature angle of the arc. For example, enter 180 to draw a semicircle.
-
Click OK to complete the arc.
Start, center and length of chord
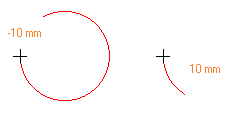
You can draw an arc by defining the start point, the center point, and the length of the chord (the direct distance between the arc's start point and end point).
The sign of the chord length value determines whether the arc is drawn as a major arc or a minor arc.
Do the following:
-
In the Draw group, select Arc > Start, center and length of chord.
-
Pick the start point of the arc.
-
You can now change the arc's properties, if needed, by selecting Properties from the context menu.
-
Pick the center point of the arc. A dialog opens for defining the chord length.
-
In the Length of chord in range… field, enter the length of the chord in millimeters. Use a positive value to define a minor arc or a negative value to define a major arc.
-
Click OK to complete the arc.
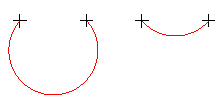
Start, end and length of radius
You can draw an arc by defining the start point, the end point, the length of the radius, and the arc type.
The arc type determines whether the arc is drawn as a major arc or a minor arc.
Do the following:
-
In the Draw group, select Arc > Start, end and length of radius.
-
Pick the start point of the arc.
-
You can now change the arc's properties, if needed, by selecting Properties from the context menu.
-
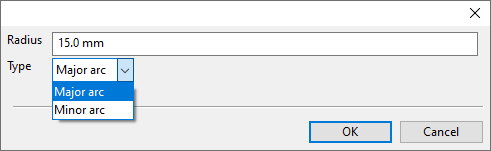
Pick the end point of the arc. A dialog opens for defining the radius and the type of the arc to draw.
-
Define the arc:
-
In the Radius field, enter the length of the radius in millimeters.
-
In the Type field, select whether to draw a major arc or a minor arc.
-
-
Click OK to complete the arc.
Start, end and angle
You can draw an arc by defining the start point, the end point, and the angle of curvature.
Do the following:
-
In the Draw group, select Arc > Start, end and angle.
-
Pick the start point of the arc.
-
You can now change the arc's properties, if needed, by selecting Properties from the context menu.
-
Pick the end point of the arc. A dialog opens for defining the angle.
-
Enter the required angle value and click OK to complete the arc.
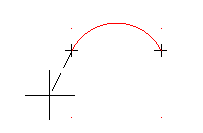
Start, end and direction
You can draw an arc by defining the start point, the end point, and the direction of the tangent at the start point.
Do the following:
-
In the Draw group, select Arc > Start, end and direction.
-
Pick the start point of the arc.
-
You can now change the arc's properties, if needed, by selecting Properties from the context menu.
-
Pick the end point of the arc.
-
Drag the mouse to achieve the intended curvature and pick that point to complete the arc.
Apply properties
You can apply predefined properties to existing arcs.
Do the following:
-
In the Draw group, select Arc > Apply properties.
-
Pick one or more arcs from the drawing and press Enter. The Select Arc Properties to Apply dialog opens.
-
All properties are selected by default; change the selections if appropriate. For more information on these properties, see Arc Properties.
-
To review or edit the properties before applying them, click Edit Properties.
-
Click OK.
Circle
You can draw circles that have the properties described in Circle Properties. Administrator defines the default properties, but you can choose different properties when inserting or editing a circle. You can also apply predefined properties to existing circle objects.
You can modify existing circles with the generic tools described in Modify.
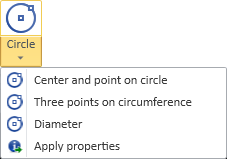
Center and point on circle | Three points on circumference | Diameter | Apply properties
Center and point on circle
You can draw a circle by defining the center point and a point in the circumference of the circle.

Do the following:
-
In the Draw group, click the circle insertion tool
 or select Circle > Center and point on circle.
 -
Pick the center point of the circle.
-
You can now change the circle's properties, if needed, by selecting Properties from the context menu.
-
Drag the mouse to achieve the intended circumference and pick that point to complete the circle.
Three points on circumference
You can draw a circle by defining three points in the circumference of the circle.

Do the following:
-
In the Draw group, select Circle > Three points on circumference.
-
Pick the first point of the circle.
-
You can now change the circle's properties, if needed, by selecting Properties from the context menu.
-
Drag the mouse to achieve the intended circumference and pick that point to complete the circle.
Diameter
You can draw a circle by defining the start point and the end point of the diameter.

Do the following:
-
In the Draw group, select Circle > Diameter.
-
Pick the first point of the diameter.
-
You can now change the circle's properties, if needed, by selecting Properties from the context menu.
-
Drag the mouse to achieve the intended direction and length of the diameter, and pick that point to complete the circle.
Apply properties
You can apply predefined properties to existing circles.
Do the following:
-
In the Draw group, select Circle > Apply properties.
-
Pick one or more arcs from the drawing and press Enter. The Select Circle Properties to Apply dialog opens.
-
All properties are selected by default; change the selections if appropriate. For more information on these properties, see Circle Properties.
-
To review or edit the properties before applying them, click Edit Properties.
-
Click OK.

Spline
You can draw spline curves that have the properties described in Spline Properties. Administrator defines the default properties, but you can choose different properties when inserting or editing a spline. You can also apply predefined properties to existing spline objects.
You can modify existing splines with the generic tools described in Modify.
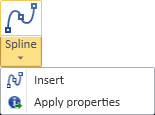
Insert
You can draw splines.
Do the following:
-
In the Draw group, click the spline insertion tool
 or select Spline > Insert.
 -
Pick the start point of the spline.
-
You can now change the spline's properties, if needed, by selecting Properties from the context menu.
-
Pick as many control points as needed to form the shape of the spline curve.
Tip: You can also add, move, and remove control points later, if needed.
-
Pick the end point and press Enter to complete the spline.
Apply properties
You can apply predefined properties to existing splines.
Do the following:
-
In the Draw group, select Spline > Apply properties.
-
Pick one or more splines from the drawing and press Enter. The Select Spline Properties to Apply dialog opens.
-
All properties are selected by default; change the selections if appropriate. For more information on these properties, see Spline Properties.
-
To review or edit the properties before applying them, click Edit Properties.
-
Click OK.
Hatch
You can add hatch patterns to areas formed by the boundaries of one or several drafting objects (lines, rectangles, arcs, circles, splines). The hatch patterns have the properties described in Hatch Properties. Administrator defines the default properties, but you can choose different properties when inserting or editing a hatch pattern. You can also apply predefined properties to existing hatches.
Using the Modify group's tools on a drafting object also modifies the related hatch accordingly, for example, by moving or rescaling the hatch pattern. You can also use the tools directly on the hatch pattern, for example, to change or delete the pattern.
Hatch
You can add hatch patterns between object boundaries.
Do the following:
-
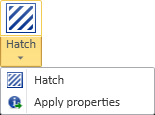
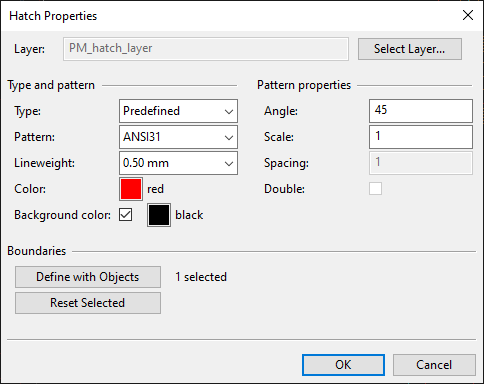
In the Draw group, click the hatch insertion tool
 or select Hatch > Hatch. The Hatch Properties dialog opens.
 -
Define the hatch properties. For more information on these properties, see Hatch Properties.
-
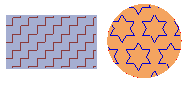
Select the objects to use as boundaries for the hatch pattern.
For example, if you select a circle, the inside of the circle is hatched, and if you select two adjacent lines, the space between the lines is hatched.
-
Click Define with Objects.
-
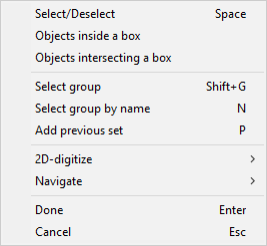
Pick the required drafting objects. You can use the commands in the context menu to select, for example, all objects inside a box.
-
Press Enter to accept the set.
If the result is not what you intended, you can click Reset Selected to remove all boundaries and then try again.
-
-
Click OK.
Apply properties
You can apply predefined properties to existing hatches.
Do the following:
-
In the Draw group, select Hatch > Apply properties.
-
Pick one or more hatches from the drawing and press Enter. The Select Hatch Properties to Apply dialog opens.
-
All properties are selected by default; change the selections if appropriate. For more information on these properties, see Hatch Properties.
-
To review or edit the properties before applying them, click Edit Properties.
-
Click OK.