Insert Part
You can use the Insert Part tool to insert a duct shape or duct component into or onto an existing duct.
An into-line duct part such as a T-piece replaces a section of the existing (straight) duct part.
An onto-line part such as a duct valve is attached to the existing duct part which can be a straight duct part, a duct shape, or duct component.
The picture below shows a straight duct part where the user has inserted an into-line part (T-piece) and some onto-line parts (duct valve and flatbar clamps).

There are separate commands for inserting the duct part either with or without a position ID.
After the insertion, you can slide an onto-line part along the air duct with the Move command on the Home tab. If you move the air duct itself, the onto-line parts are moved accordingly. Also, if you resize the air duct with the Size command on the Ducting tab, the onto-line parts are resized accordingly, if possible.
Do the following:
-
Select the Ducting tab > Duct parts group, and then one of the following:
-
Insert Part > Insert part
-
Insert Part > Insert part without position ID
-
-
Move the cursor to the required location in the target duct piece and accept that location. The Select Component – Add To Duct dialog opens.
-
Select the required component, and click OK. The Apply Duct part design rule dialog opens. See 'Apply Duct part design rule' dialog for details.
-
Shape parameters that do not display a lock icon can be edited by double-clicking the parameter row. See 'Edit value of shape parameter' dialog for details.
-
Click OK. The duct part is added to the model.
-
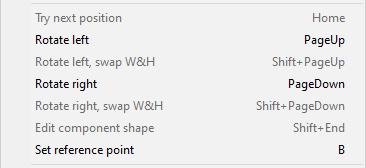
If you want to adjust the orientation or the shape parameters of the part, right-click the work view and select the required command from the context menu. See Ducting context menu for details.
-
Press Enter to accept the insertion.
-
If the part uses instance parameters, the Edit Instance Parameters dialog opens for setting the values. See Instance Parameters for details.
-
If adding a part with Position ID, you are prompted for the ID to use.
-
You can continue inserting parts in the same way or press Esc to exit the tool.