Containment setup
Containment setup enables the model area to be divided into non-logistics and logistics 3D spaces, such as compartments, blocks, and fire zones. As these spaces can overlap, a model object can belong to more than one containment at the same time. Model objects can be automatically assigned to a containment based on their physical locations, but the user is also able to explicitly assign a model object to a specific containment. Correctly configured containment setup is crucial to many Plant Modeller functions, such as the managing of welds and pipe spools.
In the containment setup configuration, the project administrator can define the hierarchical entities that can host 3D spaces for model objects.
Do the following:
-
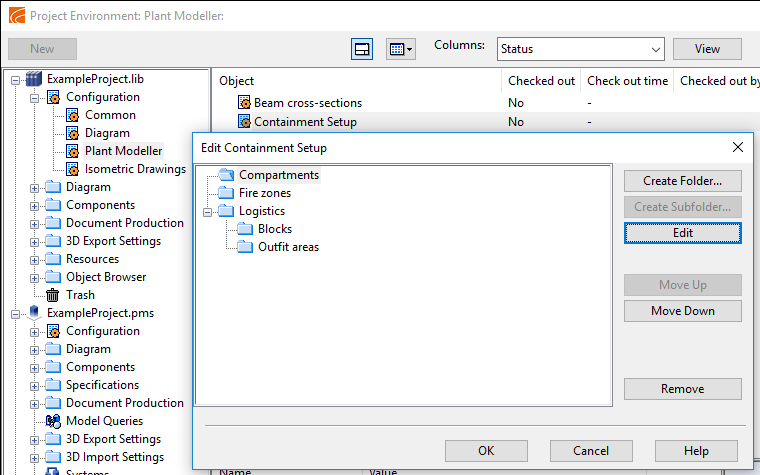
In the Project Environment dialog, browse to [project] > Configuration > Plant Modeller, and double-click the Containment Setup configuration object. The Edit Containment Setup dialog opens.
-
You can create a new logistics containment by clicking Create Folder and providing a suitable name that identifies the item in containment browser dialogs.
-
You can create a new sub-containment by clicking Create Subfolder.
-
You can edit the selected containment by clicking Edit.
-
You can move the selected containment higher or lower in the hierarchy by clicking Move Up or Move Down, respectively.
Important: Model objects are assigned to the topmost logistics 3D space. For example, in the CADMATIC example project, 'Logistics' has the subfolders 'Blocks' and 'Outfit areas'. If 'Blocks' is higher on the list, then that will be the logistics 3D space to which model objects are assigned.
-
Click OK.
