Digitizing
In CADMATIC, "digitizing" refers to the act of moving the cursor in the 3D model.
Digitizing occurs, for example, when the user is panning or zooming a view or moving the view box, and those actions are limited by the design area, not by the limits of the view.
Zooming
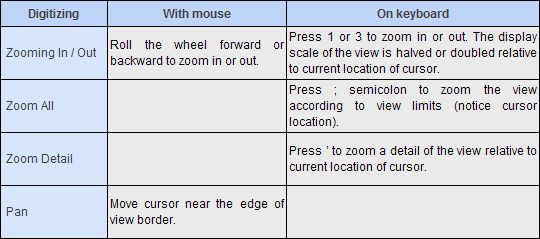
You can zoom in or out using the mouse wheel or the following commands:
-
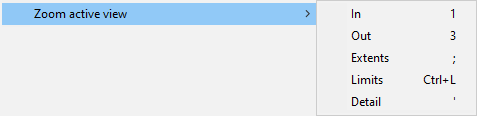
Select Zoom active view > In or press 1. The display scale of the view is halved and the view is re-drawn around the projection point of the current location.
-
Select Zoom active view > Out or press 3. The display scale of the view is doubled and the view is re-drawn around the projection point of the current location.
-
Select Zoom active view > Extents or press ; (semicolon). The display scale of the control view is set so that the whole view fits into the window.
-
Select Zoom active view > Limits or press Ctrl+L. The display scale of the view is set to cover the view limits.
-
Select Zoom active view > Detail or press '. The display scale of the view is set to a detail scale. Options can be used to set the detail scale. By default this value is set to 10.
Zoom settings can be defined as described in User Interface.
Panning
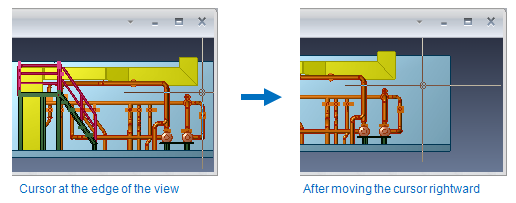
When a command is active, you can pan to reposition the view. To pan, move cursor at the edge of the view to pan the view dynamically. The pan ratio can be set to value between 0.1…1.0 to adjust the movement of the view.
Changing Pan Ratio
You can change the Pan Ratio when a command is active. To decrease or increase Pan Ratio, press < or >. The pan ratio determines how much a view will be panned in the pan direction. The ratio can vary between 0.1 and 1.0. For example, if the ratio is 0.5 then each time a pan is needed the visible "window" will be moved by half of the window size in the pan direction to make the current location visible again.
Limits for Panning
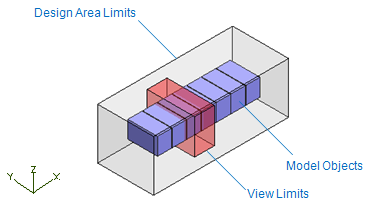
If the Design Area is bigger than the View Limits (View Box), you can pan the view in active mode but still Zoom All command brings out the view according to view limits (and cursor location).
Examples of zooming and panning
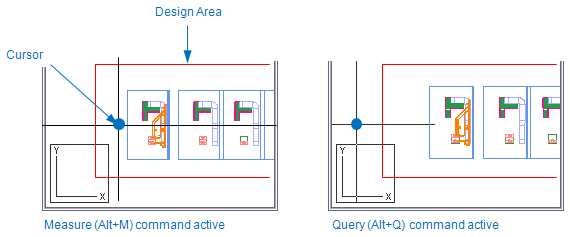
During Queries Object command (Alt+Q) there are no limits for digitizing which helps working in Axo view but might complicate zooming and panning in other views. Measure command uses the Design Area Limits as digitizing limits, see picture below.
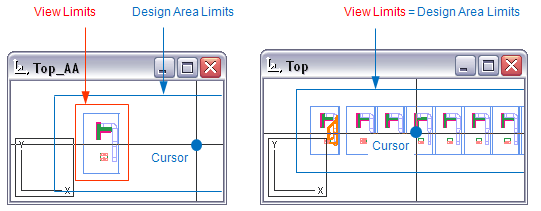
Next example of zooming and panning is introduced with two views, Top_AA and Top. View Limits of the view Top_AA are set using the Digitize 3D Box option. View Limits of the Top view are set according to Design Area Limits.
Because digitizing occurs inside the Design Area Limits, you can move cursor in Top_AA view much far away the working area, see picture below. Also moving cursor or panning in Top view affects to the Top_AA view, it’s repositioned according to the cursor location.
However, command Zoom All displays the objects according to View Limits and cursor location. If you want to zoom the view to fit the View Limits, move the cursor inside the model before Zoom All command.
Command Fit View Limits view is automatically fitted to the window so that the whole view is visible and the scale is as big as possible.
Note: To zoom views to extents, move cursor inside the model (view limits), press Alt+M to activate Measure command and then press semicolon “;” in every view.
Summary of zooming and panning commands