Upgrade installation
You can upgrade your existing CADMATIC Plant/Outfitting installation to a newer version.
Note: These instructions are for upgrading from version 6.0.7 or newer to the latest version. If your current version is older than 6.0.7, you must first upgrade to 6.0.7. If the P&ID application is used, an intermediate upgrade to 6.1.4 is also required.
Downloading the new version
Log in at https://support.cadmatic.com/, browse to Downloads > DesignApplications, and download the latest installation media from the Marine or Plant folder, as appropriate.
Preparations before upgrading
Before starting the upgrade process, do the following.
-
Verify that all replicas have received the latest update files, so that all COS servers contain the same information.
-
All users must save and check in all objects. Some temporary spool attribute objects may remain owned by the Plant Modeller area even after using Check-in All Objects. This is normal and does not prevent the upgrade.
-
All users must check in all documents: Plant Modeller drawings, isometric drawings, spool drawings, and diagrams.
-
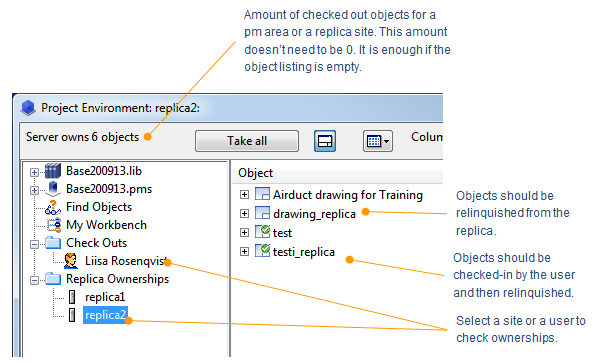
At a replica site, verify that all configuration objects in the library and project databases are located at the master site and not owned by the replica.
-
At the master site, verify that all ownerships have been received.
-
At the master site, open the Library and Project Databases tool, and check that all relevant objects are checked in by the replica. DO NOT use Force cancel check-out or Take All. Objects that are always left at the replica site include Plant Modeller areas and replica sites.
-
Exit all Plant Modeller areas.
-
Create a backup and save it to a secure location so that it is available even after the upgrade. Backups must be created at all project sites, including all replica sites.
-
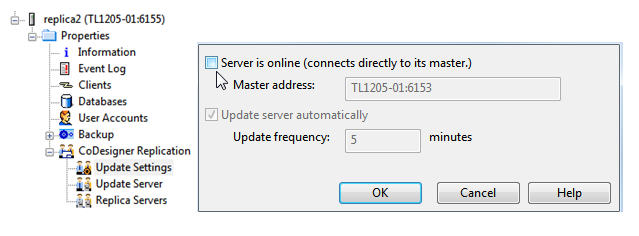
Ensure that online replica servers have been set offline from Manage COS.
Upgrading the license server and updating license files
- Check that your license file is compatible with the software version. The version number is included in the license file name, which follows this format: <name>_<id>.<release>-<startdate>-<enddate>.lcf.cry. The license server of the latest release can be used for applications from version 5.0 onward.
- Uninstall the license server via Control Panel > Programs and Features.
- Start the license server installation from the installation media and follow the instructions.
For more information on licensing, see the CADMATIC License Server manual in docs.cadmatic.com.
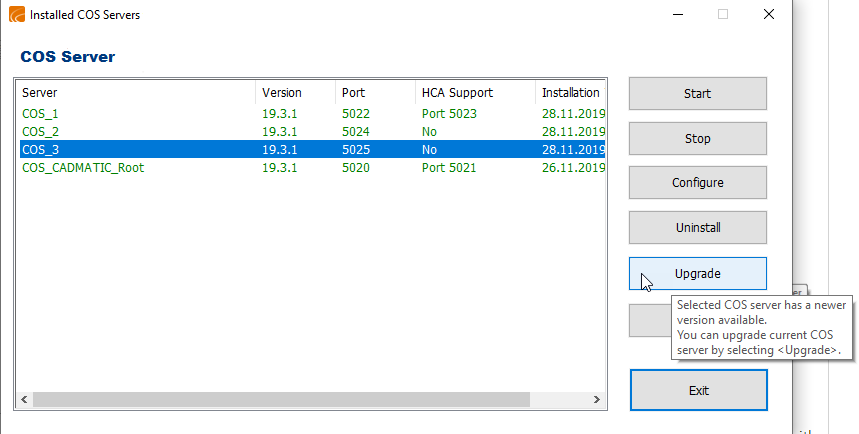
Upgrading COS servers
Upgrade the required COS servers to the new software version. If multiple projects share the same COS server, all projects must be upgraded at the same time.
-
From the installer, select the Install/upgrade COS server option, click Next, and follow the instructions.
-
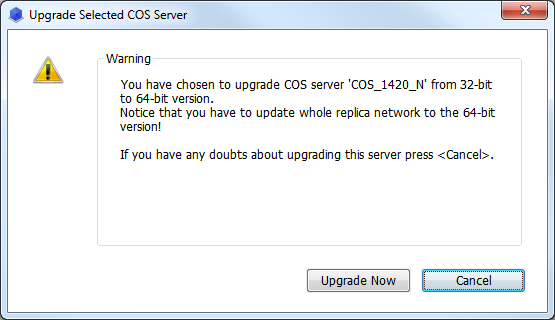
If upgrading from a 32-bit to a 64-bit COS server, you will be prompted that the entire replica network must be upgraded. Do not proceed unless you are certain.
-
Do not disturb the COS server during conversion, as this may cause it to stop prematurely.
-
Allow time for the COS server to convert, even if the program indicates that the conversion is complete.
-
Check the COS server folder to confirm that the temporary db.uc catalog has been automatically deleted.
-
Check the COS server log to confirm that it includes the line 'Database format conversion succeeded.'.
-
Check the COS server log to confirm that the server is running. You can start and stop the server to verify it remains operational on the new version.
-
Once COS servers are successfully upgraded at both master and replica sites, set the replicas online again, or in case of offline replication, send an update from the offline replica.
Installing the new version of applications
-
Start the installation media for the latest version and select the components to install.
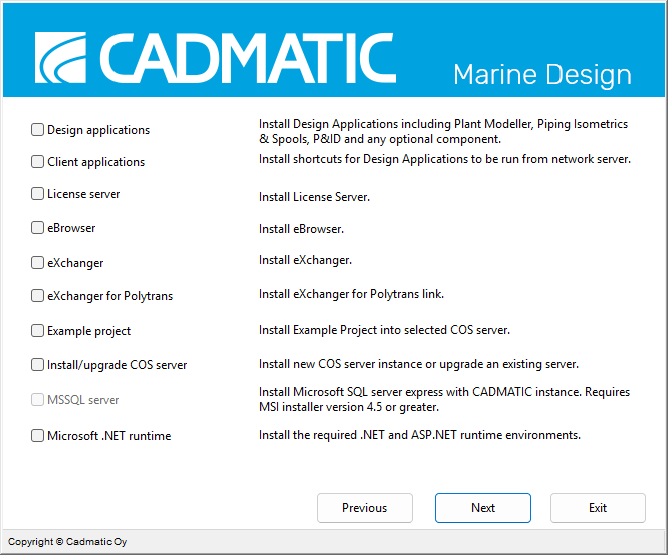
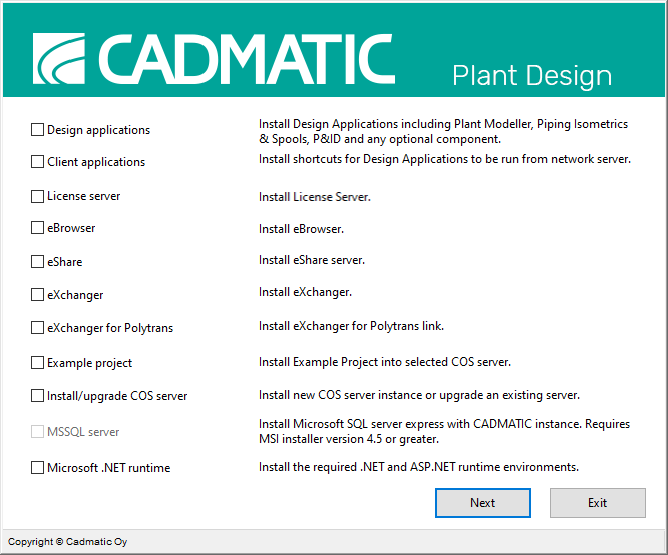
-
Install the program folders to your preferred server or workstation location (default path: C:\Cadmatic). The new main version will be installed in parallel with any existing version.
-
Select the default workstation profile or select your existing profile. Profiles must be updated.
-
After installation, verify that the correct profile is in use so all users access the new version. Disable the old profile by renaming it, if it is no longer needed.
-
If you have custom files in your program, merge your changes into the new files.
Converting projects
-
Convert the project and library. If the conversion does not start, check the Security Policies in Manage COS to ensure the system administrator has permission to perform project conversion.
-
Conversion must also be done at replica sites. If a replica site is offline, the system will notify you. Selecting OK will complete the conversion.
User areas after update
-
Verify that the area path points to the correct location.
-
When users first start their areas, they will be prompted to rebuild the model from MDL or from COS. Both options can be selected, but if unsure, choose Re-build area via COS update.
Profiles to be updated
Profile files do not need to be updated by default, but ensure they are linked to the latest version.
Upgrading Plant Modeller services and service instances
-
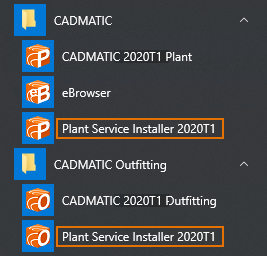
Run the version-specific Plant Service Installer from Start > CADMATIC or Start > CADMATIC Outfitting.
-
In the Installed Plant Modeller Services dialog, select Upgrade. The Upgrade Service dialog opens.
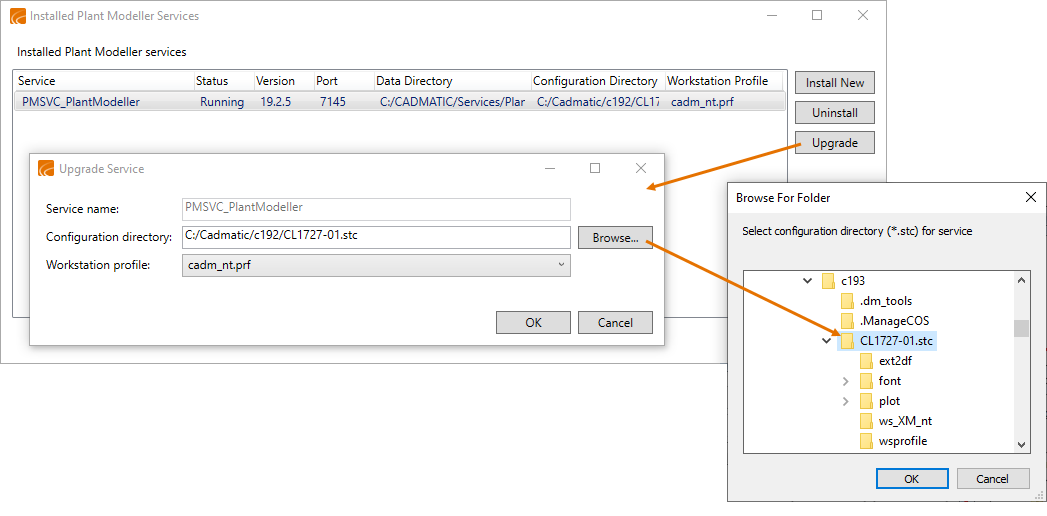
-
Select the configuration directory and workstation profile corresponding to the correct CADMATIC version.
Once the new version is set, all hosted Service Instances are upgraded automatically.
Upgrading eBrowser
-
If you are using an eBrowser version older than 2014Q1, uninstall it first via Control Panel > Programs and Features.
-
Install the new eBrowser version from the installation media.
Upgrading eShare
-
Users may need to clear their browser cache.
-
During installation of the new 3D Component on a client computer, the associated web browser may need to be closed. Sometimes, closing visible windows is not enough—you may need to end remaining browser processes via Task Manager.