Create dimension table
The primary use of dimension tables is to store sizes of components for certain types of Plant Modeller objects (pipe parts, standard parts, beams, Ducting parts, insulation materials, jointing materials and cable tray parts). Dimension tables refer to Geometric Model for standard part or to an Internal Shape.
Procedure to create a Dimension Table:
-
In Project Environment browse item Components / Catalog Parts / Dimension Table.
-
Click New > Dimension Table.
-
Name the dimension table as “DimTable_Lateral_Example”.
-
Select the geometric model (GDL) you just created as “Geometric Shape”.
-
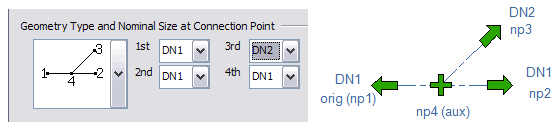
Set the nominal size at connection points:
-
np1 and np2: DN1
-
np3: DN2
-
np4 is auxiliary point and it doesn’t matter which one of the DNs it uses.
-
-
Click Dimensions > Attributes to add Wall and Mass.
-
Set the dimensions DN1 and DN2 as key dimensions, click OK.
-
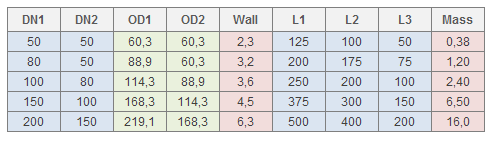
Click Dimension > Values to set dimension values according to the table below.
-
Use Angle 45 for every component.
-
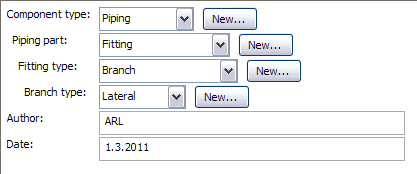
Add Object Attributes, especially the “Component Type” is important one.
Note: Use always the Component Type attribute to establish the component in the hierarchies.