Export attributes
In the Project Environment dialog, in [library] > Configuration > Common, the Export Attributes configuration object defines which attributes to include when exporting a document and how to export colors.
Configuring export attributes for Plant Modeller and Piping Isometrics & Spools
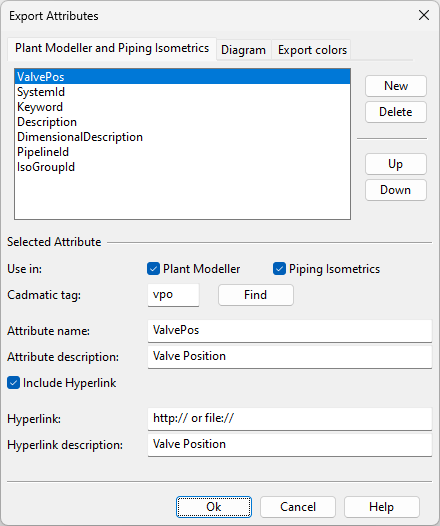
In the Export Attributes dialog, you can define which attributes to include in documents that are exported from Plant Modeller or Piping Isometrics & Spools.
Do the following:
-
In the Project Environment dialog, in [library] > Configuration > Common, right-click the Export Attributes configuration object and select Edit. The Export Attributes dialog opens, displaying the Plant Modeller and Piping Isometrics tab.
-
To define a new export attribute, do the following:
-
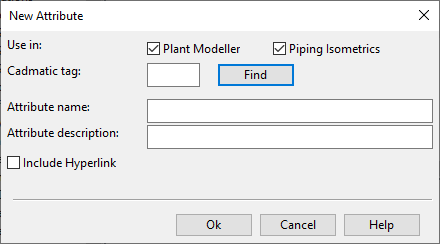
Click New. The New Attribute dialog opens.
-
Define the attribute settings:
-
Use in – Select which applications should export the attribute.
-
Cadmatic tag – Enter the attribute's tag or click Find to find the tag by searching.
If the tag relates to a property of the drawing sheet, see Adding drawing sheet attributes to the export configuration.
-
Attribute name – Enter the attribute name to export.
If the tag relates to a column in a data table, the table row number will be appended to the attribute name in export:
"Revision1"
If the tag relates to a column in a data table and the value consists of multiple rows, each row is exported as a separate attribute and the table row number and line number will be appended to the attribute name in export:
"Description1.1"
"Description1.2" -
Attribute description – Enter the attribute description to export.
-
Include hyperlink – Select this option if you want the attribute to contain a hyperlink to a specific address. Enter the address and a description for the hyperlink.
-
-
Click Ok. The new attribute is added to the list.
-
-
You can define the order of the attributes in the export file by selecting an attribute and using the Up and Down buttons to specify its position.
-
When you have added the required attributes and defined their order, click Ok.
Adding drawing sheet attributes to the export configuration
In the Export Attributes dialog, you can set any of the fields in the title box of the drawing sheet, or the fields in any data tables such as the revision table, to be exported as document attributes. The Find tool does not find these tags, but you can copy the required tag from the properties of the drawing sheet.
Do the following:
-
In the Project Environment dialog, in [library] > Document Production > Drawing Sheets, right-click the drawing sheet of the document to export and select Properties. The Object Properties dialog opens.
-
On the Source tab, locate the required attribute and copy its tag, and then close the dialog.
 Show/hide example
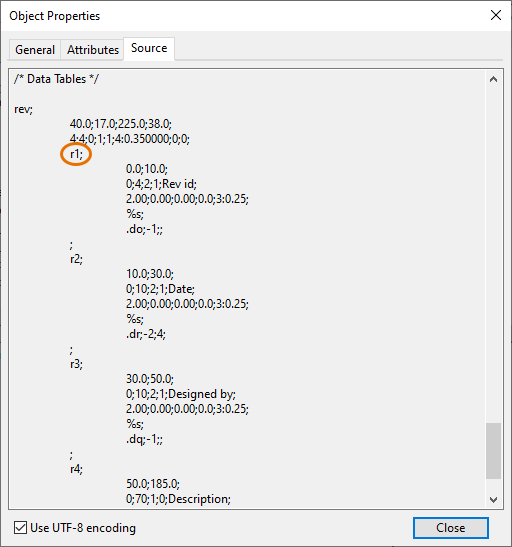
These examples use the drawing sheet "Cadmatic_pm_A3".
Example 1 – Title Box Attribute
In this example, the property we want to export as a document attribute is "Description row1" and the tag we need for the export configuration is "A05".
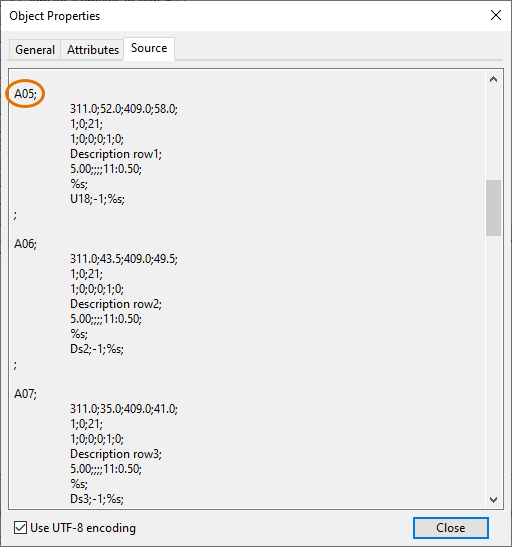
Example 2 – Revision Table Attribute
In this example, the property we want to export as a document attribute is the first column of the revision table and the tag we need for the export configuration is "r1".
-
In [library] > Configuration > Common, open the Export Attributes configuration object and click New.
-
Enter the attribute's tag in the Cadmatic tag field, fill in the other fields as appropriate, and click Ok.
-
Click Ok. The specified drawing sheet attribute will be included in document export.

Configuring export attributes for P&ID
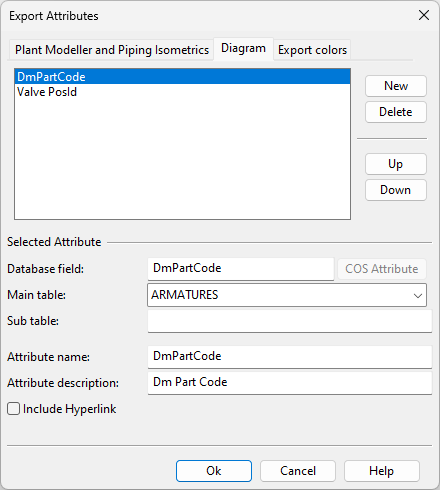
In the Export Attributes dialog, you can define which attributes of diagram symbols to include when exporting a diagram from P&ID, and in which order to list the attributes in the exported file.
Do the following:
-
In the Project Environment dialog, in [library] > Configuration > Common, right-click the Export Attributes configuration object and select Edit. The Export Attributes dialog opens.
-
Open the Diagram tab.
-
To define a new export attribute, do the following:
-
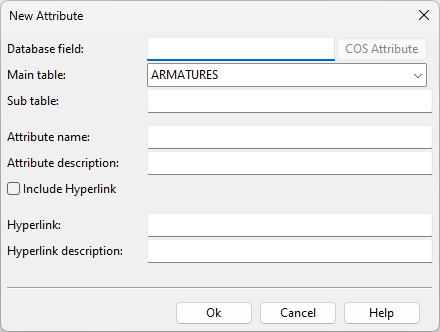
Click New. The New Attribute dialog opens.
-
Define the attribute settings:
-
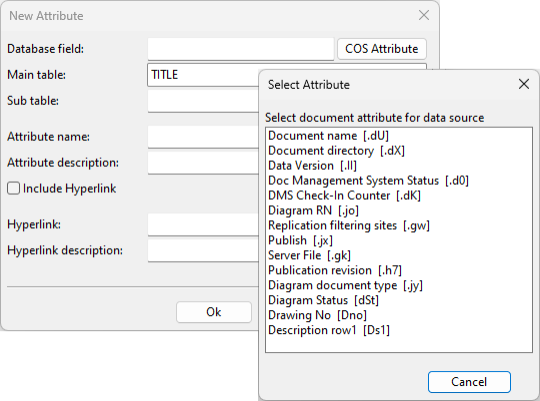
Database field – Enter the name of the database field from which to get the attribute. For a title box attribute, you can click the COS Attribute button to select a COS attribute tag from a list.
-
Main table – Select the main table of the object type from the list.
-
Sub table – Enter the name of the sub-table, if relevant. You can use this, for example, if a field by the same name exists in both the main table and the sub-table.
-
Attribute name – Enter the attribute name to export.
-
Attribute description – Enter the attribute description to export.
-
Include hyperlink – Select this option if you want the attribute to contain a hyperlink to a specific address. Enter the address and a description for the hyperlink.
-
-
Click Ok. The new attribute is added to the list.
-
-
You can define the order of the attributes in the export file by selecting an attribute and using the Up and Down buttons to specify its position.
-
When you have added the required attributes and defined their order, click Ok.
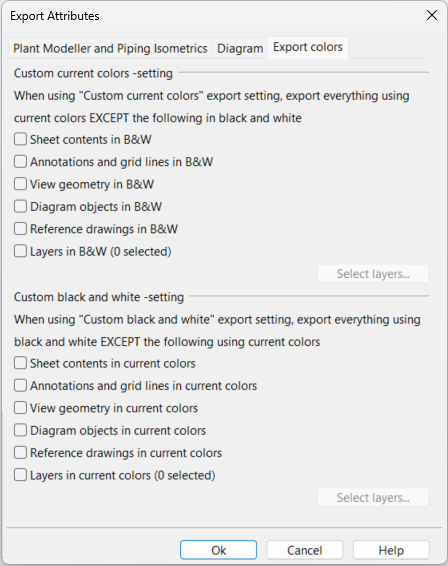
Configuring export colors
In the Export Attributes dialog, you can select which entities should ignore the overall color scheme when a document or diagram is exported using the Custom current colors or Custom black & white option of the export format. This enables, for example, the sheet and the annotations to be exported in black and white while everything else is exported in their current colors.
The settings affect document export from Plant Modeller document browser (see Export) and document editor (see Export), and diagram export from P&ID.
Note: Entities whose color is white (or very close to it) are exported in black color. In black and white export, entities that have a fill color are exported in black color.
Do the following:
-
In the Project Environment dialog, in [library] > Configuration > Common, right-click the Export Attributes configuration object and select Edit. The Export Attributes dialog opens.
-
Open the Export colors tab.
-
Custom current colors setting – Select the entities that should be exported as black-and-white when a colored document is exported using the Custom current colors option of the export format.
Note: To apply this to imported tables (see Import table), you must select the Annotations and grid lines in B&W option.
-
Custom black and white setting – Select the entities that should be exported in their current colors when a black-and-white document is exported using the Custom black & white option of the export format.
Note: To apply this to imported tables (see Import table), you must select the Annotations and grid lines in current colors option.
-
Click Ok.
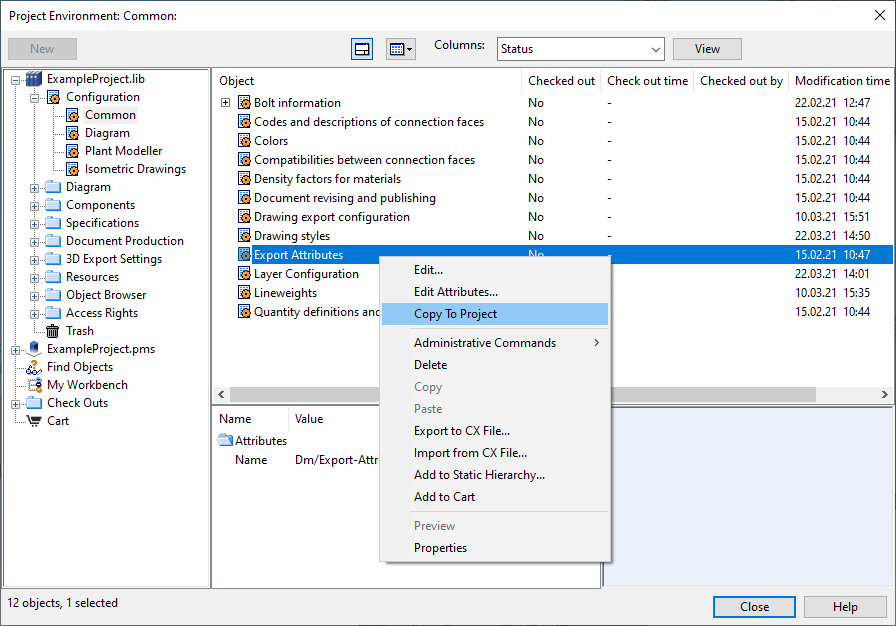
Copying the configuration to the project database
There can be an Export Attributes configuration object in the library database and in the project database.
-
If the configuration only exists in the library database, then that one is used in the project.
-
If the configuration exists in both databases, then the one in the project database is used in the project.
When there is no configuration in the project database, the one in the library database can be copied to the project database by selecting Copy To Project from the context menu.