Stand-alone installation
In a stand-alone installation, the CADMATIC applications are installed locally to a workstation. Also the license server and other server applications can be installed locally, or they can be used from the network. Installation of eBrowser, eShare, 3D eXchanger for AutoCAD, and 3D eXchanger for PolyTrans is optional.
Install design applications
Select Design applications in the CADMATIC installer to install P&ID, Plant Modeller, and Piping Isometrics & Spools on the local computer.
Destination folder
Enter the name of the directory where you want the CADMATIC applications to be installed. You can either use Browse to select an existing directory or type the name manually.
Site-specific configuration
If you are upgrading from an old version that has a compatible configuration directory, you may choose to use your old configuration. Enter the name of the configuration directory and select Use the existing site configuration directory. No modifications will be made to your old configuration. When you use a different workspace profile than the default cadm_nt.prf, you have to manually edit your CadDtm.prf file. This file can be found from the root directory of a CADMATIC application. It is not recommended to use this option when installing a new major release.
However, if you do not have an old configuration directory, you must select Create new from template. Enter a name for the directory, such as the name of your company. Note that the name has to end with the .stc extension. Setup will then create a configuration directory based on a default template and your current settings.
Shortcuts
Application shortcuts can be added to the Start Menu, to the Windows desktop, and to the Quick launch bar. This selection lets you choose which users (if any) will see the shortcuts, on the computer that you are installing the software on; if you want the shortcuts on workstations that run the software from a network server, you must create shortcuts separately on each workstation by choosing Use Applications from Network Server from the setup program's opening screen.
Optional components
If you want to install any of the add-on components in the list, click on the appropriate item. You can also choose to install some components later. Some components are removable, and you can uninstall them using the setup program. If you want to install or uninstall components after you have completed the installation, run the setup program as you did before, and you will be able to make changes in the component list.
All other add-ons than Example Project & Library, Project Follow Up tool and Elotools need a license to run.
The Excel Export Plus add-on uses a Microsoft Excel template with Visual Basic macros. To use this add-on, Excel must be installed to include Microsoft Visual Basic for Applications (VBA), and Excel’s macro settings must allow execution of macros. To use the CADMATIC eBrowser integration of this add-on, the 32-bit eBrowser must be installed in the same computer.
Install license server
If you have a license file for your computer, you can install the license server locally by selecting the option License server. Otherwise, you are asked for default host for license server in the format Hostname:Port.
For more information on licensing, see the CADMATIC License Server manual in docs.cadmatic.com.
Install local COS server
To install a local COS Server, select Install/upgrade COS server. This is mandatory if you also choose to install the example project. When you create a project, you are asked which COS Server is used to manage the library and project databases.
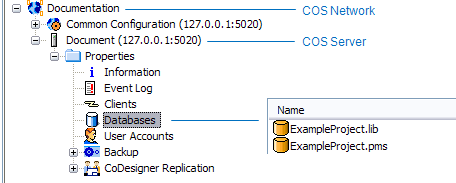
Name for the COS network
A company can have several COS networks. COS Network manages the common configuration for all projects in this COS network and it includes one COS server.
Name for the COS server
COS server manages the databases in the project(s). COS server also manages replica servers in satellite site(s), performing the data transfer operations needed to replicate model objects and documents between Root and Replica server.
Port
Select which port to use to connect to the server.
Path to data files
These files include COS network files, and they can be installed to the default folder.
COS server administrators
Create new administrator accounts, if necessary.
Install example project
If installing the CADMATIC Example Project, define the following:
-
Library Name
-
Project Name