Viewing P&ID object data in Microsoft Excel
You can retrieve CADMATIC P&ID object data directly from the SQL database to Microsoft Excel. You can use this to create different types of reports.
Using CADMATIC P&ID Data Miner
You can use the P&ID Data Miner tool to retrieve P&ID object data from Microsoft SQL Server to Microsoft Excel. There are a number of default views, each on a separate sheet, and you can create more views as required.
Note: In the Excel file, all data cells are of type Text.
Prerequisites
- You have Microsoft Excel installed.
- You have copied the file Cadmatic Diagram Data Miner.xlsb from the Tools folder of the CADMATIC installation package to a suitable location on your disk.
Do the following:
-
Open the Cadmatic Diagram Data Miner.xlsb file in Microsoft Excel. If you see a security warning, click Enable Content to enable macros.
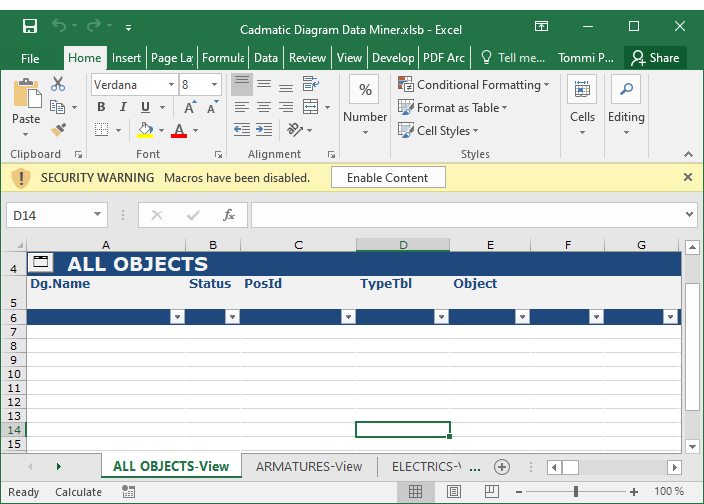
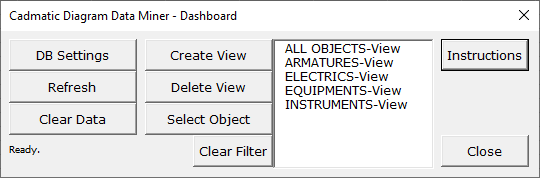
The data miner's Dashboard dialog opens.
-
In the Dashboard dialog, first you must define the settings for connecting to the P&ID database in Microsoft SQL Server.
-
Click DB Settings. The Database Connection Setup dialog opens.
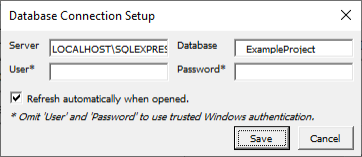
- Server – Enter the address of the database server in the format <Computer>\<SQLServer>.
- Database – Enter the name of the P&ID SQL database.
- User, Password – If using SQL Server authentication, enter the username and password. If using Windows authentication, leave the fields empty.
- Refresh automatically when opened – If selected, opening the Excel file refreshes the data from the SQL database.
- Click Save.
-
-
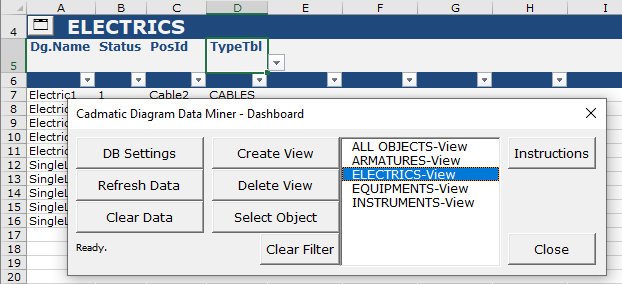
You can now click Refresh to connect to the database and retrieve data to the default views:
-
You can switch between the views by clicking a view name in the dashboard.
-
You can create a user-defined view for any object type that exists in the P&ID database.
-
The TEMPLATE-View sheet defines the default columns of new views. In the column header row, you can define which database columns to display in new views by typing the title of the given database column in a field.
Important: Be careful not to insert or delete rows or columns in the title area as that might break the view functionality.
-
Click Create View. The Select Object dialog opens.

-
Select the required object type from the list, and click OK. The view is created and populated with data from the database.
-
-
You can replace an existing view by selecting the view from the dashboard and clicking Select Object. This opens the Select Object dialog where you can select which object type's data to show in the view, and when you click OK the view is populated with the selected object's data.
-
You can filter and sort the data columns normally, using the tools in Excel. You can remove all filters from the current view by clicking Clear Filter.
-
You can remove all data from all views by clicking Clear Data.
-
You can delete unnecessary views by selecting a view from the dashboard, clicking Delete View, and confirming the action.
Note: If you delete a default view, it will be re-created the next time you refresh the data.
-
Save and close the file.
Using Microsoft SQL Server views
You can use the Microsoft SQL Server Management Studio application to create a view that contains the CADMATIC P&ID objects you are interested in, and then export the data to a Microsoft Excel file.
Prerequisites
- You have Microsoft Excel and Microsoft SQL Server Management Studio installed.
Do the following:
-
Open the Microsoft SQL Server Management Studio application and in the Object Explorer pane browse to Databases > [database] > Views.
-
Right-click the Views node and select New View.
-
In the Add Table dialog, select the tables to include in the Excel and click Add.
-
Use either the design tools or the SQL query pane to define an SQL query that extracts the required data.
-
Select File > Save [view name] to save the new view.
(You can now close Microsoft SQL Server Management Studio.)
-
Create or open a Microsoft Excel file.
-
Select the cell to use as the top-left corner of the imported data table, and then select Data > Get External Data > From Other Sources > From SQL Server.
-
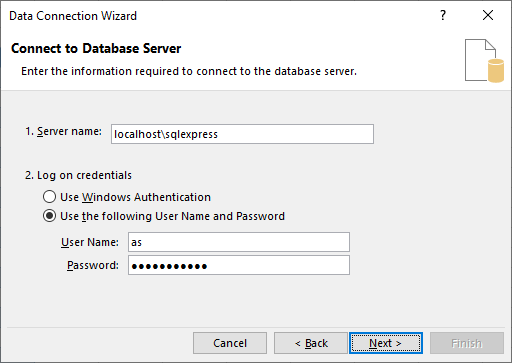
In the Data Connection Wizard dialog, do the following:
-
On the first page, in Server name enter the computer name and server name (database instance), and select how to sign in.
-
On the second page, select the database and table to connect to.

-
On the last page, click Finish.
-
-
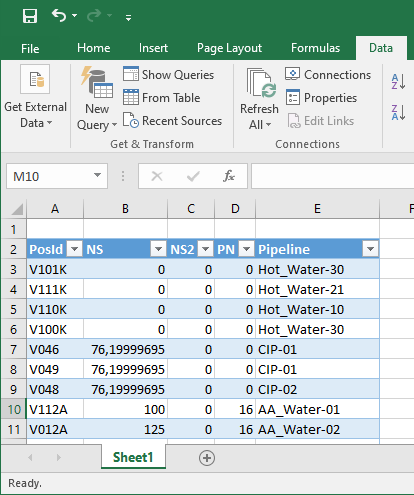
In the Import Data dialog, select how to view the data and click OK.
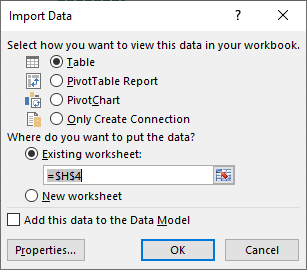
The data is imported to the Excel file.
-
Save and close the file.