Adjusting automatic arrangement of isometric groups
Adjusting the arrangement of piping isometric groups (usually after automatic arrangement has taken place) is done using a simple view based tool.
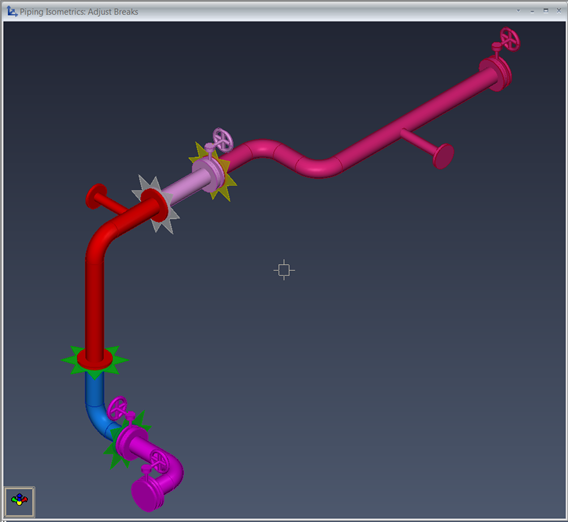
This editing tool shows all the objects in the isometric scope. Objects are colored according to the isometric group to which they belong. Between the isometric groups are star-like break objects. Yellow stars are the result of automatic arrangement, and green stars are the breaks that the user has modified. Initially all of the stars are yellow. These stars are very thin and may not be visible in a perfectly edge-on view.
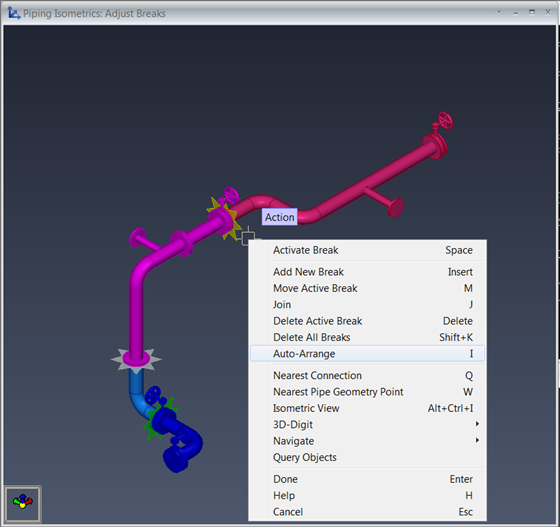
There is a small action cursor in the view. The context menu associated with this cursor contains the commands that adjust the arrangement.
As you can see, the normal navigation and view control commands are available when you work with the isometric breaks.
We want to emphasize the use of navigation keys Q (Go to Nearest Connection) and W (Go to Nearest Seam in Pipe). You should use these before creating or moving breaks.
Note: There is no undo functionality within this tool, but the changes are not permanent until you exit the tool session. At this point you can either accept all the changes that you made, or cancel to drop the changes.
Activate Break
Certain commands expect one of the breaks to be active. The active break is shown as a light gray color on the break position star. To activate a break, move the cursor onto the star and hit Space or left click. The star’s color is changed to indicate that this is now the active break. Since this is a single view tool, there is no need to adjust the spatial depth of the cursor.
Add New Break
To add a new break, move the cursor close to the intended break location (remember earlier remarks about navigation commands Q and W) and use shortcut key Insert, or post a menu and select command Add New Break.
Plant Modeller tries to locate a connection or seam nearest to the current cursor location. Face types at the break are shown in a confirmation message. Hit y, Return, Space, or left click to verify the selection. You can still zoom or rotate the view while the tool is waiting for confirmation. If the break is not wanted, then press the Esc key or another Insert.
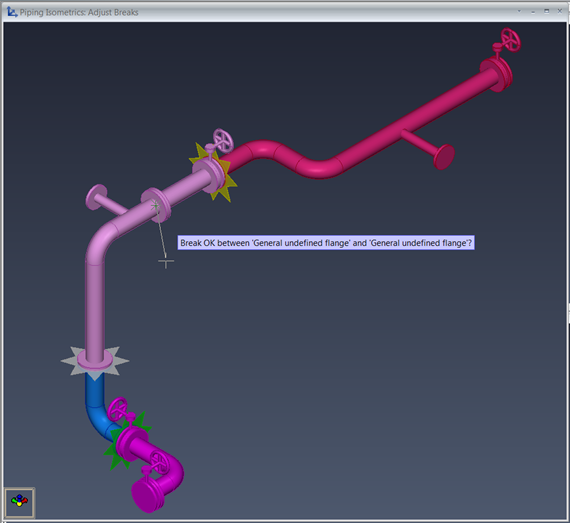
If you are using spools and the selected location would break the spool, then a separate confirmer is popped up. This usually means that you should reconsider the location of the break.
Also, if the selected location requires cutting a pipe, then that too requires your confirmation.
If the break is correct, a new break star symbol is drawn and a new isometric group is created, changing the color of objects on the other side of the break. If a spool was also broken, then a new spool containing parts on the other side of the break will be created.
Move Active Break
First activate the break symbol that you want to move. Then move the cursor (remember Q and W) to the new break location and use the shortcut key M, or post the menu and select Move Active Break.
As with the command Add New Break, connection faces at the new break location will be shown for your confirmation. Checks of the spools and pipes are performed, similar to when a new break is added.
After the break symbol has been moved, some of the model parts will have their isometric group changed.
Join
Allow user to select isometric groups that will be joined into one. Any breaks inside the new iso will be removed. The command can be started from the menu or with the shortcut key J.
Delete Active Break
First activate the break symbol that you want to delete. Then use the shortcut key Delete, or post a menu and select Delete Active Break. After your confirmation the break symbol is removed, and objects on different sides of the break are assigned to the same piping isometric group. Pipes will not be joined, nor will spools be modified in any way.
Delete All Breaks
To delete all breaks use the shortcut key Shift+K, or post a menu and select Delete All Breaks.
Before the breaks are removed a confirmation is required.
The result will be that all objects will belong to one piping isometric group.
Auto-Arrange Again
If you want to perform auto-arrangement again then use the shortcut key I, or post a menu and select Auto-Arrange Again. Before any action is taken your confirmation is required.
In this command all auto-breaks are removed and the auto-arranger for isometric groups is performed again. Breaks that you have touched are honored by the auto-arranger. After auto-arrange is completed the results will be shown in the view.
Done
When the arrangement is complete, use the shortcut key Return, or post a menu and select Done.
The current arrangement is confirmed and passed back for further processing to create the actual piping isometric drawings.
Cancel
If you want to cancel the whole arrangement then use the shortcut key Esc, or post a menu and select Cancel.
After your confirmation all changes that were necessary during the arrangement are undone. For example, if it was necessary to cut a pipe then that cut is undone.