Example of containment based isometrics
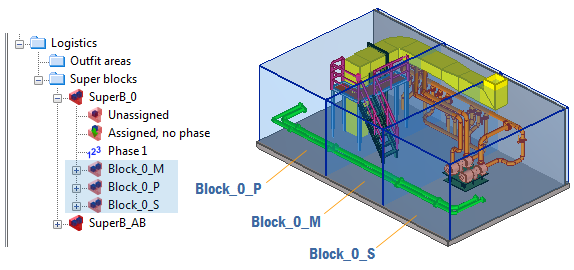
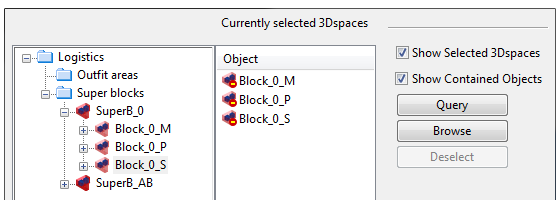
In the CADMATIC example project, the Super block 'SuperB_0' contains three Block-type 3D Spaces: Block_0_P, Block_0_M, and Block_0_S. Two 'Pressure_Air' pipelines (green in the picture below) pass through these three blocks.
About publishing containments
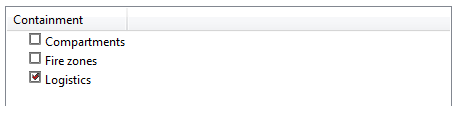
The containment hierarchies must be published as object data to be able to use them as 3D spaces. Select Tools > Manage > Containment > Select containments to publish and select 'Logistics'. If the administrator has forced the containment hierarchy to be always published in the Containment Setup, users cannot see the hierarchy in the list, as shown in the picture below.
Select objects and define isometric groups
Before interactive selections of 3D spaces and pipelines, the user defines the rules for how objects are selected and how objects are divided into isometric groups. In special cases, the user can change these settings.
To start creating containment based isometrics in the Piping Isometrics dialog, select Documents > Drawings > Piping Isometrics, and select the option Several Systems.
Then select Groups > Create isometrics via containment, system and pipeline.
Object Selection
Object selection consists of defining selection rules and selection limits. If an object is already included in an isometric group, it will be skipped.
Selection Rules
In the Selection Rules section, define the conditions for object selection for isometric groups.
-
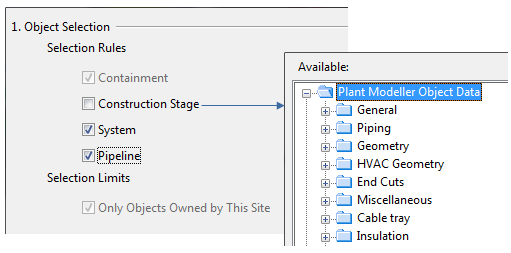
Containment (3D space) – Selected by default.
-
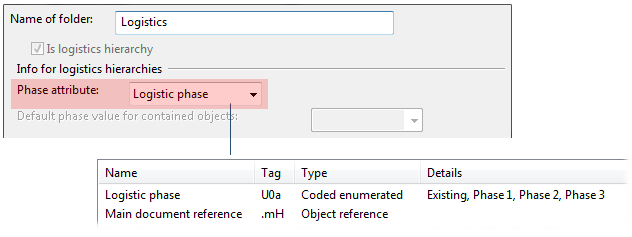
Construction Stage – If you select this option, a dialog opens for selecting the attribute that determines the construction stage. The same attribute must be used as the 'Phase attribute' in the Containment setup.
In the example below, the containment setup folder 'Logistics' uses 'Logistic phase' as the phase attribute.
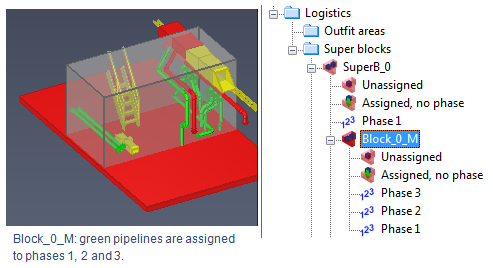
Note: The objects to be used in isometrics must be assigned to phases in Containment Browser before creating the isometric groups, as shown in the picture below.
-
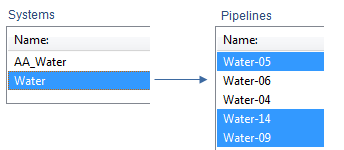
System, Pipeline – Select these options to select objects from specific systems and pipelines. Those objects where all selected conditions are true are selected.
Selection Limits
Only Objects Owned by This Site is automatically selected.
Objects are divided into isometrics by

The data used to select objects is not necessarily the same as the data used to divide the objects into isometrics. For example, you can select objects by system and divide the selected objects to isometric drawings by pipeline. Clicking Define opens a dialog for selecting how to divide the objects.

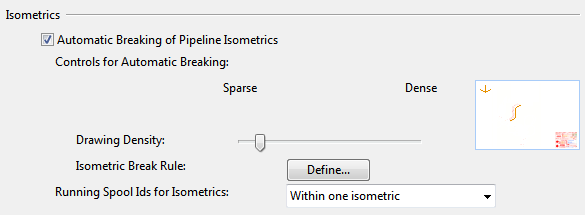
Selecting the Allow adjust isometric splitting option enables automatic, rule-based splitting. The option is available if Automatic Splitting of Pipeline Isometrics has been selected in Piping Isometrics dialog > Tools > Options > Isometrics.
Select 3D spaces
Containments are selected from the tree view on the left side. Selected containments appear in the Currently selected 3D spaces list. Containments can be deselected with Deselect.
Select systems and pipelines
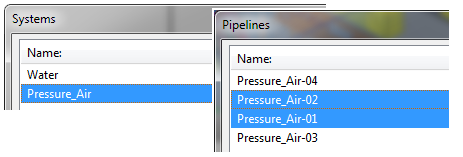
You are prompted to select systems and/or pipelines if those options were selected in the Selection Rules section.
Generated isometric groups
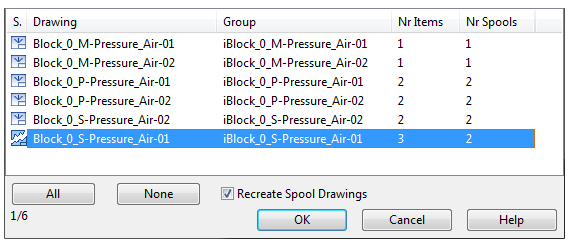
As a result, our example has six isometric groups. The names of the groups were generated with the Isometric Drawing Name Generator. Each name contains the name of the containment and the pipeline. Isometric groups are also automatically divided into spools according to Spool Break Rule.
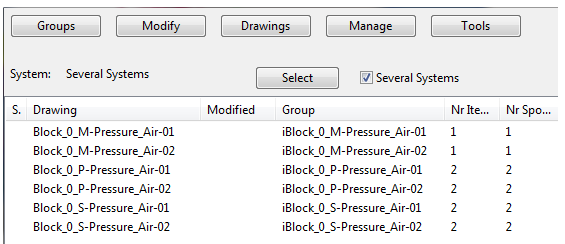
At this point in this example, the isometric drawings are created in the Piping Isometrics dialog by selecting Drawings > Create isometric/spool drawings.
Updating containment based isometrics and spools
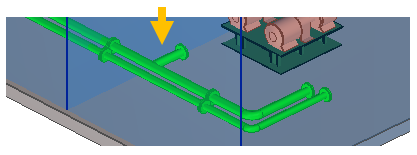
Containment-related isometric groups are rule-based and easy to update. As an example, a new branch is added to one of the previous pipelines:
Update isometric group
The new branch causes the icon of the isometric drawing to show that the isometric group has changed and the drawing needs to be updated. First. the isometric group is updated using Modify > Update isometric group.
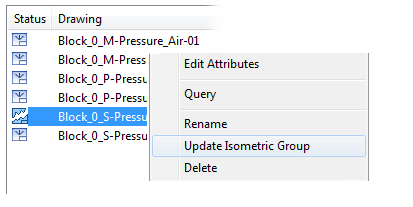
Update spools
The next step is to attach new objects to existing spools using Modify > Define spools.
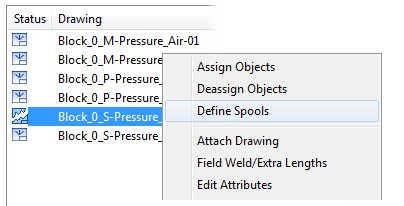
In the Define Spools tool, select the spool 001 in the list and select Assign Objects to add the branch into the spool.
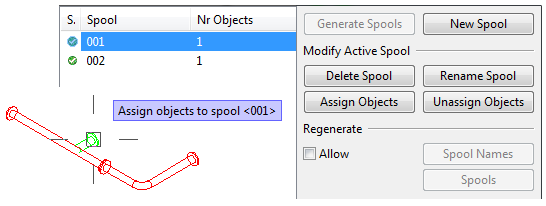
Update geometries of isometric and spool drawings
Next, the geometry of the isometric and spool drawings can be updated using Drawings > Update geometries of isometric/spool drawings.
Note: Always update the geometries when the status of a drawing is "broken".
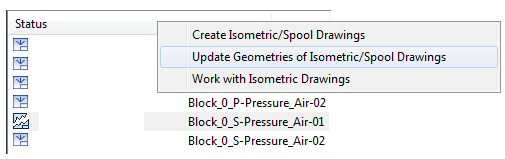
When the option Recreate Spool Drawings is selected, all old annotations are removed and new spool drawings are generated.