Pull Markers
In the Cable Manager dialog, on the General tab, the Pull Markers section contains tools that allow you to define the locations where the cables are to be delivered for installation.
Defining a pull marker for a cable results in the following:
-
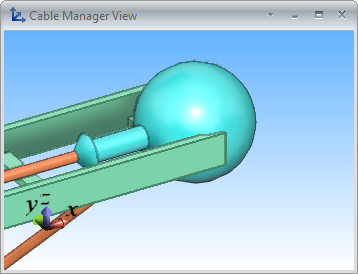
Visualization shows the pull marker in cyan color.
-
Cable has pull marker specific attributes.
 Show/hide details
Attribute
Tag
Description
Availability
Cable route length from pull marker to head
.C5
Length from the pull marker to the head equipment in the current route.
Available in listings, via the Query Cable tool, and in the columns of the cable router. Only calculated for routed cables and cables whose route has changed.
Cable route length from pull marker to tail
.C6
Length from the pull marker to the tail equipment in the current route.
Available in listings, via the Query Cable tool, and in the columns of the cable router. Only calculated for routed cables and cables whose route has changed.
Cable route points from pull marker to head
.C7
List of node IDs from the pull marker to the head equipment.
Available in listings and via the Query Cable tool.
Cable route points from pull marker to tail
.C8
List of node IDs from the pull marker to the tail equipment.
Available in listings and via the Query Cable tool.
Cable pull marker node
.C9
Node ID of the pull marker.
Available in listings and via the Query Cable tool.
-
Listings contain information about the pull marker ID, lengths from the pull marker to the head and tail equipment, and lists of route nodes from the pull marker to the head and tail equipment.
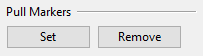
Set
In the Pull Markers section, the Set tool allows you to select one of the nodes as the location where the cable is to be delivered for installation.
You can add a single pull marker for several cables that go via the same node.
If the cable already has a pull marker, adding a new marker deletes the existing one.
Prerequisites
-
The cable is checked out and not approved.
Do the following:
-
In the Cable Manager dialog, in the Cables pane, select the cable to which to add the pull marker.
You can select multiple cables if they have a shared node.
-
On the General tab, in the Pull Markers section, click Set.
-
Pick the node where you want to add the marker and press Enter.
Remove
In the Pull Markers section, the Remove tool allows you to delete pull markers from selected cables.
Prerequisites
-
The cable is checked out and not approved.
Do the following:
-
In the Cable Manager dialog, in the Cables pane, select the cables from which to remove pull markers.
-
On the General tab, in the Pull Markers section, click Remove.