Plot
In the document object browser, you can select to plot multiple documents from the document list.
Note: If the drawing sheet or the drawing views of a document contain objects whose color is white or close to white, they are plotted in black color.
Do the following:
-
In the document object browser, select the documents to plot.
-
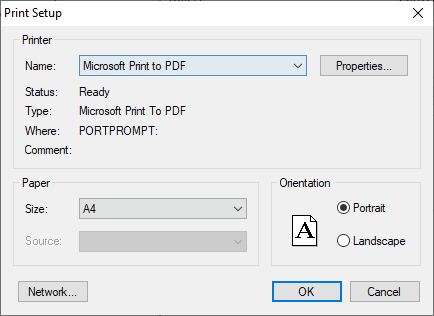
Right-click the selection and select Plot from the context menu. The Print Setup dialog opens.
-
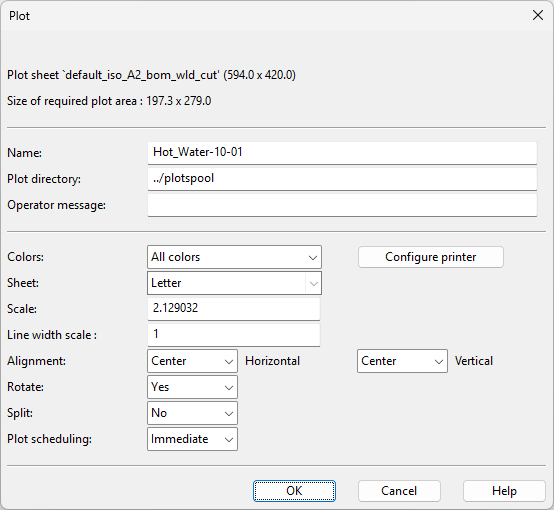
Specify the printing options and click OK. The Plot dialog opens.
-
Define the plot settings:
-
Name – Enter a name for the document.
-
Plot directory – Define the directory to use for the plotting files.
-
Operator message – Enter a message for the operator.
-
Configure printer – Select this to modify the printing options.
-
Colors – Select All colors or Black and white.
-
Sheet – This is automatically set based on the paper size selected in the printing options.
-
Scale – This is automatically set based on the paper size selected in the printing options.
-
Line width scale – Define how to scale the line widths. Values between 0.5 and 1 make the lines thicker, and values larger than 1 make them thinner.
For example, when a larger sheet size is scaled to fit on a smaller paper size, thinner lines make the document easier to read.
-
Alignment – Select how to align the document horizontally and vertically.
-
Rotate – Select whether to rotate the document.
-
Split – Select whether to split the document.
-
Plot scheduling – Select whether to plot immediately or later.
-
-
Click OK. The Save Print Output As dialog opens.
-
Select the saving location, enter the file name, and click Save.