Penetration

On the Ducting tab, the Penetration group contains the following tools.
Insert
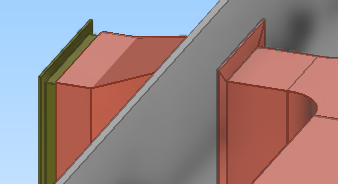
Use the Insert tool to add a penetration to a straight duct piece that has been routed through a hull structure such as deck or bulkhead. The properties of the penetration, such as what materials to use for strengthening the hole and how much space to have between the sides of the duct and the hole, are taken from the dimensions of the duct and the penetration settings defined by project administrator.
Note: When you insert a penetration, the tool automatically creates a new hole request with the shape "Rounded rectangular".
Prerequisites
- Project administrator has defined the required duct penetration settings, as described in Duct penetration settings.
Do the following:
-
Select the Ducting tab > Penetration group > Insert.
-
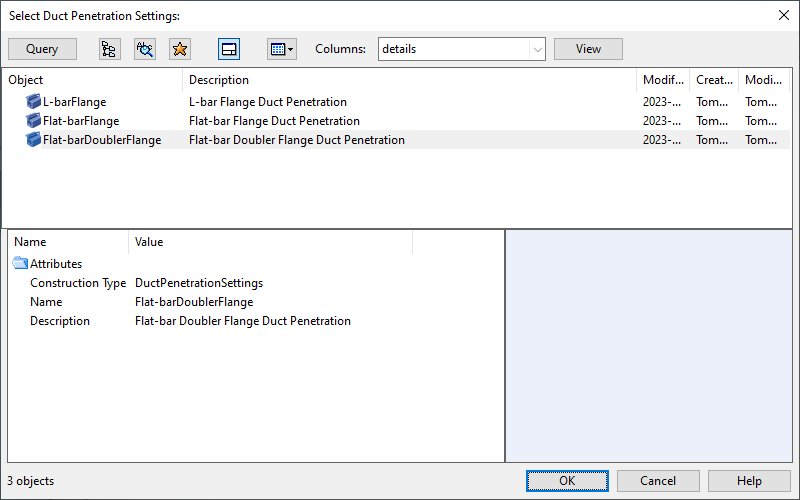
In the Select Duct Penetration Settings dialog, select the penetration settings to use, and click OK.
-
Pick a straight duct that intersects a hull structure, and press Enter.
-
Pick the hull structure that is being penetrated, and press Enter.
-
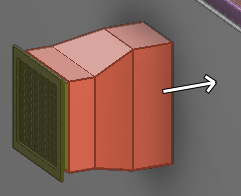
You are prompted to select on which side of the hull structure to add the penetration materials. By default, they are placed on the side where duct node 1 is located, and a white arrow points to the suggested side.
-
Click Yes if you accept the suggested side (flow direction: in).
-
Click No to add the penetration to the opposite side (flow direction: out).

-
- To submit the hole request to hull designers, open the Hole Manager and select Request Update.
Re-create
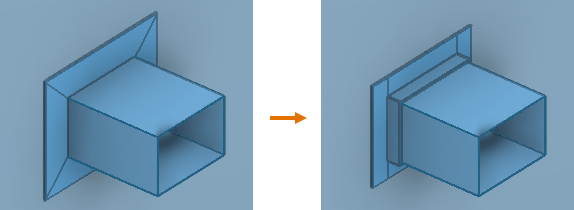
You can recreate a duct penetration to update the penetration and the related hole request to match the current situation in the 3D model.
You can also use this command to change the type of the penetration.
Prerequisites
-
The associated hole request is checked out to you.
Do the following:
-
Select the Ducting tab > Penetration group > Re-create.
-
Pick one object from the duct penetration you want to recreate, and press Enter.
The Select Duct Penetration Settings dialog opens.
-
Select the settings to use, and click OK.
Delete
Use the Delete tool to delete a duct penetration from the model. If the associated hole request has not yet resulted in the hole being created, also the hole request can be deleted.
Do the following:
-
Select the Ducting tab > Penetration group > Delete.
-
Pick one object from the duct penetration you want to delete, and press Enter.
-
If you are prompted that the associated hole request could not be deleted, use the Hole Manager tool to delete the hole request.