Point Cloud Manager

On the Model tab, in the Content group, the Point clouds button opens the Point Cloud Manager dialog where you can import a point cloud, move the cloud to the correct position, resize the cloud so that it matches the scale of the project, and activate the cloud so that it can be shown in work views.
The user interface
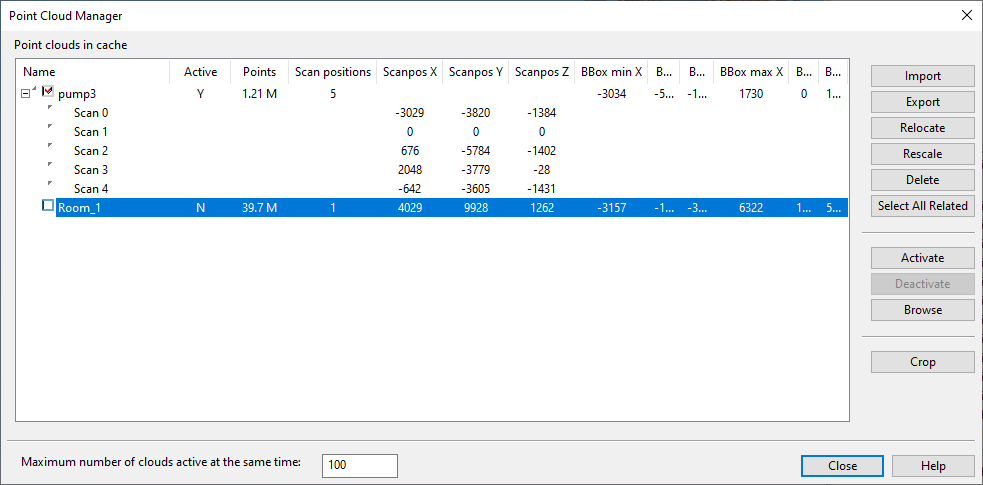
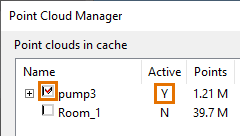
In the Point Cloud Manager dialog, the Point clouds in cache pane shows the point clouds that have been imported to Plant Modeller and are now stored as .cpe or .cpd files in the point cloud cache folder of your computer.
|
Column |
Description |
|---|---|
| Name |
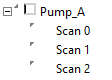
The name of the point cloud. You can expand a merged point cloud to see the list of the scanning positions.
|
| Active |
"Y" – The point cloud is active. "N" – The point cloud is not active. |
| Points | The number of points in the point cloud, expressed as millions. |
| Scan positions |
The number of scanning positions in the point cloud. |
| Scanpos X, Y, Z |
The XYZ coordinates of the scanning position. |
| BBox min X, Y, Z |
The XYZ coordinates of the minimum corner of the bounding box. |
| BBox max X, Y, Z |
The XYZ coordinates of the maximum corner of the bounding box. |
When you select one or more point clouds from the list, you can see their bounding box in shaded work views and use the point cloud tools to manipulate the point clouds as required.
| Button | Description |
|---|---|
|
Import |
Allows importing point cloud files to Plant Modeller, as described in Importing point clouds. |
|
Allows exporting the selected point clouds from Plant Modeller, as described in Exporting point clouds. |
|
|
Relocate |
Allows changing the position or rotation of the selected point clouds, as described in Relocating point clouds. |
|
Rescale |
Allows changing the scale of the selected point clouds, as described in Rescaling point clouds. |
|
Delete |
Deletes the selected, deactivated point cloud files from the point cloud cache directory. You are prompted to accept the action. |
|
Select All Related |
Selects all point clouds that have the same name prefix as the currently selected point cloud. The prefix can be any text string that is followed by a dash, period, space or underscore. This command can also be selected from the context menu of the list view. |
|
Activate Deactivate |
Sets the selected point clouds as active or inactive. Active point clouds are visible in views that have been configured to show point clouds. See Activating and deactivating point clouds. |
|
Browse |
Opens a bubble view that shows the area around the scanning position as a panorama image. See Browsing a bubble view. |
|
Crop |
Allows all views to hide those scanned points that are located outside the crop boxes, such as an open corridor that is leading to the scanned room. See Cropping point clouds |
These options affect the displaying of point clouds:
-
Maximum number of clouds active at the same time – Trying to open too many point clouds at the same time can slow down or completely halt the operation of Plant Modeller. This setting defines how many point clouds can be active at the same time, and you are prompted if trying to open too many. The optimal value depends on your computer's hardware and the size of the point clouds—adjust the maximum number as needed.
-
You can define your personal preferences for working with point clouds in File > Settings > User Settings, as described in Point clouds (visualization options) and Point Cloud (cache folder and bubble view settings).
Importing point clouds
You can import point clouds from the formats listed in Point cloud formats, one format at a time.
Most import files are automatically converted to the native CADMATIC format and stored in the local cache folder as binary .cpe files. The older .cpd format you can still import without conversion, but the .cpe format has many benefits, such as the possibility to merge multiple source files into a single point cloud.
For each scanning position, a panoramic point cloud is generated and stored in the <PointCloudCache>\Panoramas subfolder as a .cpx file, to be used when the scanning position is opened in a bubble view. You can also import .cpx files separately.
Do the following:
-
In the Point Cloud Manager dialog, click Import. A file browser opens.
-
Select one or more files that have the same file name extension and click Open.
Note: If you select more than 255 files, you will not be able to merge the files into a single point cloud.
-
If importing the old CADMATIC CPD format, you are prompted whether to convert it into the optimized CPE format (select Yes) or to keep the CPD format (select No).
Note: If you keep the CPD format, you will not be able to merge the files into a single point cloud.
-
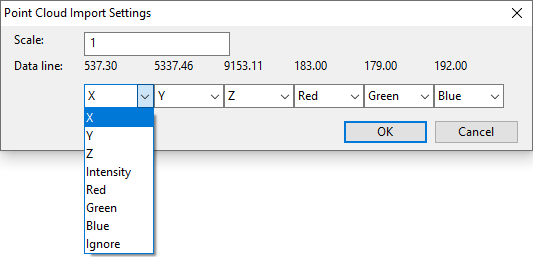
If importing an ASCII format, the Point Cloud Import Settings dialog opens. Specify the following options as appropriate and click OK.
-
Scale – Define the scaling factor to use to import the data as millimeters. Set the scale to 1000 if you know the coordinates in the file are measured in meters, and to 1 if they are measured in millimeters.
-
Data line – Displays a sample data row extracted from the import file. Use the drop-down menus to select what each data field in that row represents. The import requires at least X, Y and Z to be defined.
- X, Y, Z – Coordinate values.
- Intensity – Intensity value from the laser.
- Red, Green, Blue – Color information from the camera.
- Ignore – Ignore the value in all data lines.
-
-
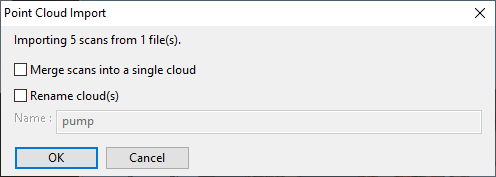
The Point Cloud Import dialog opens. Specify the following options as appropriate and click OK.
-
Merge scans into a single cloud – Select this option if you want all the imported files to be merged into a single point cloud that has multiple scanning positions. A point cloud that is merged in import is much easier to manage with commands such as Rescale and Activate/Deactivate.
If the option is not selected, each file or scanning position is imported as a separate point cloud file.
-
Rename cloud(s) – Select this option if you want the point cloud's name to be something other than the original filename.
The option is automatically selected if importing multiple files and you selected the Merge… option.
If you are importing several files but did not select the Merge… option, the imported files will be named using the pattern <new name>_001.cpe, <new name>_002.cpe, …
-
-
The files are imported and displayed in Point Cloud Manager. You are prompted if the point clouds are completely outside the model area—you can move, rotate, and rescale the point clouds as needed.
Exporting point clouds
You can export point clouds in ASCII or binary format.
Prerequisites
-
You know which point cloud format you want to export. For details, see Point cloud formats.
Do the following:
-
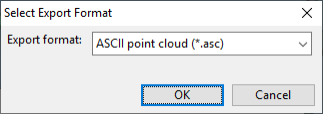
In the Point Cloud Manager dialog, click Export. The Select Export Format dialog opens.
-
Select the file format to use and click OK.
- ASCII point cloud (*.asc) – Select this option to export an ASCII file.
- CADMATIC Point Cloud v2 (*.cpd) – Select this option to export a binary file that can be opened in older CADMATIC software versions.
- CADMATIC Point Cloud v3 (*.cpe) – Select this option to export an optimized binary file that can be opened in the current CADMATIC software version.
- CADMATIC Panoramic Point Cloud (*.cpx) – Select this option to export a binary panorama file (one per scan).
-
Select the target folder and click Select Folder.
The files are exported to the specified folder.
Relocating point clouds
You can relocate point clouds so that they are correctly positioned in relation to the 3D model by moving and rotating them as needed.
Note: A point cloud can contain unsaved changes only if it is active or if it has a bubble view open. If you relocate an inactive point cloud, or relocate an active point cloud and then deactivate it, and that point cloud does not have an open bubble view, the point cloud is immediately saved at the new position.
Do the following:
-
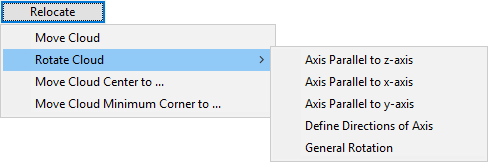
In the Point Cloud Manager dialog, select one or more point clouds from the list and then click Relocate.
-
In the Relocate menu, select how to move or rotate the selected point clouds.
Rescaling point clouds
Plant Modeller does not store information about the original scale of the imported point cloud files. If a point cloud has been imported (from ASCII) using a wrong scale or from a format where the scale cannot be specified during import, use the rescaling tool to adjust its scale so that it matches the scale of the 3D model.
You can rescale both active and inactive point clouds. The rescaling uses the global origin of the project.
Do the following:
-
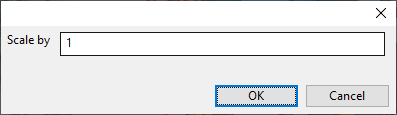
In the Point Cloud Manager dialog, select one or more point clouds from the list and then click Rescale.
-
Enter the scale to use for the selected point clouds.
For example, if point cloud has been imported as one thousand times too small, enter the scale as 1000. Or if it is one thousand times too large, enter the scale as 1/1000.
-
Click OK.
Activating and deactivating point clouds
Active point clouds are loaded into the memory of Plant Modeller and displayed in all work views whose filtering settings allow point clouds to be shown. See Role of view regarding point clouds for information on how to control point cloud visibility in work views.
In the Point Cloud Manager dialog, activate the point clouds that you want to see in work views and deactivate the others.
- To activate or deactivate one or more point clouds, select the point clouds from the list and then click Activate or Deactivate, as appropriate.
- To activate or deactivate a single point cloud, double-click the point cloud or one of its scanning positions (if they were merged in import).
Note: Depending on the hardware, activating multiple point clouds at the same time might be a time-consuming operation. Try activating only a couple of point clouds first to get some idea of how well your computer handles them.
When a point cloud is active, the checkbox in front of the point cloud name is selected and the Active column displays the value "Y".
Browsing a bubble view
A bubble view shows the point cloud from the perspective of the laser scanner that recorded the data. You can rotate the view around the scanning point and zoom the view. Plant Modeller supports up to eight simultaneously visible bubble views.
By default, bubble views show the point cloud as a 3D panorama image, which normally enhances the look of the cloud and makes it lighter to operate. Alternatively, you can switch to a point-based bubble view by preventing the use of the panorama image, as described in Role of view regarding point clouds.
Do the following:
-
In the Point Cloud Manager dialog, select a point cloud or a scanning position from the list.
- If you select a point cloud, the bubble view will open in the first scanner position of that point cloud.
- If you select a scanning position, the bubble view will open in that position.
-
Click Browse. The Select Bubble View dialog opens.
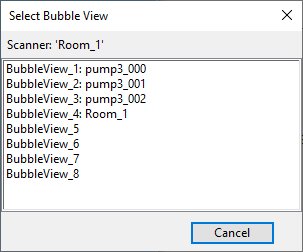
-
Select an empty view from the list. If all eight bubble views are already in use, select the one whose data you want to replace. The bubble view opens.
-
You can rotate the bubble view with the mouse, and you can zoom in or out with the mouse wheel. Press Esc to return to Point Cloud Manager (the bubble view stays open).
Cropping point clouds
You can crop point clouds to hide those parts that are not of interest to you.
Typically, laser scanners capture points that are outside the room being scanned, for example when the laser beam finds a route down a corridor or via an open doorway. Use a crop box to remove these protruding parts from an otherwise rectangular scanning area.
Note: This is a different kind of filter than view limits—the View Limits settings clip any component models and point clouds in the designated view. Crop boxes, on the other hand, are specific to particular point clouds, and crop boxes are applied to both shaded work views and bubble views. Another difference is that a point cloud can have more than one crop box (the maximum is 16); points are shown if they are inside any of the crop boxes defined for the point cloud. You can, for example, use two crop boxes to define the extents of an L-shaped room.
Do the following:
-
In the Point Cloud Manager dialog, select one or more point clouds from the list and then click Crop.
-
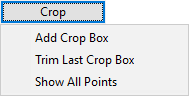
In the Crop menu, select what to do:
- Add Crop Box – Select this option to pick the first and second corner (opposite corners) of the crop box from the model. You can also use navigation commands to enter the corner coordinates, if you know the extents of the scanned room. The points that are inside this box will be visible, and the points that are outside the box will be hidden. After inserting one crop box you can add another to increase the visible area.
- Trim Last Crop Box – Select this option to decrease the area covered by the last crop box you added. You are prompted to pick the first and second corner of the trim box. The points that are outside this box will be hidden.
- Show All Points – Removes all the crop boxes to show all the points of the point cloud.
The work views and bubble views that show the point cloud are re-drawn.