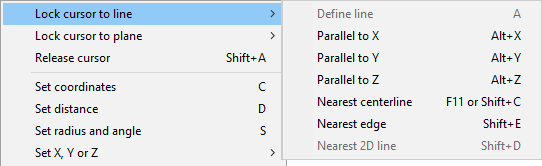
Lock cursor to line/circle
Define line (A)
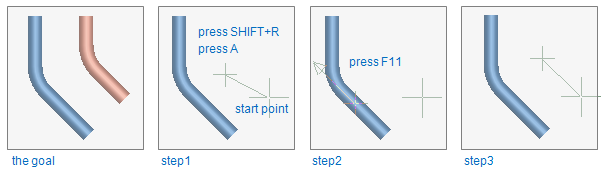
This shortcut key is usually used to line the end point or to define direction for a routing segment as shown in the picture below.

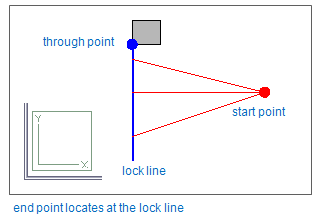
A result is a lock line which is defined with a point (through point) and direction vector. When the shortcut key A is pressed the current location of cursor is the through point. The direction vector can be set using several direction definitions.
After lock line definition, the end point of pipe is coincident with the lock line. The cursor is locked to through point after navigation command, press 5 or 6 to release the cursor.
The steps:
The goal here is to have a new pipe segment that is parallel with an existing one.
-
Step 1: after start point, restore cursor in original location pressing Shift+R. Press A for lock line. Notice that the through point is same as the start point.
-
Step 2: to define the direction vector, place cursor near the centerline of a pipe and press Shift+C or F11.
-
Step 3: define the end point of pipe segment.
Parallel to X (Alt+X), Parallel to Y (Alt+Y), Parallel to Z (Alt+Z)
These commands are used to lock the direction parallel to coordinate axis when routing especially in axonometric view. Note, that the current location of cursor is the through point. Often the start point works also as a through point. In the picture below, the through point located at the corner of a plate.
The steps:
-
Step 1: give a start point and press E to snap the corner point of the plate as a through point.
-
Step 2: press Alt+Y to lock the direction parallel to Y axis.
-
Step 3: release the cursor by pressing 5 and 6 because it was locked to vertex after navigation.
After unintentional move of mouse, return the cursor back to original location using Shift+R. Press Shift+A to unlock the cursor from axis direction.
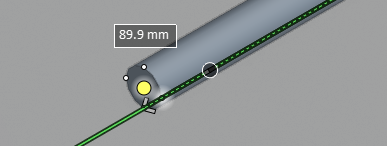
Nearest centerline (F11 or Shift+C)
This command locks cursor to the centerline of the pipe, air duct or beam nearest to the digitized point. The centerline of a beam intersects the beam end plane in the local origin of the cross-section.

Pressing Shift+A releases the cursor.
Use following steps to route a pipe to same level with an existing one. Because new pipe starts at flange connection, the direction of new pipe is locked:
-
Step 1: route a new pipe and move cursor near the flange connection. Press P to lock cursor in that connection. Because direction is locked, you have to release cursor by pressing Shift+A.
-
Step 2: move cursor inside the existing pipe and press Shift+C or F11 to lock cursor in centerline.
Nearest edge (Shift+E)
This command locks the cursor to the nearest edge in a component (equipment, structural component, beam, duct, or cable tray) or to the nearest quadrant line of a pipe (as shown in the picture below).
Pressing Shift+A releases the cursor.
Nearest circular edge (Alt+Shift+E)
This command locks the cursor to the nearest circular edge in a component (equipment, structural component, standard component, duct, or cable tray).
Pressing Shift+A releases the cursor.
Nearest 2D line (Shift+D)
Moves and locks the cursor to the 2D line nearest to the digitized point in the control view. The depth coordinate of the point in view coordinates is not changed.
The command is not active if direction is already locked.
Pressing Shift+A releases the cursor.