Join

On the Piping tab, in the Pipe group, the Join menu includes the following tools for joining pipes. The joined pipe inherits all group memberships and attribute definitions from the original pipes, and if there are differences you must select which ones to keep for the joined pipe.
Join
You can use the Join tool to join two pipes if they have collinear end points and the pipes are parallel. If the pipes belong to different pipelines, after the join they will belong to the same pipeline. If the pipe has a hole request, the tool also tries to set the joined pipe as the trigger object of the hole request.
Do the following:
-
Select Piping tab > Pipe group > Join > Join.
-
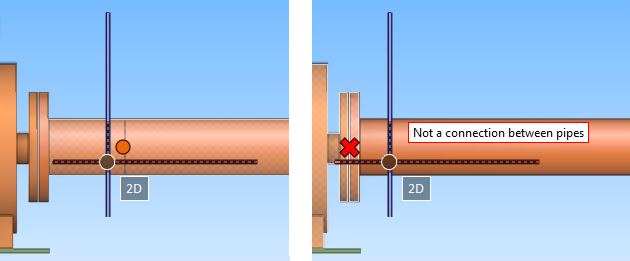
In a work view, move the cursor to the location where the join should be made. When a connection point is displayed, click to join the pipes. If the pipes cannot be joined, for example if there is a flange instead of an unconnected pipe end, a red X is displayed and a message indicates why joining is not possible.
-
If the pipes belong to different pipelines you are prompted to select how to proceed.
To join the pipes and assign them to the same pipeline, set Pipeline to the required pipeline and then click OK.
To cancel the join operation, click Cancel, or set Join Pipes to 'No' and then click OK.

-
If the pipes belong to different groups you are prompted to select which group membership to keep for the joined pipe. See Group membership in joining pipes.
-
If you have assigned attributes to the pipes and the attributes have different values, you are prompted to select which value to keep. Or, you can click Cancel to remove the attribute.
-
If you are prompted that the tool could not update all hole requests that are related to the changed objects, you must run the Set Trigger command in the Properties of Hole Request dialog of Hole Manager.
-
You can continue to make more join operations in the same manner. To exit the join tool, press Esc.
Join with miter
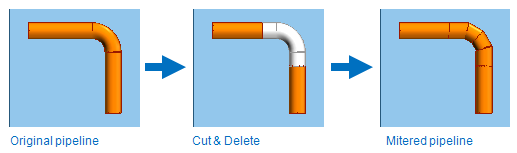
You can join two existing pipes with a miter. The nominal size of the pipes must be the same and the centerlines must intersect. Usually this command is used to replace an elbow with miter. The pipeline can be cut from a distance of the seam.
Prerequisites
- Optionally, administrator has defined recommended miter settings, as described in Miter settings.
Do the following:
-
Cut the pipe from both sides of the elbow, and then delete the elbow.
-
Select Piping tab > Pipe group > Join > Join with miter.
-
Select the two pipe ends one by one by picking the connection point and then pressing Enter.
You are prompted if the settings cannot be applied to the specified pipe.
-
Make a note of the issue, and then click OK.
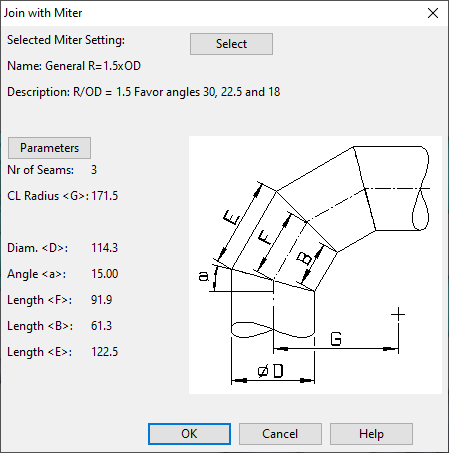
The Join with Miter dialog opens.
-
You can do the following:
-
Click Select to select a different miter setting configuration.
-
Click Parameters to change the parameters of the miter you are adding.
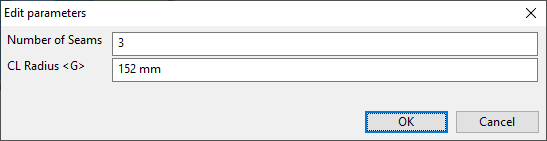
Then click OK to accept the settings/parameters.
-
-
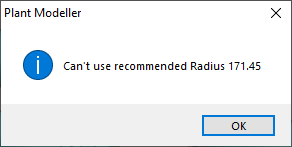
You are prompted if a setting is not defined in the recommended settings or deviates from the recommendations.
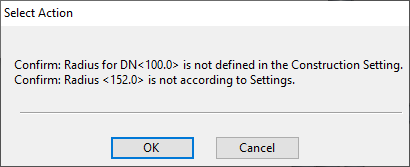
Click Cancel if you want to go back to changing the settings/parameters; otherwise, click OK to create the miter.