Flange Set

A flange set means a "short" flange connection where two flanges are connected to each other without any component between them (except a gasket). When there is a component (a valve, for example) between the flanges, it is a "long" flange connection that uses a wafer connection type.
Insert
You can insert flange sets to a pipe. The pipe is cut at the insertion point and the flanges are added to the facing ends of the two pipes. Control values that specify the minimum pipe length and thickness of the flange determine the nearest possible cut distance from the end of the pipe component. If the insertion point is too close to the end of the pipe, the cut location is moved to the pipe's end.
Insert
Use the Insert command to insert a flange set that the tool automatically selects by searching the specification for the Short Codes "f", "f1"…"f999", using the Nominal Size of the pipe to find a compatible flange. If a compatible flange is not found, then the program attempts to find another flange that can be connected to the first flange. This makes it possible to create flange sets that are not symmetric in regard to connection faces. If the pipe has a hole request, the tool also tries to set the new piping part as the trigger object of the hole request.
Do the following:
-
On the Piping tab, in the Flange Set group, select Insert > Insert.
-
Navigate to the location where you want to insert the flange set, and press Space or click to accept the location.
The flange set is inserted to the specified location. The pipe ends are connected by the flanges.
-
If you are prompted that the tool could not update all hole requests that are related to the changed objects, you must run the Set Trigger command in the Properties of Hole Request dialog of Hole Manager.
-
You can insert another flange set in the same way or press Esc to finish.
Insert from specs
Use the Insert from specs command to insert a flange set that you manually select from the specification.
Do the following:
-
On the Piping tab, in the Flange Set group, select Insert > Insert from specs.
-
Navigate to the location where you want to insert the flange set, and press Space or click to accept the location.
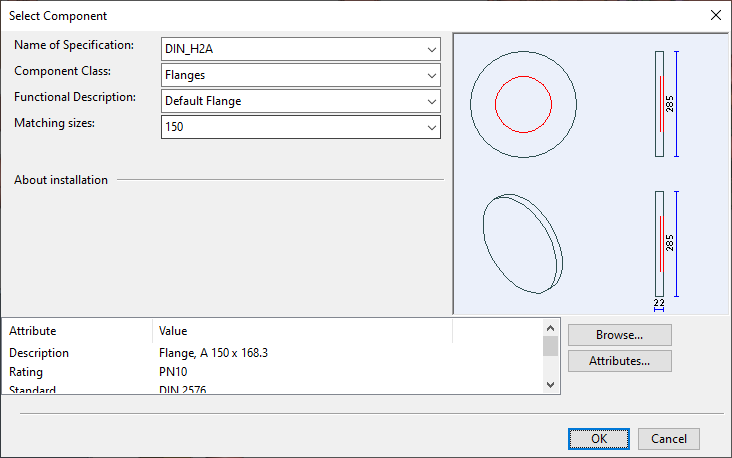
The Select Component dialog opens.
-
In the Functional Description field, select the flange component to use and click OK.
-
You can continue inserting flange sets of the same type or press Esc to finish.
Delete
Use the Delete tool to remove a flange set from a pipe. This joins the two pipes into a single pipe, and the new pipe inherits all group memberships and attribute definitions from the original pipes. If the pipes belonged to different groups, you are prompted to select which group membership to keep for the joined pipe.
If the pipe has a hole request, the tool also tries to set the joined piping part as the trigger object of the hole request.