Edit
On the Piping tab, in the Penetration group, the Edit menu includes tools for managing the members of a Penetration Group.
Add members to penetration group
You can add piping objects to an existing Penetration Group.
Do the following:
-
Select Piping tab > Penetration group > Edit > Add members to penetration group.
-
Pick any member of the Penetration Group you want to edit and press Enter.
-
Pick the objects you want to add to the Penetration Group and press Enter.
-
If the objects you are trying to add have existing group assignments, one of the following might happen:
-
You are prompted that adding is not possible.
-
You are prompted that adding is possible if you allow existing group assignment to be removed.
-
-
Perform Re-create multi-pipe penetration.
Remove members from penetration group
You can remove piping objects from a Penetration Group.
Do the following:
-
Select Piping tab > Penetration group > Edit > Remove members from penetration group.
-
Pick any member of the Penetration Group you want to edit and press Enter.
-
Pick the objects you want to remove from the Penetration Group and press Enter.
-
Perform Re-create multi-pipe penetration.
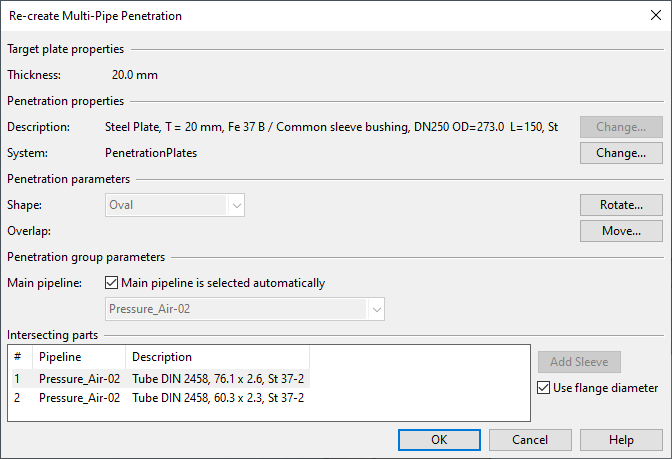
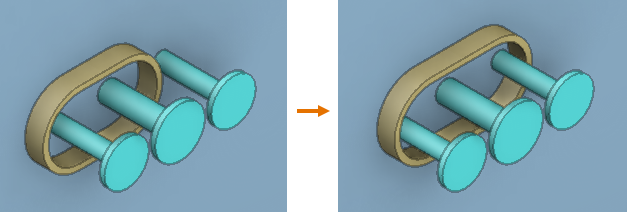
Re-create multi-pipe penetration
You can recreate a multi-pipe penetration to update the plate, the sleeve, and the related hole request to match the current situation in the 3D model. You can use this, for example, if pipes have been added to or removed from the Penetration Group.
Prerequisites
-
The associated hole request is checked out to you.
Do the following:
-
Select Piping tab > Penetration group > Edit > Re-create multi-pipe penetration.
-
Select the multi-pipe penetration from the model and press Enter.
-
You might be prompted that:
-
Materials of the penetration changed.
-
'Use flange diameter' settings need to be manually set.
Click OK.
The Re-create Multi-Pipe Penetration dialog opens.
-
-
Review the penetration settings, make change as appropriate, and click OK.