Script Project Manager
Developers of larger script applications can make development more manageable by dividing the code into several smaller source code files that call each other with *_CALL_SCRIPT externs. To improve runtime performance, the called scripts are usually precompiled.
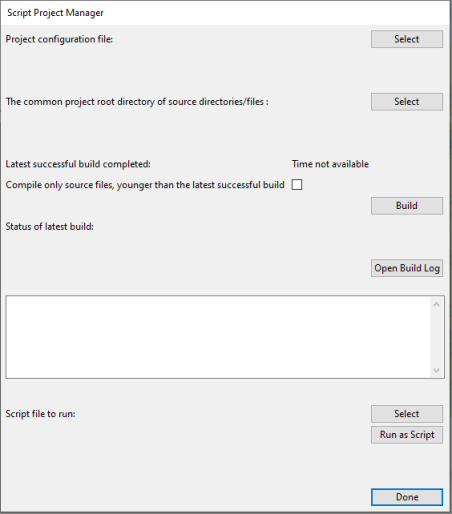
The Script Project Manager tool allows the developer to compile all source code files of a modular development project in one step, and then run and debug the code.
If there are several script development projects, they must be located under the same root directory.
Setting up the project configuration file
You must create a project configuration file for each script project that you want to build with the Script Project Manager tool. This configuration file defines where the source files are located and where the compiled files are placed when the project is built.
Create the project configuration file with a text editor, using CADMATIC tag records as described below, and save the file with the .btn file extension.
Here is an example of a project configuration file:
/*
    Copy resource files and public scripts to the installed CADMATIC product home directory.
*/

cmd SYS_RUN_PROG;exe xcopy.exe; ARG $CCS_SYST/syst/opt/pm/Support; ARG $PMS_HOME/opt/pm/Support;arg /E;arg /F;arg /Y;;

/*
    Compile the ‘non-public’ SD kernel scripts in $CCS_SYST/opt/pm/Support
     and place the .bs files under $PMS_RUNDIR/opt/pm/Support
*/

cmd sc;sdi $CCS_SYST/opt/pm/Support;sfi *.mac;tdi $PMS_RUNDIR/opt/pm/Support;;

/*
    Compile the 'public' SD scripts in $PMS_HOME/opt/pm/Support/xxx
     and place the .bs files under $PMS_RUNDIR/opt/pm/Support/xxx
*/

cmd sc;sdi $PMS_HOME/opt/pm/Support/Annot;sfi *.mac;tdi $PMS_RUNDIR/opt/pm/Support/Annot;;
cmd sc;sdi $PMS_HOME/opt/pm/Support/Build/interface;sfi *.mac;tdi $PMS_RUNDIR/opt/pm/Support/Build/interface;;
cmd sc;sdi $PMS_HOME/opt/pm/Support/Build/lib;sfi *.mac;tdi $PMS_RUNDIR/opt/pm/Support/Build/lib;;
This table lists the tags that you can use in the project configuration file:
|
Tag |
Explanation |
|---|---|
|
cmd |
The build command to be executed. |
|
SYS_PUTENV |
Sets an environment variable. |
|
var |
Name of the variable. |
|
val |
Value of the variable. |
|
SYS_RUN_PROG |
Runs an executable in a DOS Shell. Important: DOS Shell requires file paths to be defined using '\' as the separator character—use the ARG tag to convert '/' characters to '\' characters. |
|
exe |
Path to the executable to run, or the base name of the .exe file if %PATH% specifies the directory. |
|
arg |
Argument string (max. 10 pieces), no conversion. |
|
ARG |
Argument string (max. 10 pieces) where all '/' characters are internally converted to '\' characters. |
|
sc |
Compiles a script source file (.mac) to the target binary script (.bs). |
|
sdi |
Source directory. |
|
sfi |
Source file (base name) pattern match string (such as *.mac, *.h). |
|
tdi |
Target directory. |
When a tag defines a file path, consider the following:
-
You can use environment variables in the path by adding the $ character in front of the variable, for example: $PMS_HOME
-
You can use $CCS_SYST in the path to refer to the root directory of your source code tree. This environment variable is set when you first select the root folder in Script Project Manager and then build the project.
Using Script Project Manager
You can use the Script Project Manager tool to compile and run your scripts.
Prerequisites
Do the following:
-
In Plant Modeller, select Tools > Script.
-
Select the script source file %PMS_HOME%\pm\macro\PmMgeScriptProject.mac and click Open.
-
In the Script Project Manager dialog, select the configuration file you created for this script development project:
-
Click Select.
-
Select the .btn file and click Open.
Note: This file defines where the program can find the source code files and where it places the compiled files.
-
-
Select the root directory of your source code tree:
-
Click Select.
-
Select the source code directory and click Select Folder.
Note: This path is assigned to the CCS_SYST environment variable when you build the project.
-
-
Build the project:
-
Select whether to compile only those source files that are newer than the latest successful build.
Note: The program does not resolve dependencies. If a source file has not been modified but includes an #include reference to a header file that has been modified, you must clear this option to compile the source file.
-
Click Build.
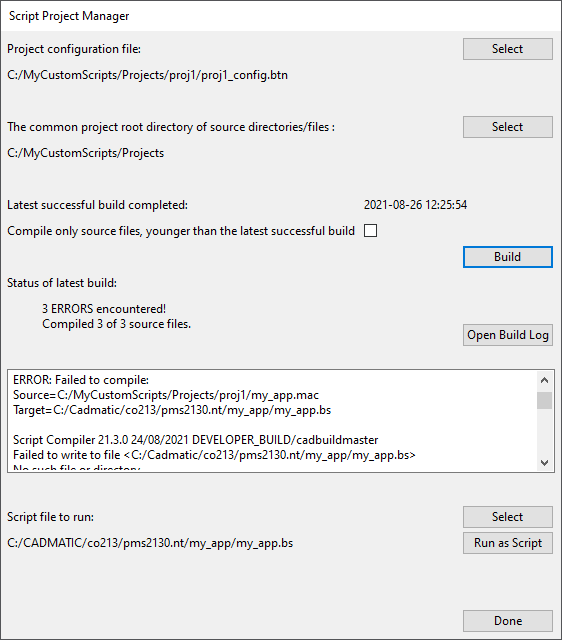
The program builds the application as defined in the project configuration file and shows the status in the dialog. If the program encounters errors, the error messages are listed in the dialog.
-
If you want to view the complete build log, click Open Build Log. The program opens a text file that contains information about previous builds.
-
-
If the build is successful, you can run the script:
-
Click Select.
-
Select the main script file that you want to run and click Open.
The file path is shown in the dialog.
-
Click Run as Script. The dialog is hidden and then shown again when the script execution has completed.
-
-
Click Done.
Adding Script Project Manager to the ribbon
If you intend to use the Script Project Manager script regularly, you can add a command for it to the application ribbon.
You can add custom commands to the ribbon by defining a 'Custom UI' object.
<RibbonSettings>
  <Ribbon Name="main">
   <RibbonTab Name="homeTab">
    <TabGroup Name="tabgroupScM" Text="Script Project">
     <CustomCommand Name="Manage" CommandData="$PMS_HOME\pm\macro\PmMgeScriptProject.mac main()" Hotkey="Ctrl+B" />
    </TabGroup>
   </RibbonTab>
  </Ribbon>
</RibbonSettings>
If you store the 'Custom UI' object in the library, remember to approve it for use in the project.