Insert another equipment (pump) into the pipeline
Next, you learn how to insert a liquid pump (according to ISO standard) into the pipeline.
Before you insert the pipe, check that you have the Automatic Insert mode turned on. Press F5 to toggle the mode.
Do the following:
-
Select Templates > ISO > Equipment > PUMPS.
-
Double-click Liquid pump.
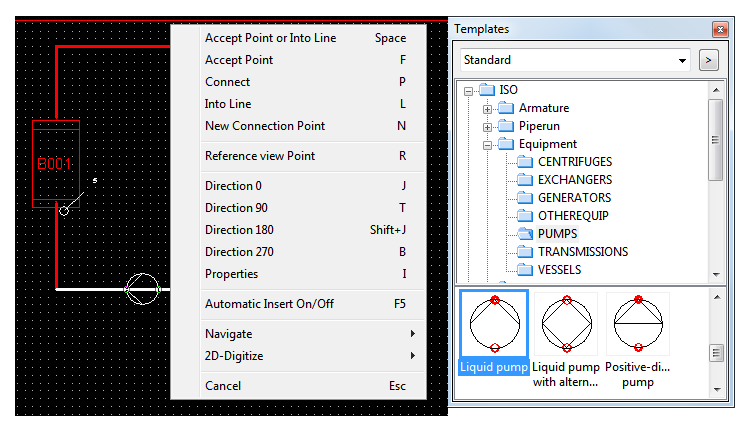
The program switches into the Insert Component mode like when you inserted the vessel. The pump figure is shown on the screen.
-
Move the cursor on the lower horizontal pipeline segment.
The orientation of the pump symbol changes automatically according to the flow direction of the pipe if the Automatic Insert mode is On.
If Automatic Insert mode is Off, press L, or right-click and select Into Line to orientate the symbol, cut the line, and create the connection points (marked as red circles in the symbol).
-
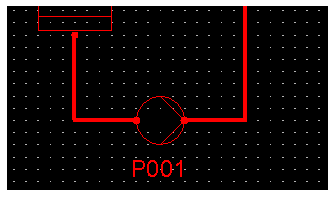
Left-click to insert the pump.
Note: Use Automatic Insert mode when inserting equipment, armature etc. into a pipeline. The pipeline or connection point is automatically selected and highlighted and you can left-click to insert the symbol automatically into the right position. The line is also automatically cut.
The symbol of the liquid pump is equipped with two connection nodes and flow directions at the nodes are defined. You may now be wondering which components have nodes and which nodes are defined to be sensitive to flow direction. The answer is quite simple: in this setup, the vessel doesn't have nodes, but other components do. You can select Into Line for all components with two nodes in a straight line. All components with drawing symbols clearly defining the possible direction of flow (pumps, non-return valves, etc.) are built to be flow direction sensitive, and they orient themselves correctly when you select Into Line.
Note: You can see the connection nodes as red circles in the symbol in the selection bar.
Next, a dialog opens to let you change the flow direction. You can force the program to swap the component, even against the flow direction.
Do the following:
-
Click OK to proceed.
You do not need to change the direction for this exercise.
The Edit Equipment Data dialog opens.
-
Click OK.
-
Left-click under the pump to place the label.
-
Press Esc to exit the inserting mode.
You have now inserted a pump into the pipeline.