Import point clouds
Before importing, check that all per-scanner point cloud data files are in one directory. The supported formats are listed in Point cloud formats. If you are importing ASCII point cloud files, also check that a valid ScanPositions.txt file is in the directory. If not, get one or create one with a text editor if you know the accurate locations of the scanners. Non-ASCII point cloud file formats always include the scanner position information.
Note: If importing ASCII files and a valid ScanPositions.txt is not located in the input directory, you cannot use bubble views in the project and thus will lose most of the functionality of the CADMATIC point cloud solution. ScanPositions.txt is no longer used by the program after the import is done, because the binary CADMATIC files also include the scanner location data.
A ScanPositions.txt file exported from Faro™ might look something like this (long lines are wrapped):
"# iQscene Model Extract"
"iQLib" 5.1.0.30630
Scans {
"powp_001" -8.005764611 -9.256886915 0.974046369 -0.022563513 0.0054934033 0.99973032 64.454547 1.11.2012 12:42:54
"powp_002" -6.3867569923 -11.330074214 0.954458525 0.013429356 -0.010565108 0.999854 168.70051 1.11.2012 12:46:3
"powp_003" -5.05210852 -9.753278674 0.973149866 -0.004712273 -0.0057090523 0.9999726 177.31665 1.11.2012 12:48:54
"powp_004" -3.449088451 -8.15579622 1.054568959 -0.0094946676 0.015459694 -0.99983541 120.78284 1.11.2012 12:52:4
"powp_005" -5.038471855 -5.926367956 3.237938504 -0.025127871 -0.0057032702 -0.99966798 173.26077 1.11.2012 12:57:9
}
If the name of the scanner file is powp_001.xyz, then the program searches the scan position from a line that contains either “powp_001” or powp_001. The name can be within quotes. After the name, the scanner position {X Y Z} is expected to be given in the first three numbers that follow. The program applies the same scale to these numbers as to the point data.
In the example above, the data read by Plant Modeller is marked in red. If you create this file manually, you only need to type the red texts.
If you know the scale of the data, you can provide a conversion scaling on input, as described below. Alternatively, you can rescale the point cloud after the import.
Here is an example workflow for importing.
Do the following:
-
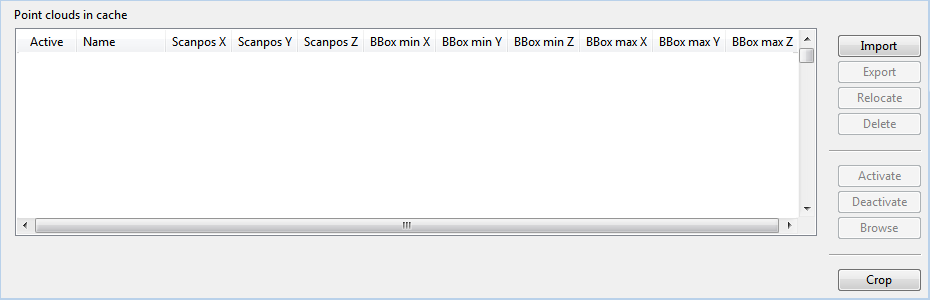
On the Model tab, in the Content group, click Point Clouds. The Point Cloud Manager dialog opens.
-
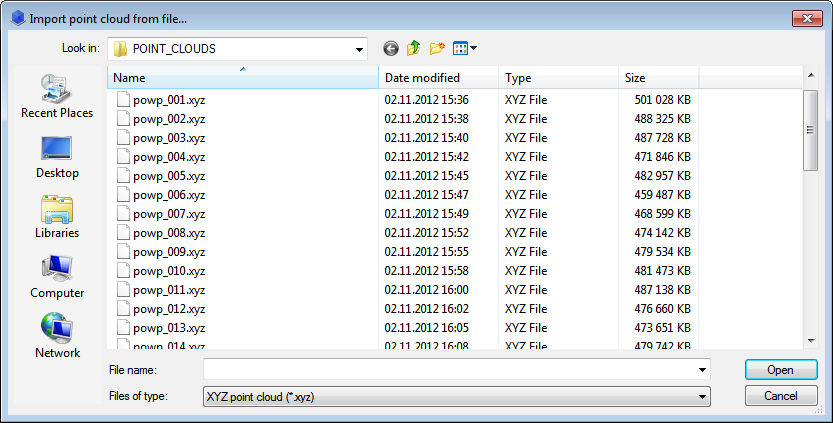
Click Import to select the files to import. The Import point cloud from file dialog opens.
-
If you are importing ASCII data from Faro, for Files of type, select XYZ point cloud (*.xyz).
-
Multi-select the point cloud files that you want to import.
-
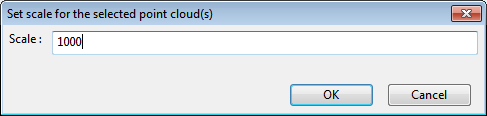
Click Open. The Set scale for the selected point cloud(s) dialog opens.
Plant Modeller works with millimeters. If the scan data was output in meters, enter 1000 as the value.
If you do not know the scanner units, you can have a look at the contents of the ScanPositions.txt file. You can also import one point cloud at scale 1 as a test and measure the proper scale value. If the data is in meters, you will have a very tiny point cloud and you may not see it, so you can re-import this cloud and the others at scale 1000, or change the scale after the import.
-
Click OK.
-
Select Relocate if you want to override the origin and the axis direction that were set by the scanning group.
Again, you can import a few clouds first to get an idea of the coordinate system and then decide whether you want to change it.
Importing takes some time. The import process creates optimized CADMATIC format binary files into the your local point cloud directory. You can change the directory in Options, but note that you cannot select a network drive as the location.
The following publishing process is proposed:
-
Project administrator imports all point cloud files and the program generates and stores point clouds in CADMATIC format.
-
Project administrator copies the generated CADMATIC point cloud files to a common directory under the project's site directory, such as C:\CadmProjects\PointClouds.pms\Site\pm\PointClouds.
-
Designers copy all files from the common location to their local point cloud directory and then start using the point clouds in design.