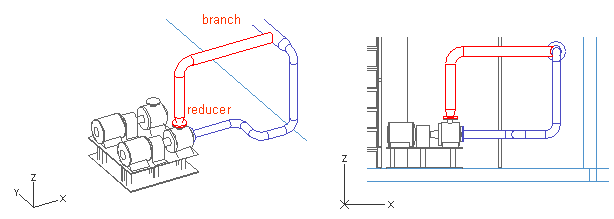
Pipeline 02
In this exercise, you start routing from the top connection, the pressure connection, of the pump. The first pipe segment after the flange is a reducer. Then, you route the pipe parallel to the Z axis at the level of the run pipe (which you routed in the previous exercise). The last step is to connect the new pipe with the run pipe using a branch.
Before you start routing the new pipe, activate the XZ view by pressing Tab, and route the whole pipeline in that view because the pipeline route runs parallel to the XZ plane.
Do the following:
-
Select Piping > Route pipe to start routing the pipe.
-
Move the cursor near the pump pressure connection.
-
Press Q to lock the cursor to the connection (optional).
-
Press P to connect the pipe.
-
Click Yes to accept the connection.
-
For System, select AA_Water.
-
For Line, select AA_Water-02.
-
For Specification, select Example_training.

-
Click Done.
-
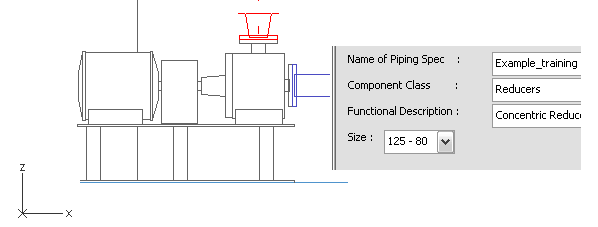
Right-click, and select Add Component to add a reducer.
-
For Component Class, select Reducers.
-
For Functional Description, select Concentric Reducers.
-
For Size, select 125 - 80.
-
Click Done.
-
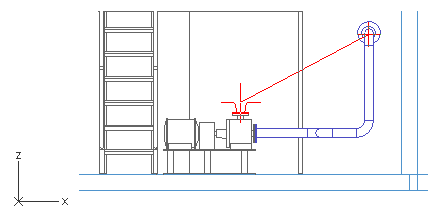
Press Shift+A to release the cursor from its alignment to the Z axis.
-
Move the cursor near the run pipe (AA_Water-01) to determine the end point for the new pipe.
-
Press F11 or Shift+C to lock the cursor to the centerline.
-
Left-click or press Space to accept the end point.
The pipe segment is now parallel to the Z axis and ends at the same level as AA_Water-01 on the Z axis.
-
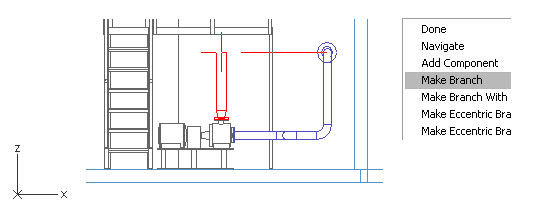
Move the cursor on the run pipe.
-
Right-click, and select Make Branch.
The run pipe is now highlighted.
Note: If a wrong pipeline is highlighted when creating a branch, press Space until the selection is right before pressing Enter to accept the run pipe.
-
Press Enter to accept the selection.
-
Click OK.
You have now routed a pipe that runs from the pump's pressure connection and branches with the run pipe you routed earlier.