Set up the project
You can install the Example Project during CADMATIC software installation or afterward by selecting Create Project > Base Setup. Start the CADMATIC desktop and browse for the project folder e.g. C:/CadmaticProjects/ExampleProject.pms. Ask the administrator for the right folder.
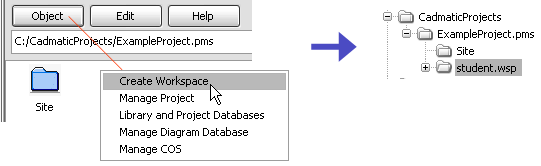
Create a workspace
Before you create a new workspace, ensure that you have not selected any icons.
Do the following:
-
Select Object > Create Workspace.
-
Select the default folder.
-
To create a name for the workspace, use your login name.
The folder is a personal storage (subfolder for the project, e.g. student.wsp) of different design areas and other information about the project.
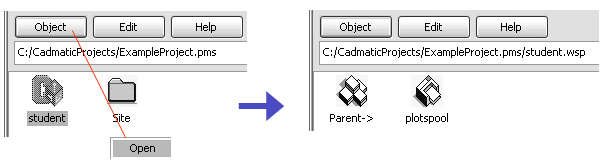
Navigate to the workspace
You can navigate to a workspace in two different ways:
-
Double-click the workspace icon.
-
Click the workspace icon and select Object > Open.
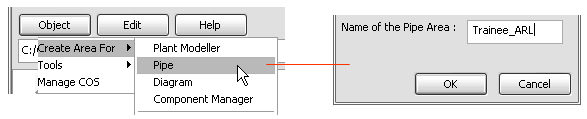
Create an area for Plant Modeller
Before you create an area for Plant Modeller, ensure that you have not selected any icons.
Do the following:
-
Select Object > Create Area for > Plant Modeller.
-
Name the area according to your initials.
-
Click Done to accept the default properties for the Plant Modeller Area.
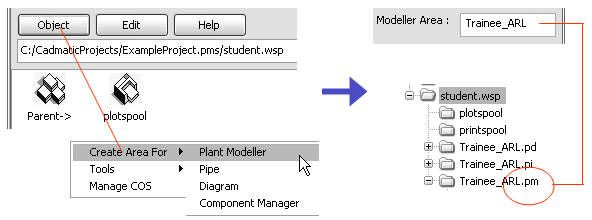
Now, a new folder (Trainee_ARL.pm in this example) is created as a subfolder for the workspace. If you create areas for the Diagram and Pipe programs, folders *.pd and *.pi are also created.
Create an area for Piping Isometrics & Spools
Before you create an area for Piping Isometrics & Spools, ensure that you have not selected any icons.
Do the following:
-
In the CADMATIC desktop, select Object > Create Area for > Piping Isometrics & Spools.
-
Name the area according to your initials.
-
Click Done to accept the default properties for the area.
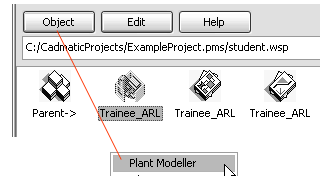
Start Plant Modeller
You can start the Plant Modeller area in two different ways:
-
Double-click the area icon to start Plant Modeller.
-
Click the area icon and select Object > Plant Modeller.