Object snap is used to make it easier to enter points into exact locations. Object snap forces the picked point to a part of an object according to object snap mode set. For example if you want to draw a line that is attached to the endpoint of another line, set object snap mode Endpoint on. That forces the point into the endpoint of the line if the mouse cursor is on the line. The point where the point is forced is marked with a diamond shape. If you then click the left mouse button, the point will be inserted into the marked point.
Points entered using keyboard are not altered whether the object snap is on or off.
The status of object snap is shown for example in the status bar (OSNAP text). The status bar text is black if object snap is on and gray if object snap is off.
Ortho forces lines to be drawn according to the ortho angle. It also has an effect on commands, in which you enter an angle with the mouse (MOVE, INSERT). Dynamic rotating of an object is done according to the ortho angle. Ortho also affects commands, that require displacement, such as move, copy and stretch. In mirroring, entering the mirror line is affected by ortho. Ortho uses an ortho angle (step size for angle) and it's value is shown in status bar. If ortho angle is set to, for example 15° (ORT:15 text in status bar), lines can be drawn in 15° increments, starting from 0 angle (directly to the right).
Ortho status is shown in the status bar (i.e. ORT:90). The status bar text is black if the ortho is on and gray if ortho is off.
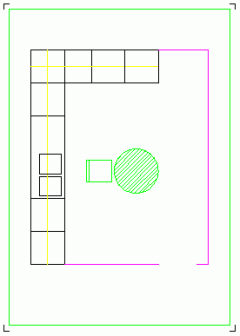
Drawing the walls
Do the following:
- Select color 7 (magenta) as the current color and layer WALLS as the current layer and CONTINUOUSas the current line type.
- Select Draw line and draw a line using points 3100,5100 and @900,0.
- Set Ortho on either in status bar or by selecting Tools tab > Drawing setting group > Ortho. Set 90 degreesas the ortho angle.
- Set Object snap on either in status bar or by selecting Tools tab > Drawing setting group > Osnap. Select object snap mode Endpoint.
- Select Draw line. When program asks for the start point, move mouse cursor on the newly drawn wall (on the right side) so that you can see the point snap to the endpoint of the wall line (=upper right corner of the kitchen). Click the left mouse button ( when you can see the diamond shape that displays the snapped point) . The start point of the line will be forced to the endpoint of the wall line.
- When program asks for the endpoint, move the mouse cursor to the lower part of the drawing area (do not click yet). This shows the direction of the line; vertically down. Ortho forces the line to be vertical. Enter the length of the line on command line, 3900 .
- Start drawing a new line and pick the endpoint of the previous line as the start point of this line. Use object snap to hit exactly to the endpoint.
- Now draw the line with the help of ortho. Move the mouse cursor to the left part of the drawing and enter thelength of the line, 200.
- Draw a third line using the same methods. Pick the lower right corner of the cabinets as the start point. Move the mouse cursor to the right part of the drawing and enter the length of the line, 1600.
Because the ortho angle has been set to 90, you can only draw horizontal or vertical lines. This makes it easier to draw the wall lines, because now you can enter the start point and then show the direction by moving the mouse cursor and then enter only the length on the line.
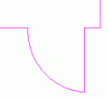
Drawing the doors
Do the following:
- Set current layer to DOORS.
- Select Draw line. Pick the start point in the right side of the door gap (use object snap). Move the mouse cursor to the lower part of the drawing and enter 800 for the line length.
- Set ortho off by clicking it in the status bar or by selecting Tools tab > Drawing setting group > Ortho.
- Select Home tab > Draw group >
 Arc menu > 3 point arc.
 - Pick the start point of the arc in the door line endpoint and the endpoint of the arc in the other end of the door gap. Use end point object snap mode. Click the arc in suitable location (OR enter a circle point 3200,600).
- Set object snap off snap by clicking it in the status bar or by selecting Tools tab > Drawing setting group > Osnap.
 Previous Previous |
Next

|