Smart Points

Smart Points are specialized markers that are linked to an object or object group and display information about that entity. You can add Smart Points also in the bubble view of a point cloud. The information that a Smart Point contains can be user-defined or obtained from an external system or database—as defined in the Smart Point Type configuration in eShare. Smart Points can be seen as icons in the 3D model, and the user can select a Smart Point to see the information that it contains. If the Smart Point uses attributes, the user can also add information by editing the attribute values. Smart Points can be created and modified in both eShare and eGo, and the changes can be synchronized from one program to the other. Accordingly, Smart Points can be used to quickly add status information or other comments during a meeting or an on-site visit.
If you have sufficient permissions, you can see, edit, and create Markups in eGo. In Model Settings > Visualization / 2D you can define whether Smart Points are shown in the 3D view, as described in Smart Points. After you have created or modified a Smart Point in eGo, synchronize the model with eShare.
Note: eShare synchronization can fail, for example, because of changed permissions. If eGo could not synchronize the Smart Point, eGo asks you if you want to interrupt synchronization or copy the unsynchronized Smart Points to the recovery folder. When you synchronize the model again, eGo attempts to resynchronize the items in the recovery folder.
Creating a new Smart Point
You can create new Smart Points to add object-specific information to the 3D model.
Prerequisites
- The project administrator has created the required Smart Point Type for this project.
- You have the permissions to create Smart Points of the given type. Otherwise, the
 button is not available to you.
Note: You can use the same button to add also Markups if you have permissions to create them. See Creating a new markup in fast mode.
Do the following:
- Open the project in the 3D view.
- Select the object to which you want to add a Smart Point.
- In the properties pane, select
 .
. - Select the Smart Point Type from the list.
- Enter a name for the new Smart Point and select OK.
- You might be prompted to define a value for one or more attributes. Select or type the given value, as appropriate.
- If there are multiple groups or a position ID that could be used as a linked reference object, you will be prompted to select a related object.
- Select OK to continue.
Results
eGo adds the Smart Point to the location that you selected in the 3D view.
Related Actions
Go to the Models view and select  to upload the new Smart Point to eShare.
Editing Smart Point attributes
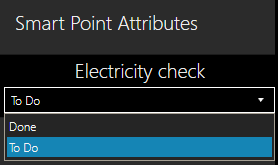
If the Smart Point uses attributes, you can change the attribute values in the properties pane.
Prerequisites
- You have the permissions to modify Smart Points of the specified type.
Do the following:
-
Open the project in the 3D view.
-
Locate and select the Smart Point that you want to modify. The properties pane opens, displaying the Smart Point details.
-
In the Smart Point Attributes section, select the value field of the attribute you want to modify and change the value as appropriate, by typing or by selecting a predefined value from a list.

-
Select
 to close the properties pane.
Related Actions
Go to the Models view and select  to upload the change to eShare.
Deleting Smart Points
Smart Points cannot be deleted in eGo.
Use eShare or eShare App to delete redundant Smart Points from the model, and then in eGo synchronize the model from eShare.