Schematics tab > Devices group >  I/O menu > Create I/O card
With this function, you can create new I/O cards. By using product models, you can define information for the new I/O card based on an existing I/O card.
Do the following:
-
Start the function in one of the following ways:
-
Select the Schematics tab > Devices group > I/O menu > Create I/O card.
-
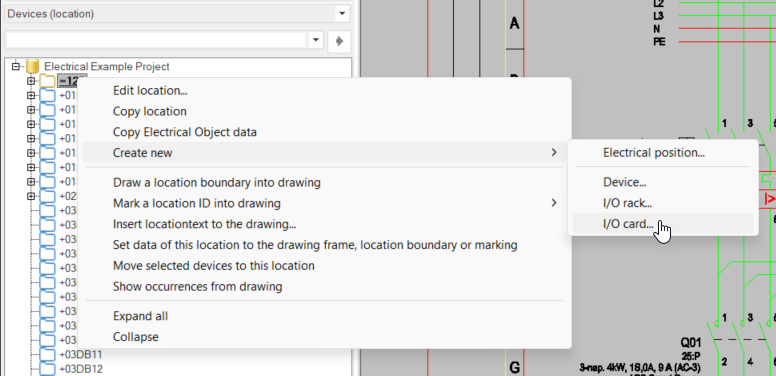
In the Devices (location) project tree, right click and select Create new > I/O card.
The New I/O card dialog opens. The previously selected location, circuit, and I/O rack are shown. In addition, the Card ID field suggests the next consecutive ID.
-
-
Select card location from the drop-down menu. Alternatively, click the
 button next to the Location field and then select the location in the Select location dialog.
 Show/hide details
Depending on your settings, the Select location dialog either shows a grid or a tree view.
Grid view: 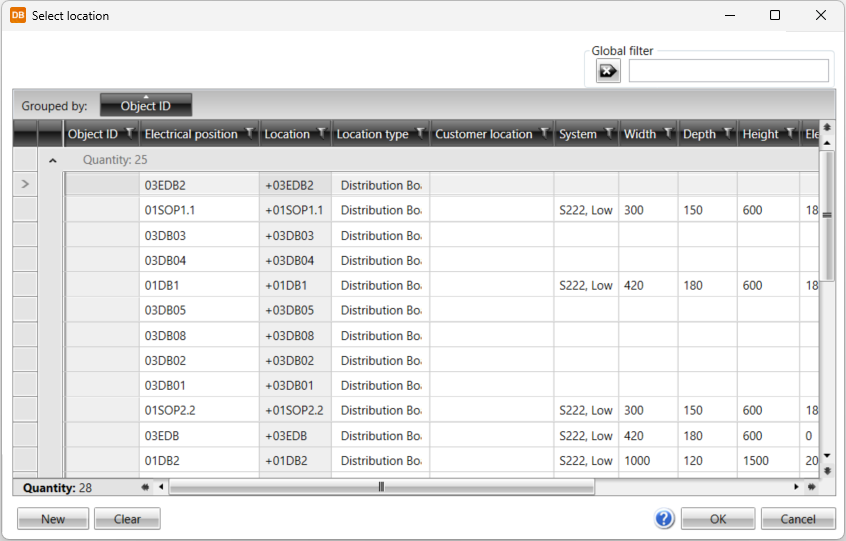
Tree view: 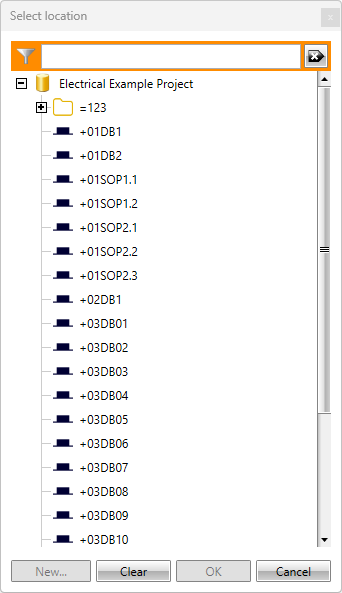
-
Select a circuit from the drop-down menu. Alternatively, click the
button next to the Circuit field and then select the circuit in the Select circuit dialog. Depending on your settings, the Select circuit dialog either shows a grid or a tree view. -
Select an I/O rack, or create a new one:
-
Create a new rack by entering a rack ID in the I/O rack field.
-
Select a rack from the drop-down menu.
-
Click the
button next to the I/O rack field and select the rack in the Select I/O rack dialog.
-
-
In the Card ID field, enter an ID for the new card.
-
If desired, select a project product model from the Product model menu. Alternatively, click the
button next to the Product model field and select the product model from the standard database or shared databases in the Product models dialog.After selecting the product model, the description and channel information from the product model are shown in the respective fields. In addition, the Start address IN, Start address OUT and Bit address offset fields become available.
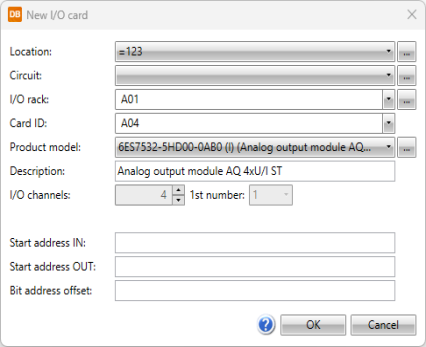
-
If you selected a product model and want the channel addresses to be created automatically, define a value in the Start address IN or the Start address OUT field. If necessary, also define a value in the Bit address offset field.
When the addresses are automatically created, you cannot edit addresses for individual channels.
-
If you did not select a product model, do the following:
-
Enter a description. If you selected a product model, the product model description will be used.
-
Define the number of channels, and the number of the first channel. If you selected a product model, the channel information from the product model will be used.
-
-
Click OK.